EmbodiQ
Product Overview
This is an AI-powered Arduino hardware control Agent System that enables intelligent interactive control of microcontrollers (MCUs) through Large Language Models (MiniMax-M2.7, OpenAI, OpenRouter and so on). The system adopts a Python + Arduino dual-end architecture, providing both Web UI and REPL interaction modes.
Core Features
1. Multi-modal Interaction Capability
-
Web Interface: Real-time streaming dialogue via FastAPI (Server-Sent Events)
-
Command-line REPL: Terminal-based interaction with colored log output
-
Natural Language Control: Users can directly describe hardware operation intents in Chinese or English
2. Rich Hardware Control Toolset
| Module | Function | Technical Specs |
|---|---|---|
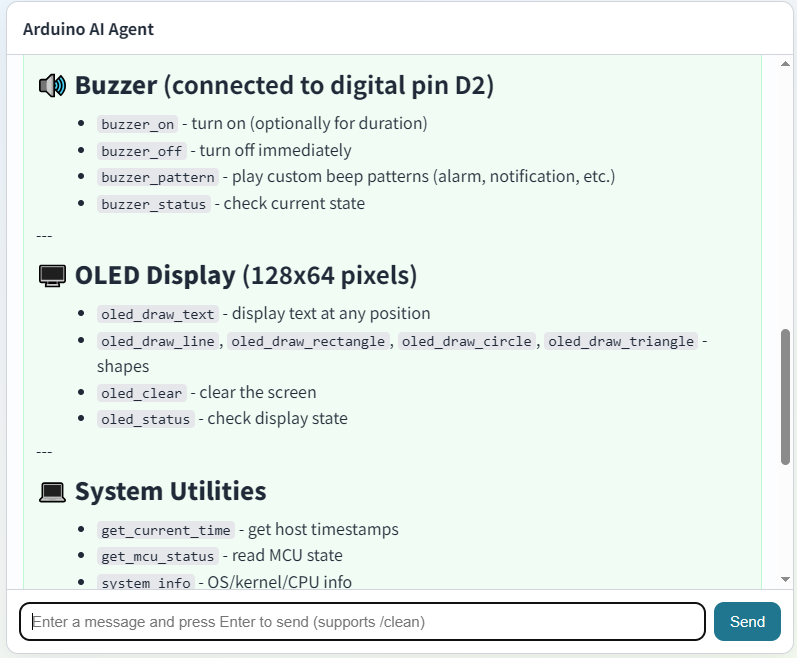
| OLED Display | 128x64 pixel graphics rendering | Text, lines, rectangles, circles, triangles; I2C communication (0x3C) |
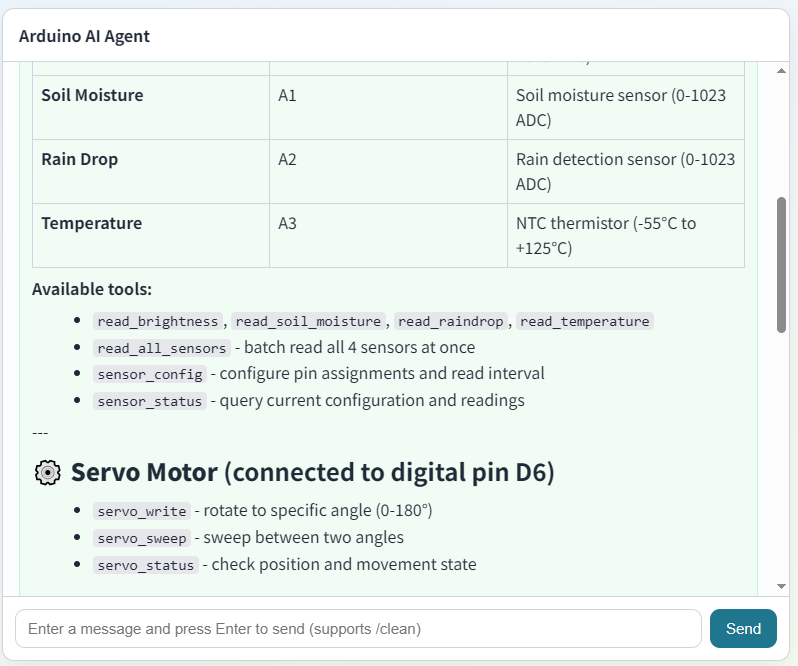
| Servo Control | SG90/MG90S servo motor | Pin D6, 0-180° angle control, smooth speed adjustment (100-10000ms) |
| Active Buzzer | Audio alerts/alarms | Pin D2, High-level trigger, timed/continuous beeping |
| Brightness Sensor | Ambient light intensity detection | Pin A0, photoresistor (LDR) based, 0-1023 ADC range, 0-5V analog output |
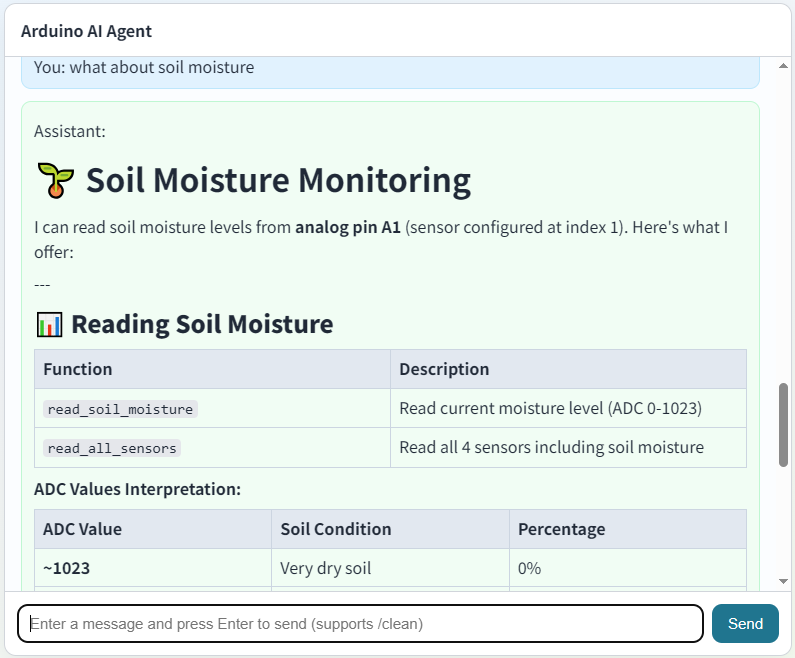
| Soil Moisture Sensor | Soil volumetric water content measurement | Pin A1, capacitive/resistive probe, 0-1023 ADC range, corrosion-resistant electrodes |
| Raindrop Sensor | Rainfall detection and intensity monitoring | Pin A2, nickel-plated sensing pad, analog output inversely proportional to rain intensity, LM393 comparator |
| NTC Temperature Sensor | Ambient temperature measurement | Pin A3, 10KΩ NTC thermistor (B3950), -55°C to +125°C range, ±0.5°C accuracy, Steinhart-Hart equation conversion |
3. Intelligent Task Orchestration (Batch Execution)
-
Executes multi-step hardware operation sequences
-
Sensor Data Fusion: Multi-sensor environmental monitoring (light, soil moisture, raindrop, temperature)
-
Conditional logic ($if), result referencing ({{step.result}})
-
Error handling policies (stop_on_error, delay_ms_between_steps)
4. System Architecture Highlights
-
Bridge Pattern: Python side communicates with MCU via Arduino RouterBridge serial protocol
-
State Caching: MCU maintains real-time cache of all hardware states
-
Streaming Response: AI reasoning process visualization (
-
Session Persistence: Web side supports session isolation and conversation history
5. Safety & Reliability
-
Hardware Interlocks: Prevention of sensor pin conflicts, servo angle limiting (0-180°)
-
Parameter Validation: Boundary checking before all tool invocations
-
Error Propagation: MCU exceptions are fed back to the AI layer via structured JSON
Tech Stack
-
AI Backend: MiniMax-M2.7 via OpenAI-compatible API / OpenAI / DeepSeek / Kimi code /
-
MCU Firmware: Arduino C++ (Servo, Adafruit SSD1306, Wire libraries)
-
Middleware: Custom RouterBridge protocol over Serial/USB
-
Frontend: Vanilla HTML5 + JavaScript (no framework dependency)
-
Python Stack: FastAPI, OpenAI SDK, Pydantic-style tool definitions
Hardware Requirements
-
Arduino UNO Q Main board
-
EmbodiQ HAT Pack(includes: soil moisture sensor, rain drop sensor, 9g servo)
-
USB-C Programming Cable
-
Laptop or PC with Arduino App Lab
Step 1. Hardware Assembly
Operation steps are as follows:
-
Install the AI Agent Hat onto the Arduino UNO Q by aligning the pins and inserting it directly into the Arduino UNO Q to ensure a proper connection.
-
You can plug the servo cable into the servo connection pins provided on the HAT. Pay attention to the polarity: the servo's orange wire is the signal line, the red wire is the power line, and the brown wire is GND.
-
Connect the Arduino UNO Q to your computer via a USB-C data cable.
Software Requirements
-
Arduino App Lab: latest version: 0.5.0
-
Arduino package requirements:
-
Servo (1.3.0)
-
dependency: Adafruit BusIO (1.17.4)
-
Adafruit GFX Library (1.12.6)
-
Adafruit SSD 1306 (2.5.16)
Step 2. Download and install Arduino App Lab app
How to Install the Arduino App Lab Application
- Open a browser and access
https://arduino.cc
Click Documentation page:
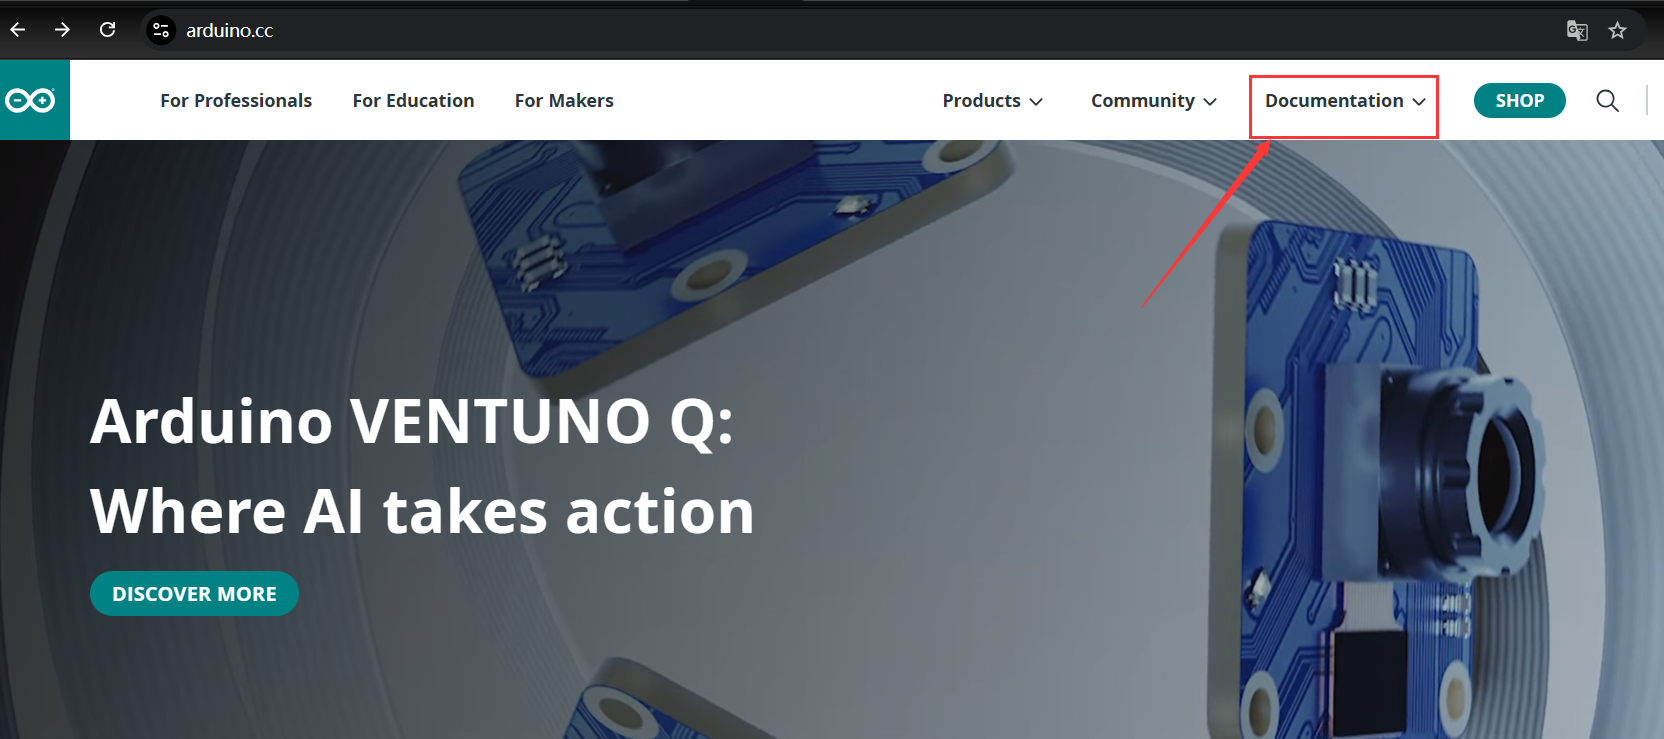
Select software: 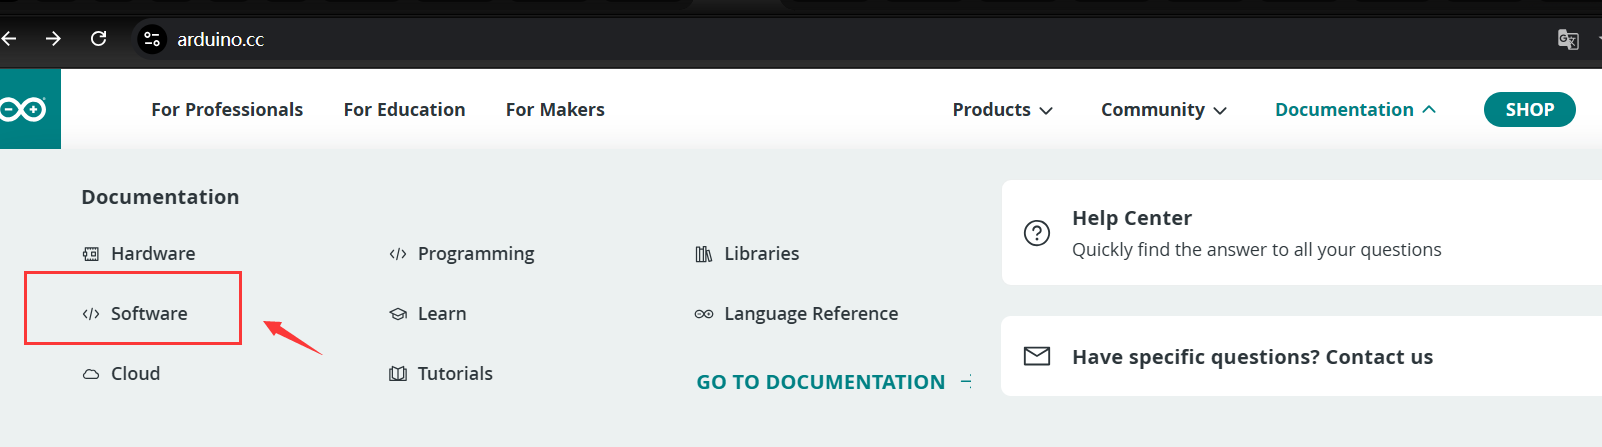
Select Arduino App Lab and click discover more: 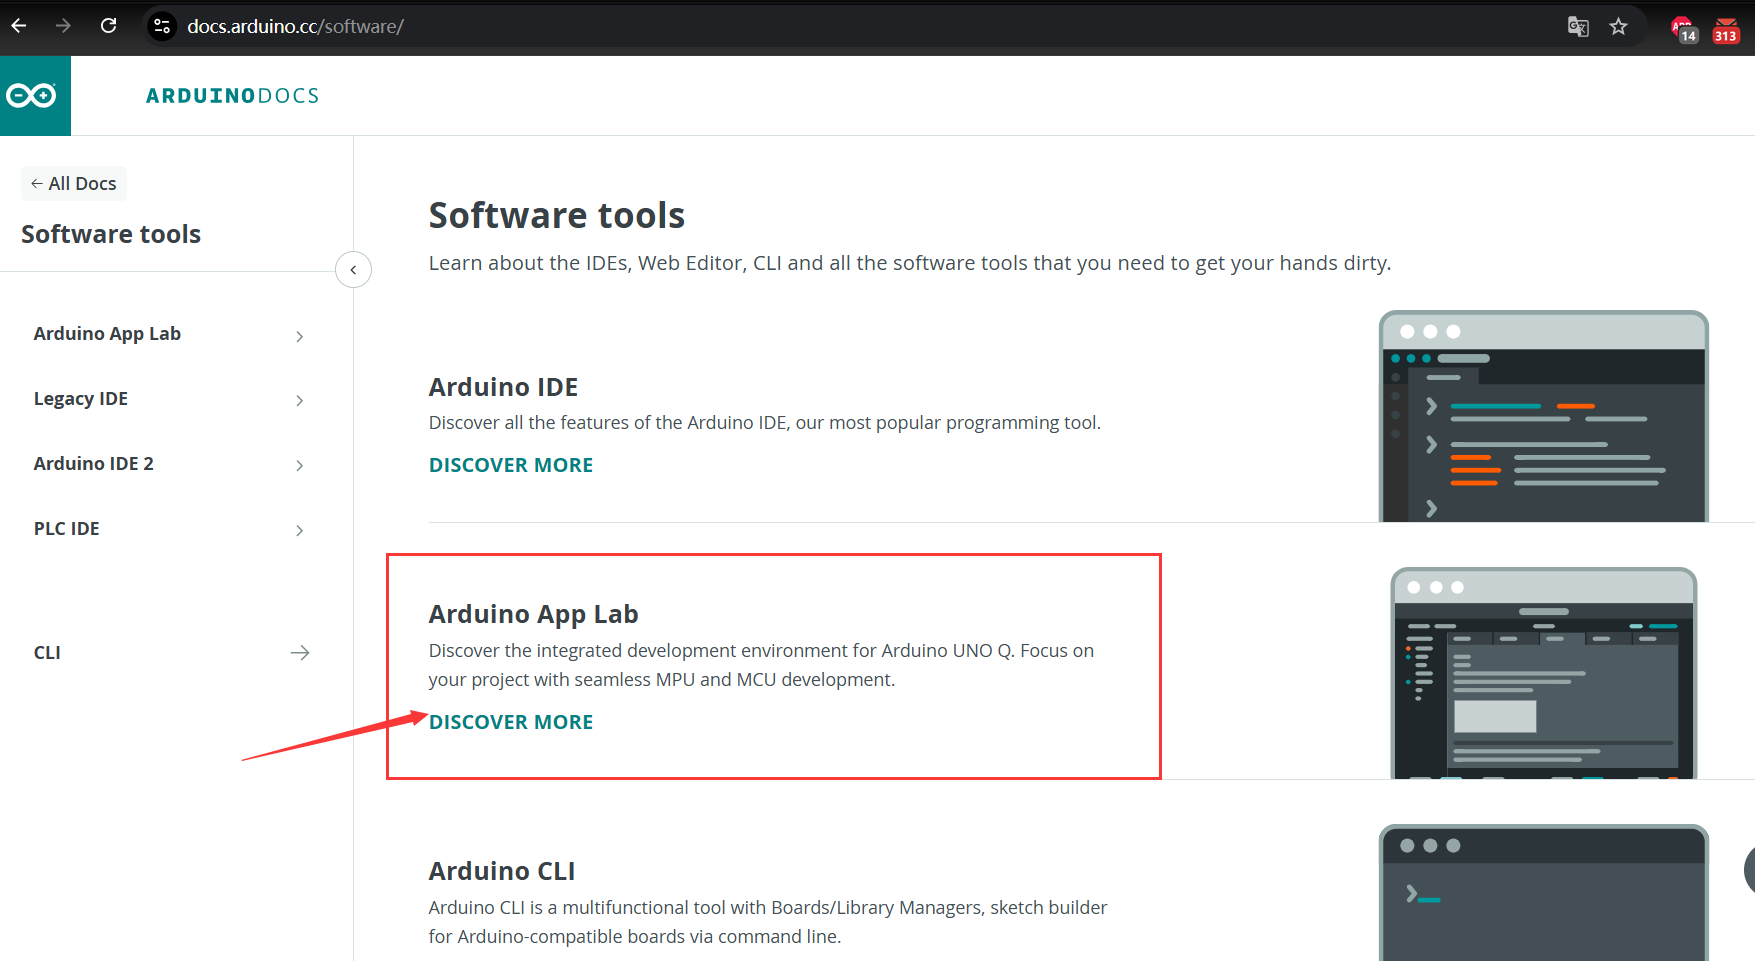
Click Download button: 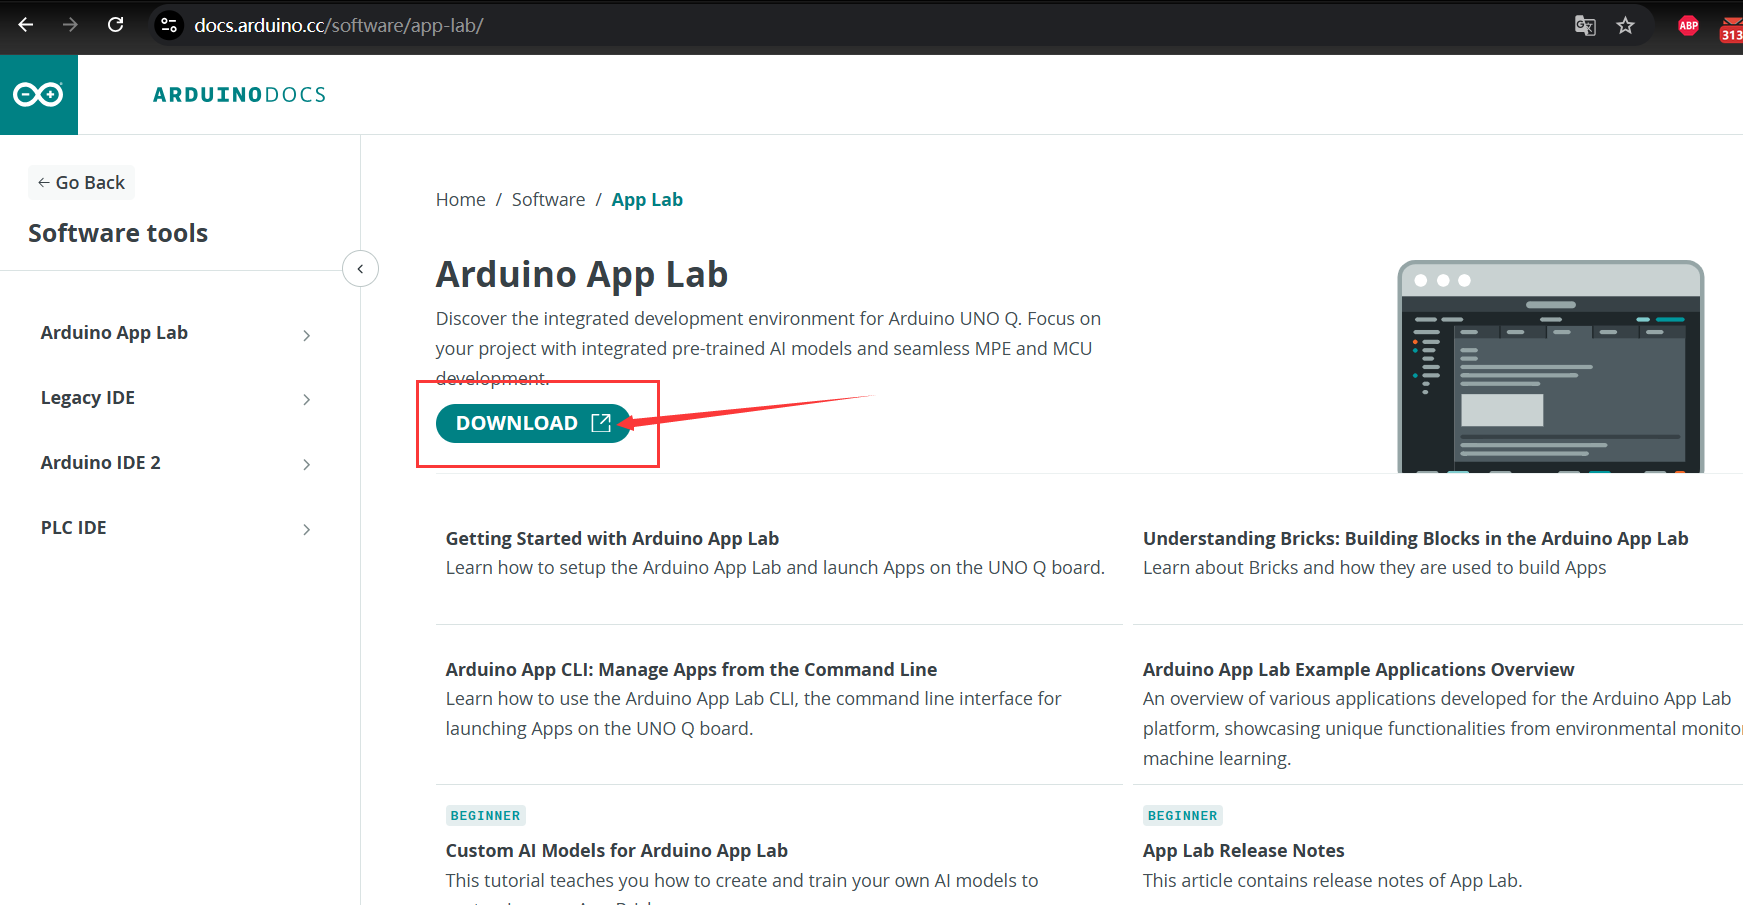
Select the operating system and click download: 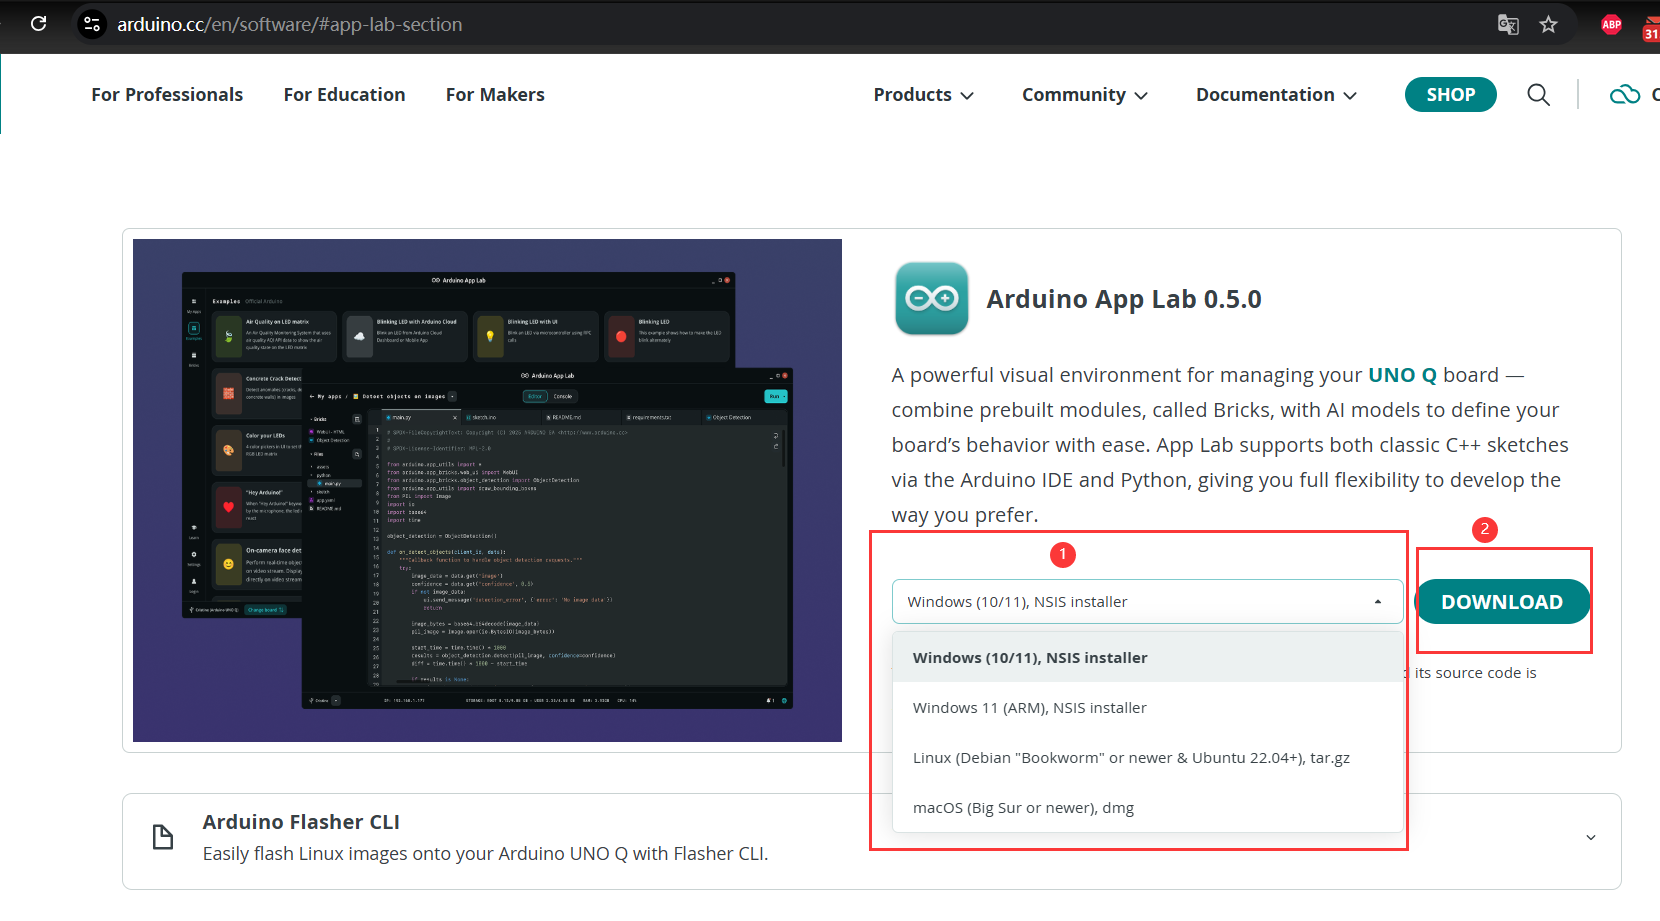
After the download is complete, double-click the downloaded file and install it, and then click the icon on desktop Arduino App Lab to start it.
Installation
Step 3. Register accounts and obtain API keys for OpenAI, OpenRouter, and MiniMax.
OpenAI
To get started with OpenAI, visit the official website at platform.openai.com
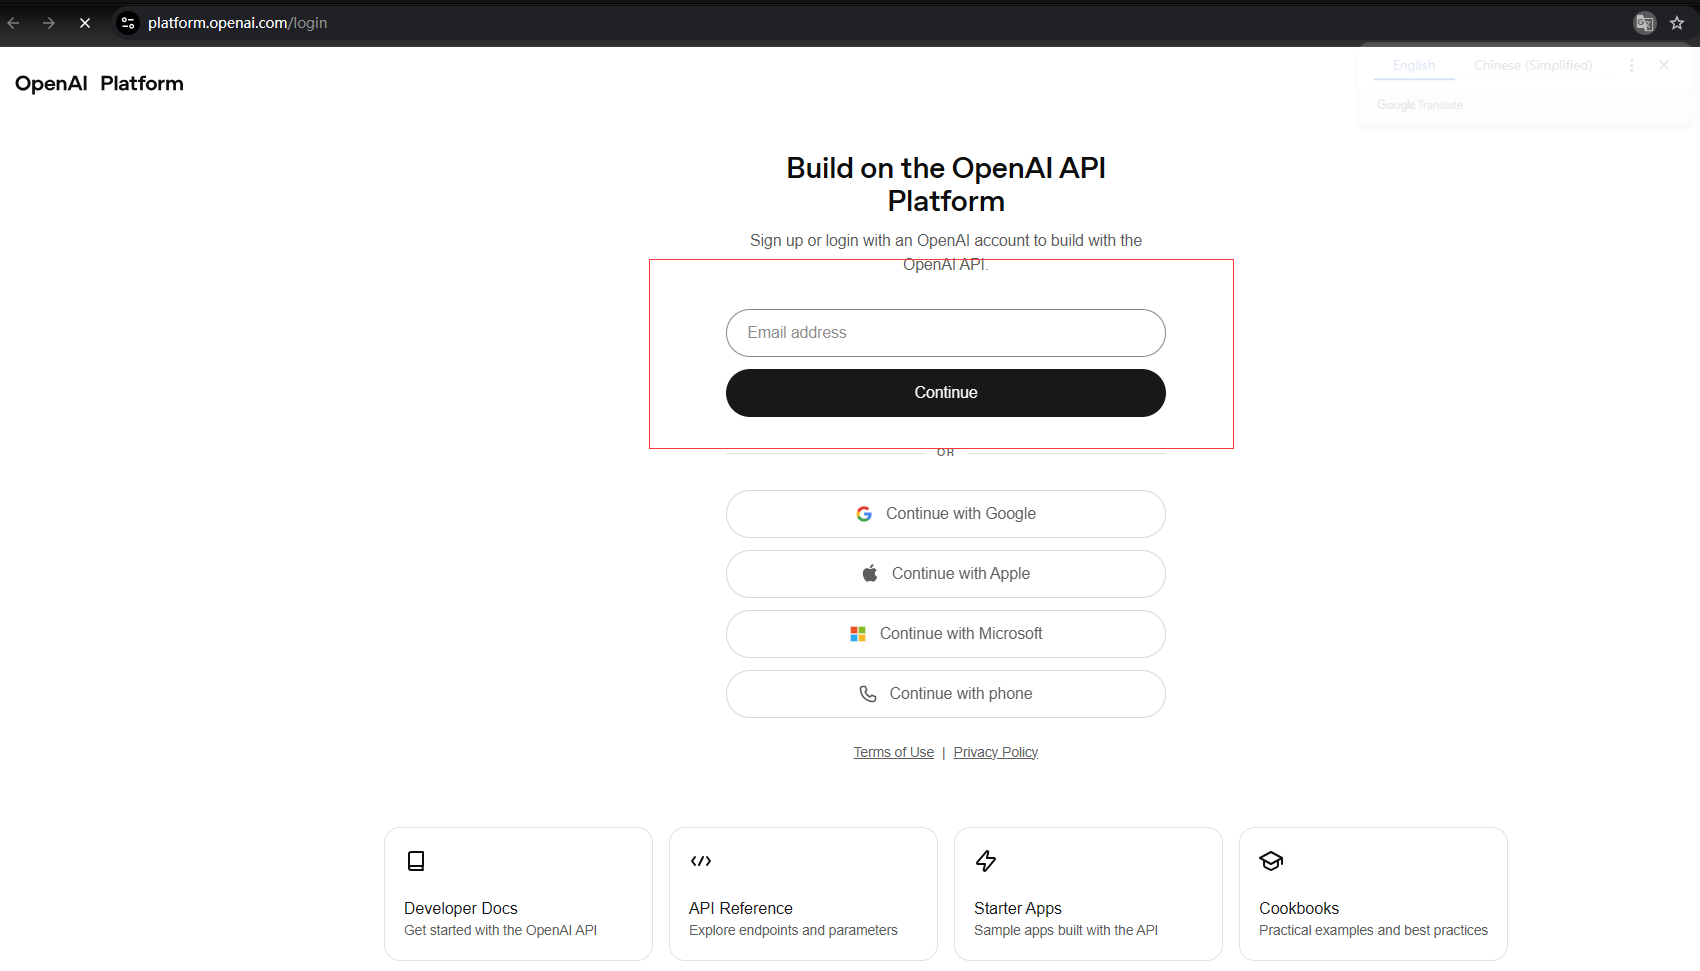
and click on the "Sign up" button. You can register using your email address, Google account, or Microsoft account. After completing the registration, log in to your account and navigate to the API keys section in the dashboard.
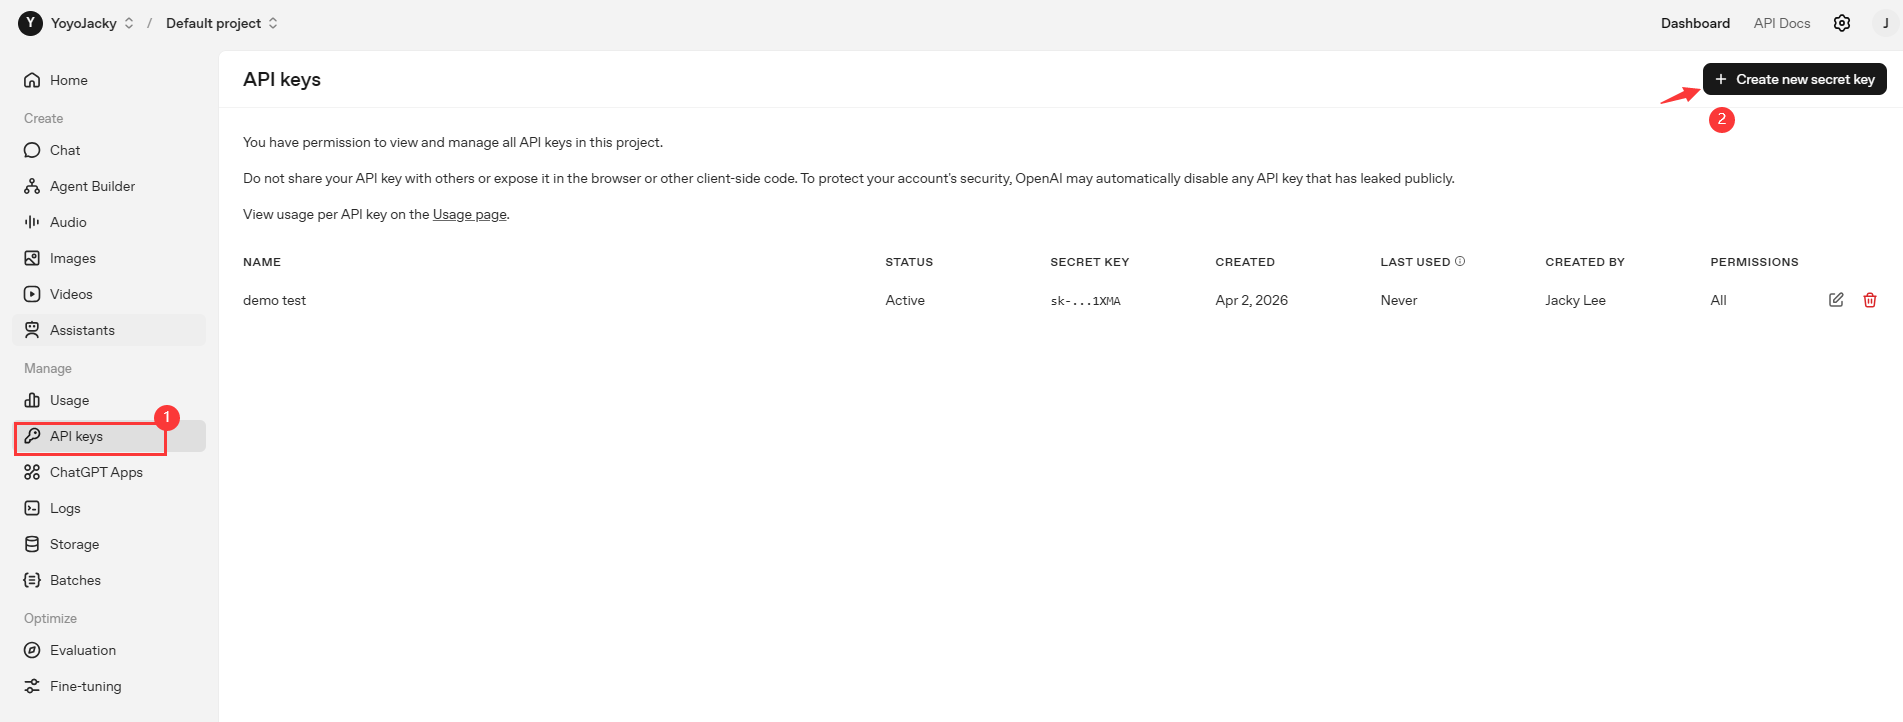
or
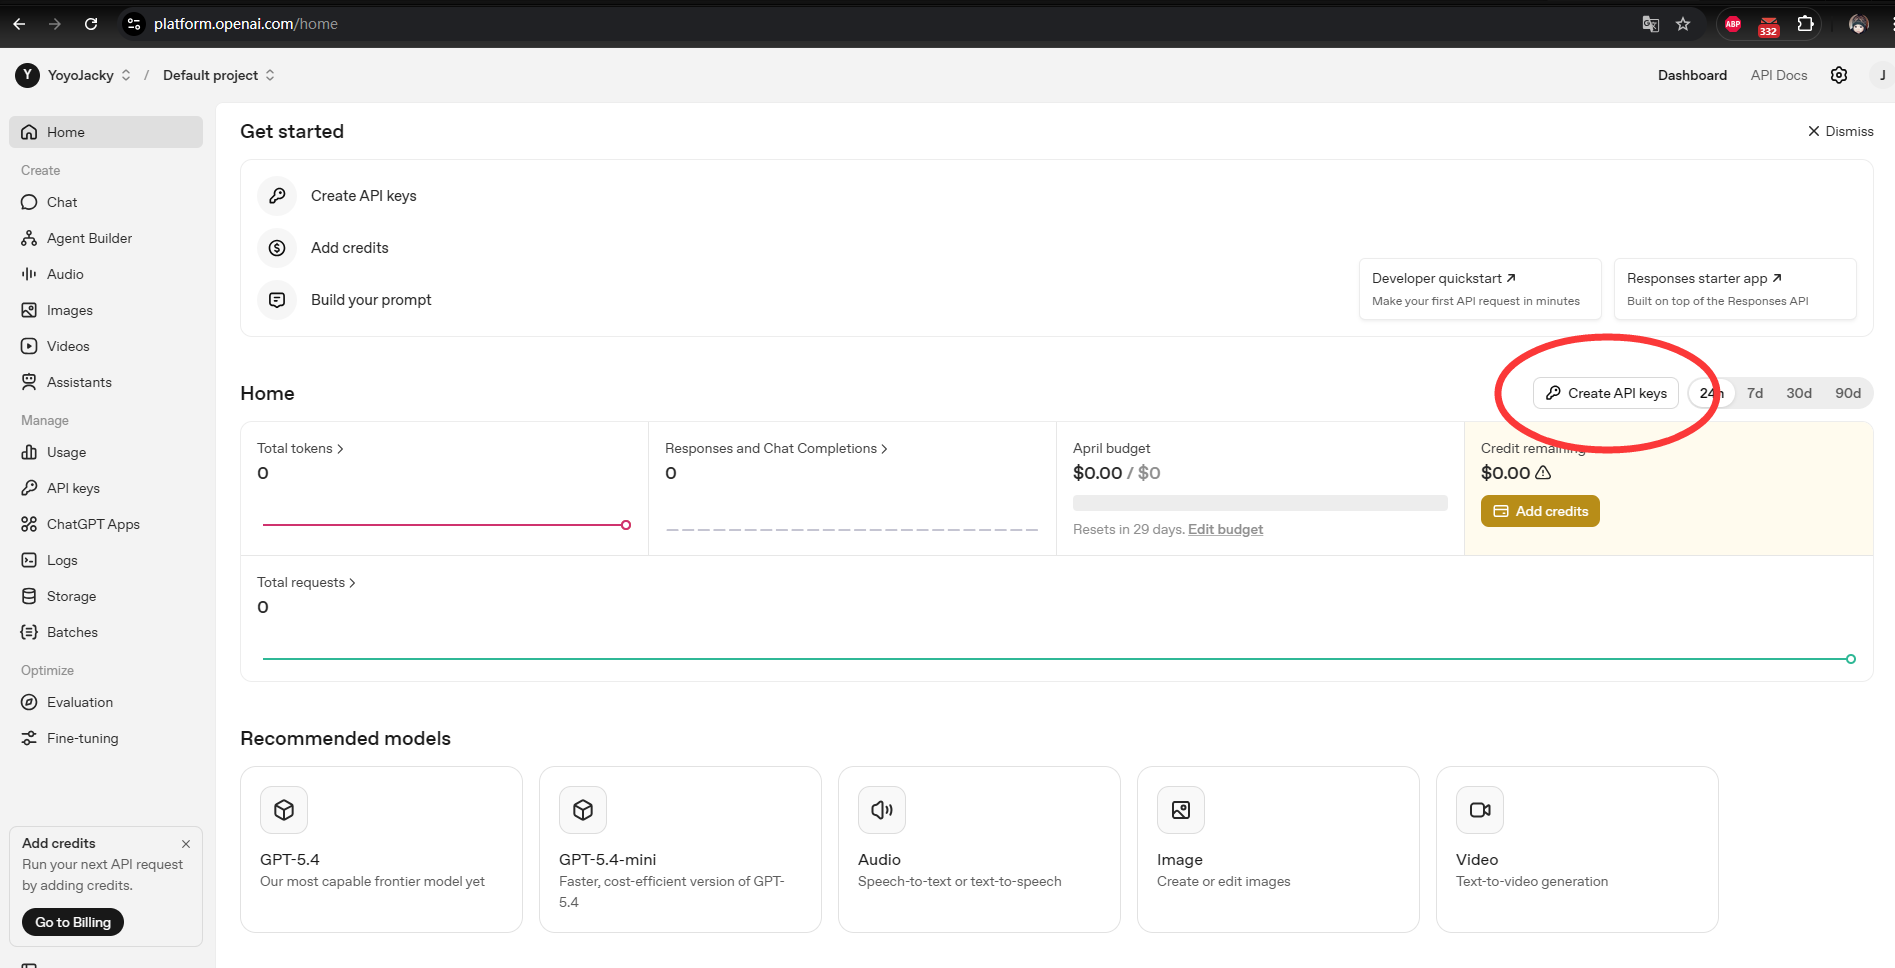
Click "Create new secret key" to generate your API key.
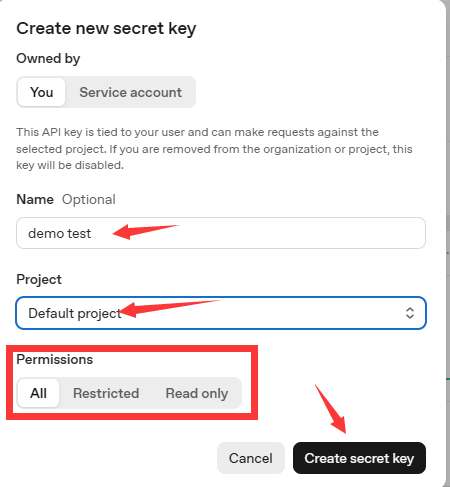
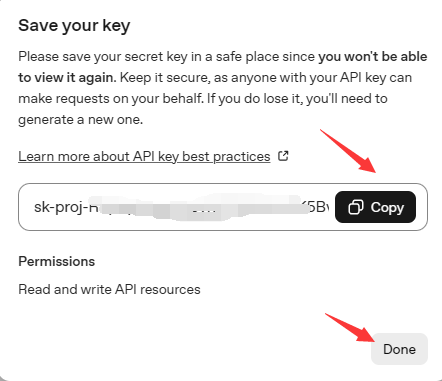
Important: Copy and save this key immediately, as it will only be displayed once. OpenAI offers free trial credits for new users, after which you will need to set up a payment method to continue using the API.
OpenRouter
OpenRouter provides a unified interface to access multiple AI models. Go to openrouter.ai
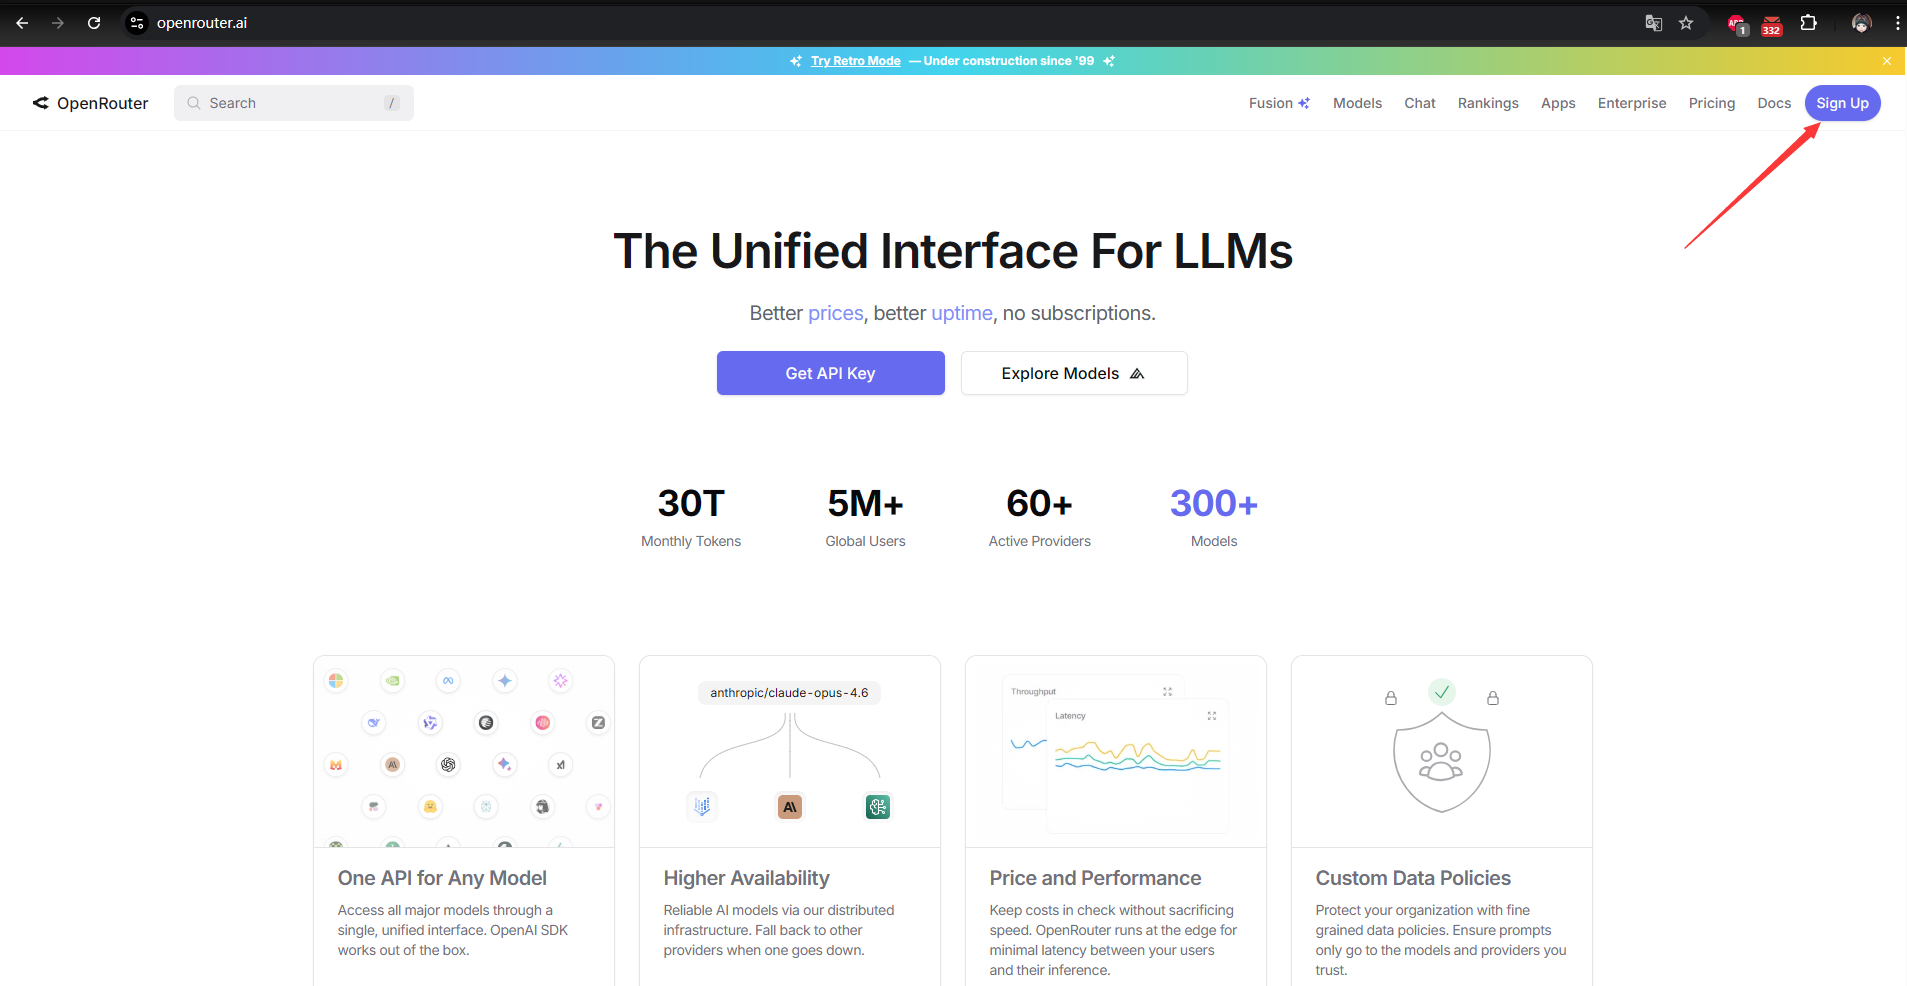
and sign up using your email, Google, or GitHub account.
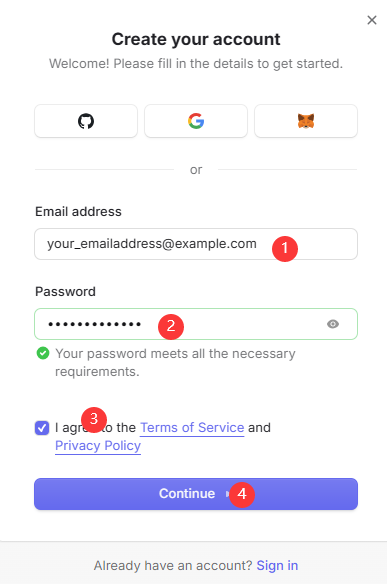
Once logged in, go to the Get API Key section in your account settings.
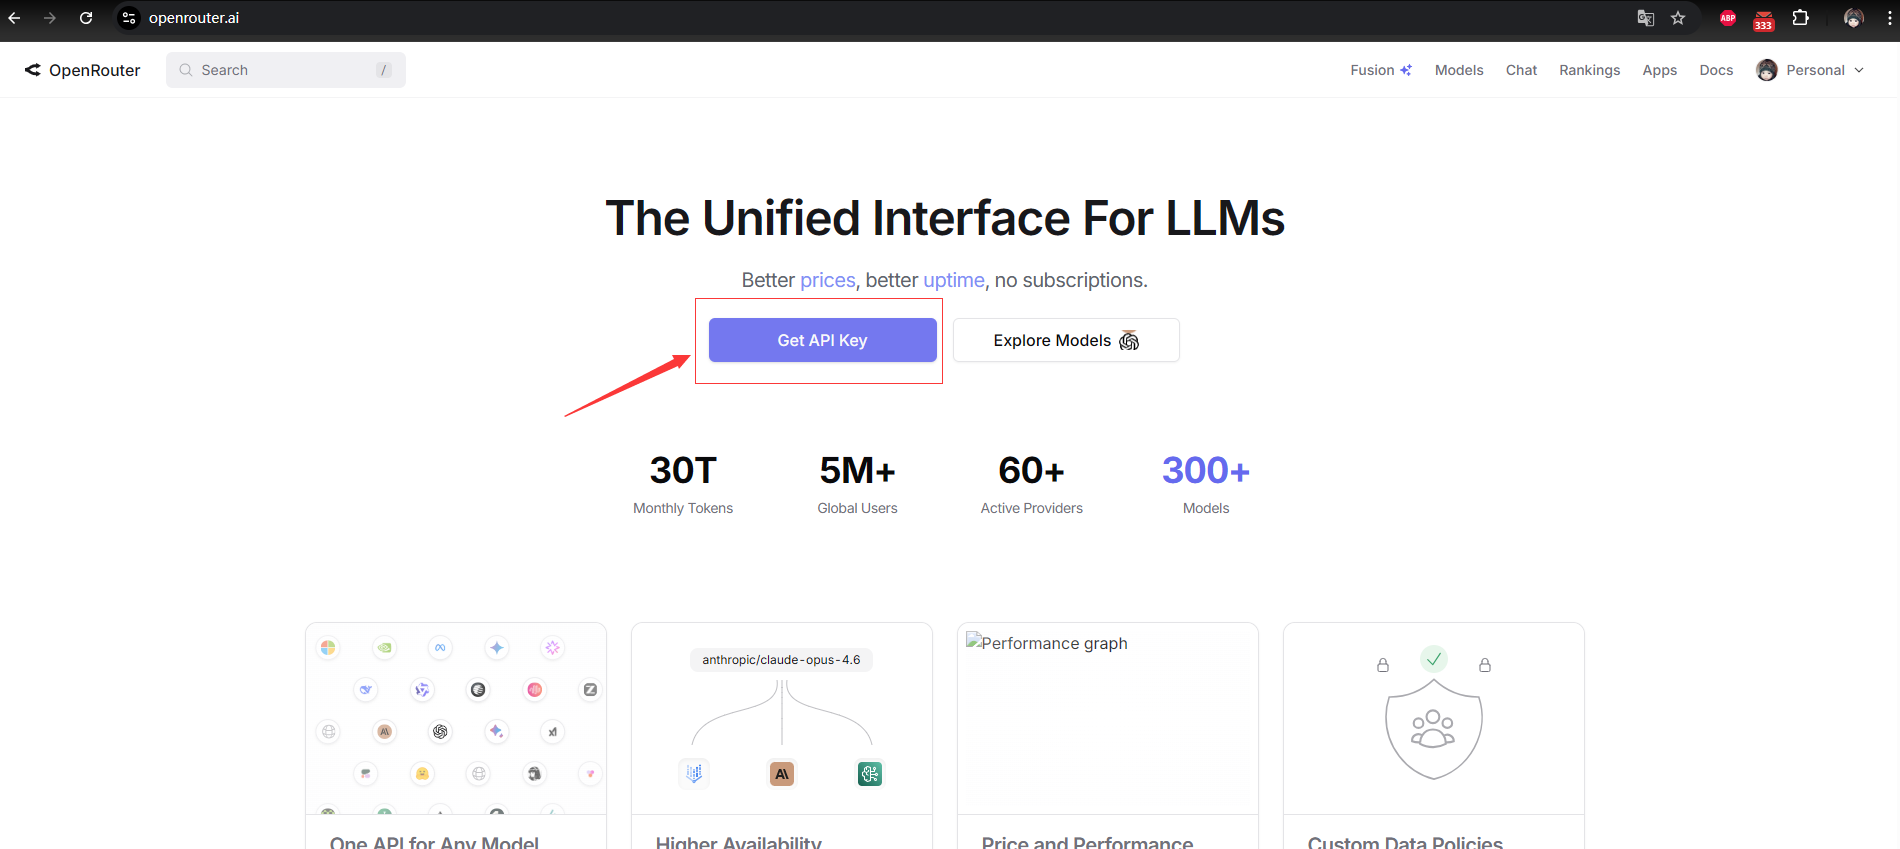
Click "Create Key" to generate a new API key.
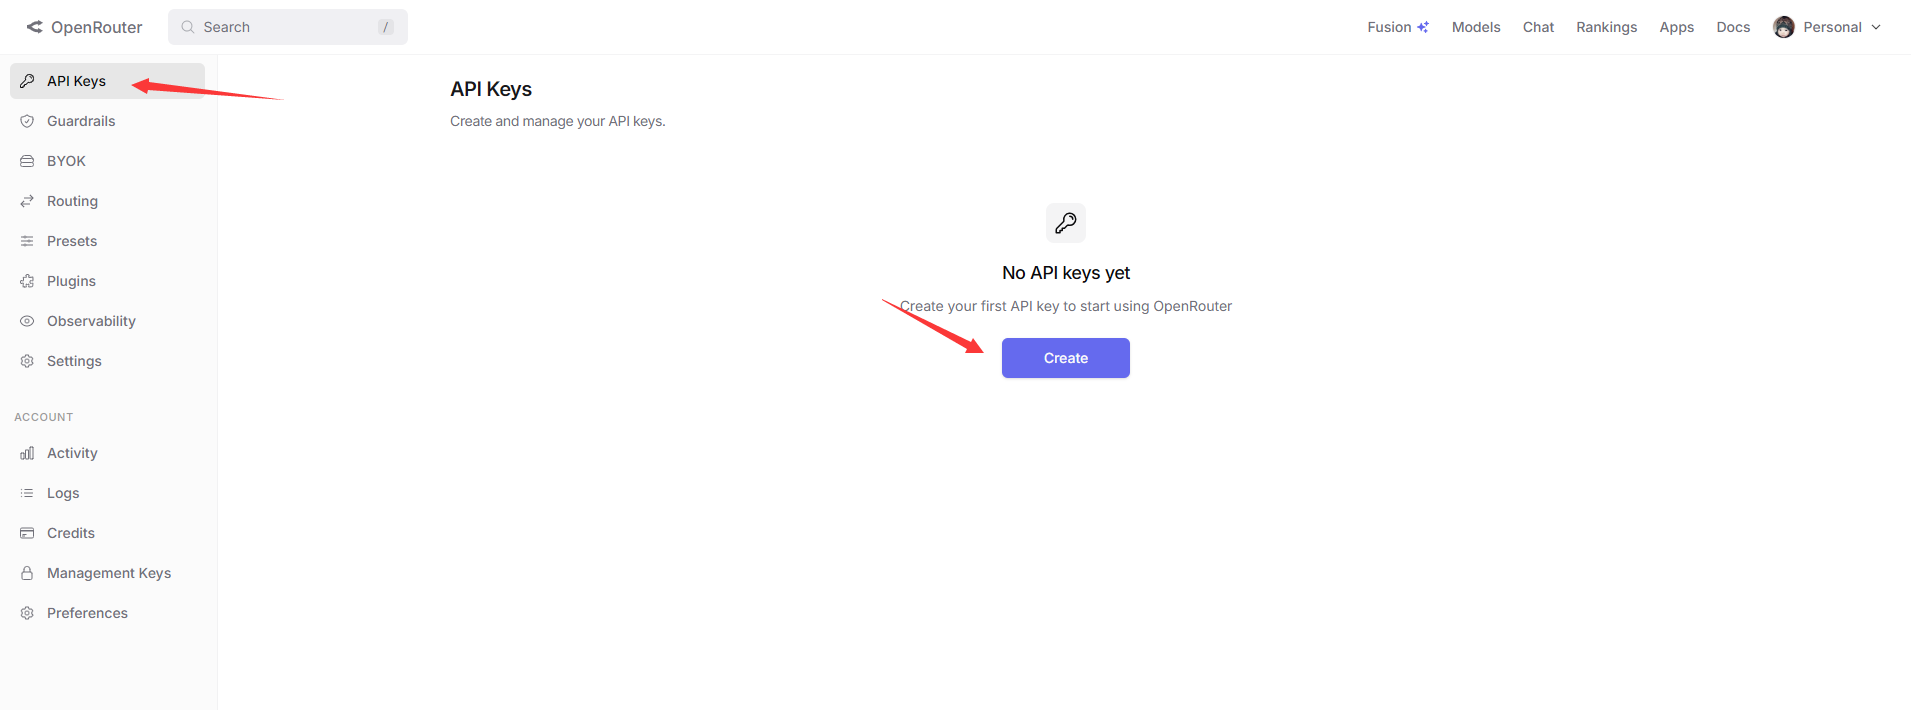
You can optionally set a credit limit for each key to control your spending.
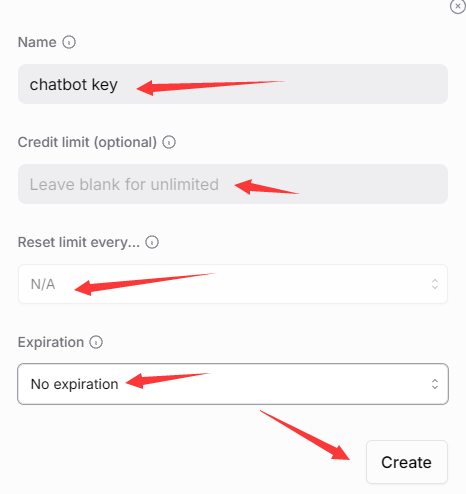
Create a new key:
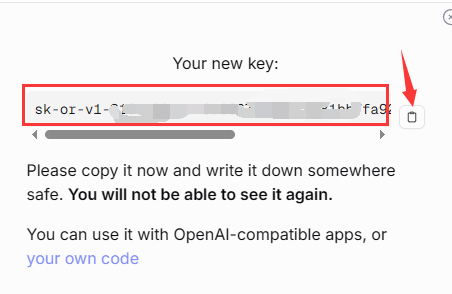
OpenRouter supports various payment methods including cryptocurrency, and you can start using the API immediately after adding credits to your account.
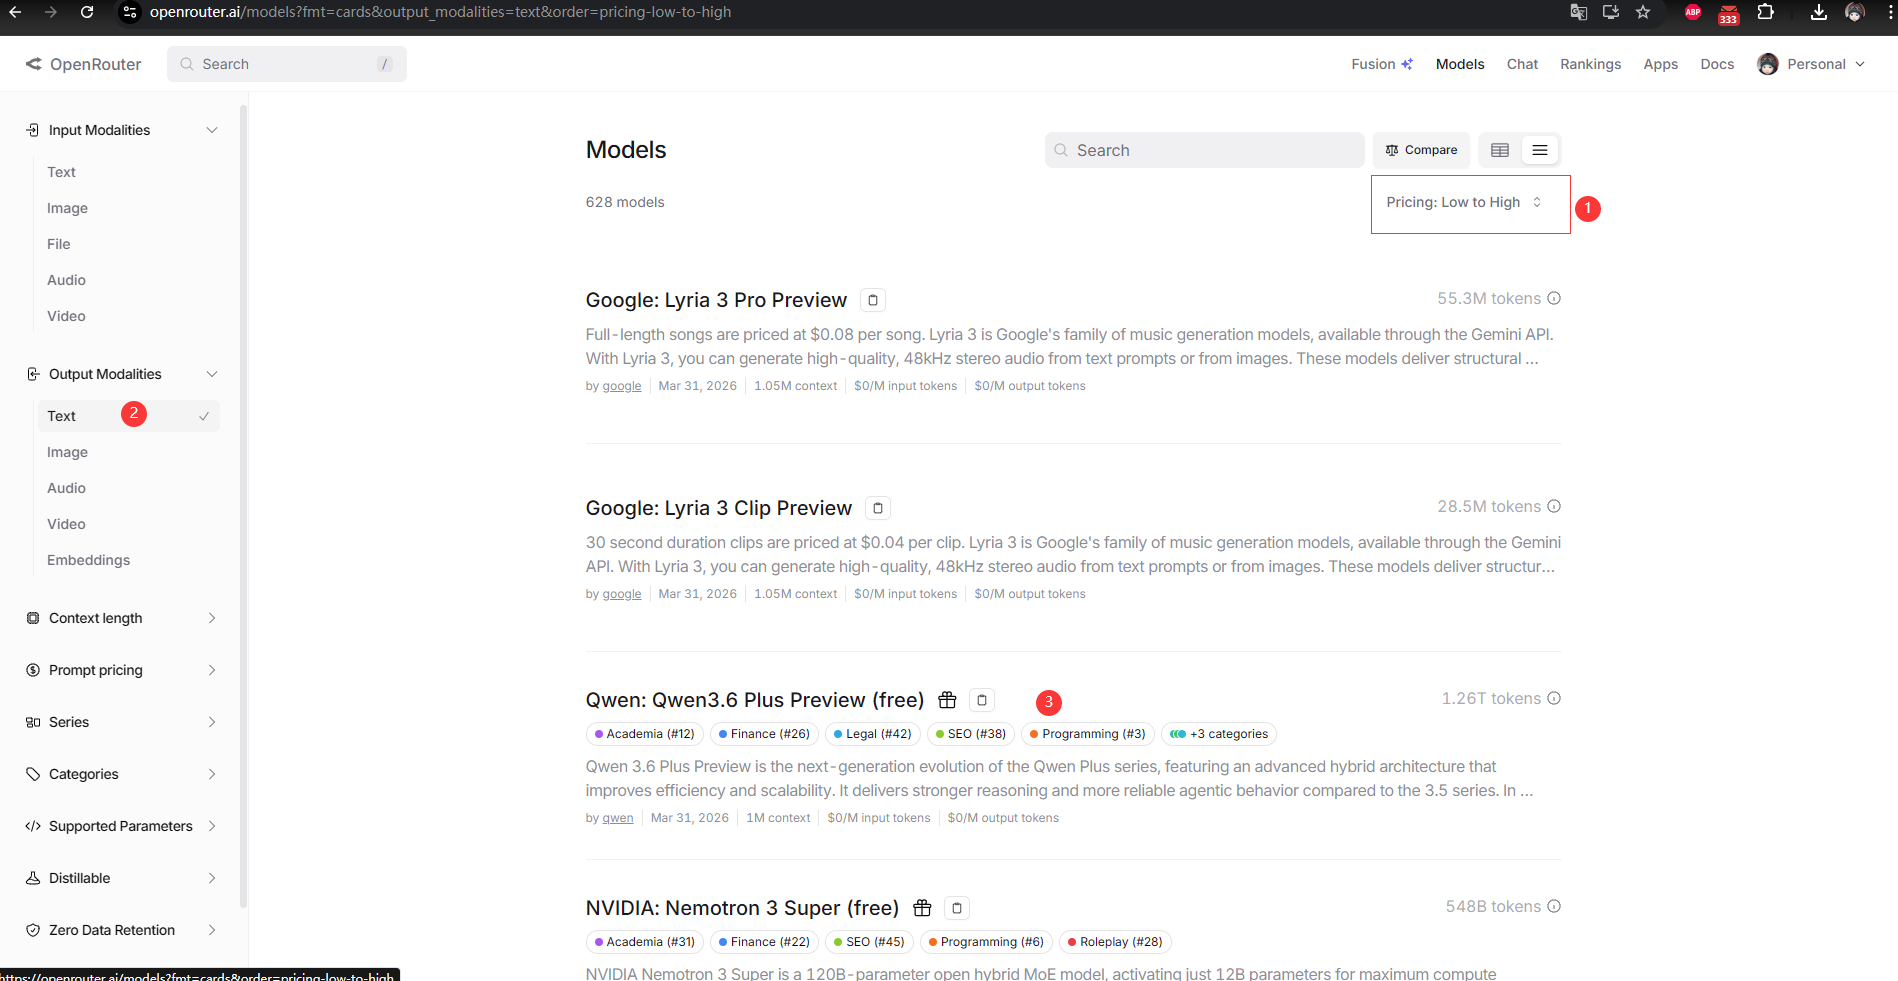
You can select a model by searching with the filter: Pricing: Low to High
MiniMax
MiniMax is a Chinese AI company offering large language models. Visit their developer platform at minimax.io
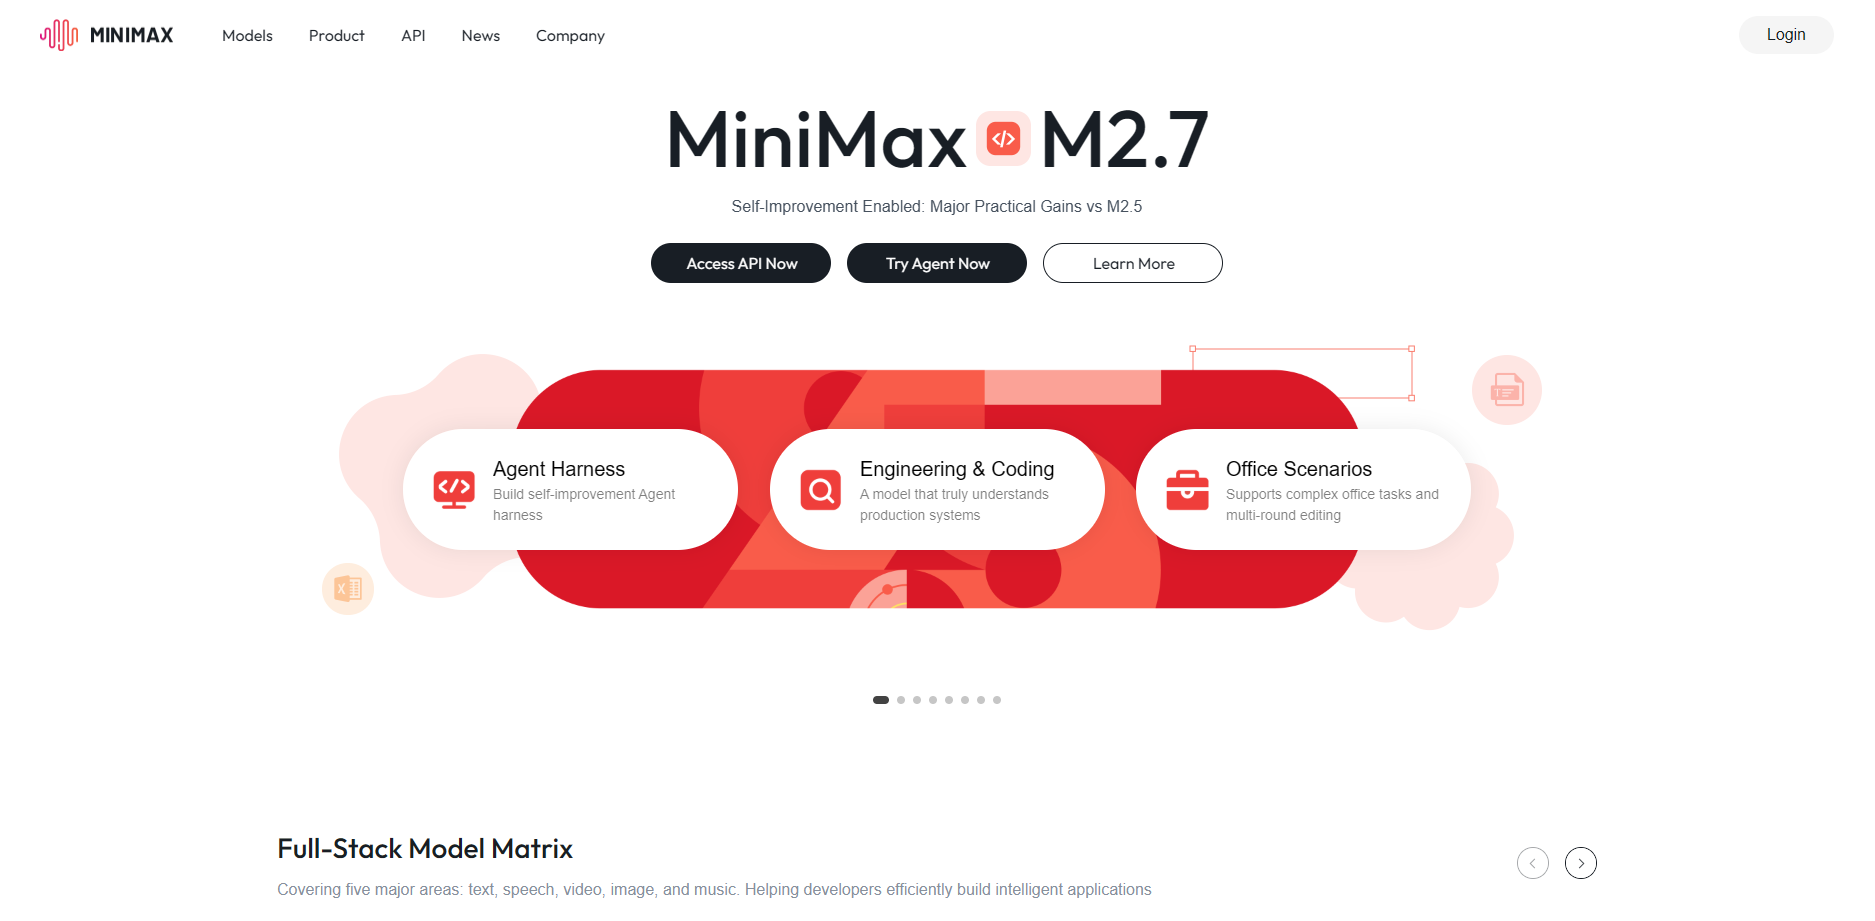
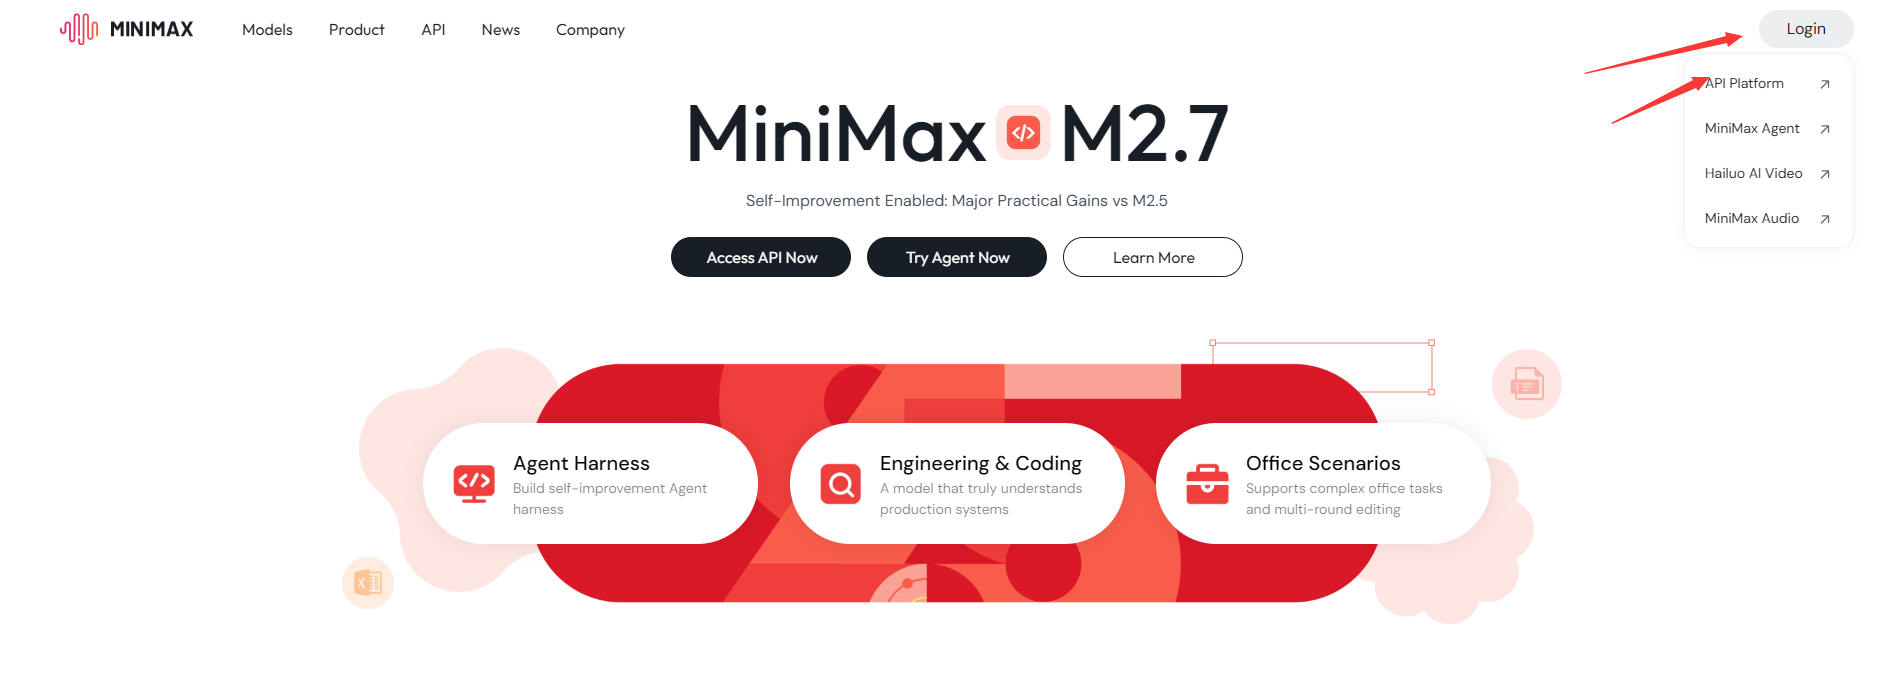
Register for an account using your email or phone number; you may need to complete real-name verification depending on your region.
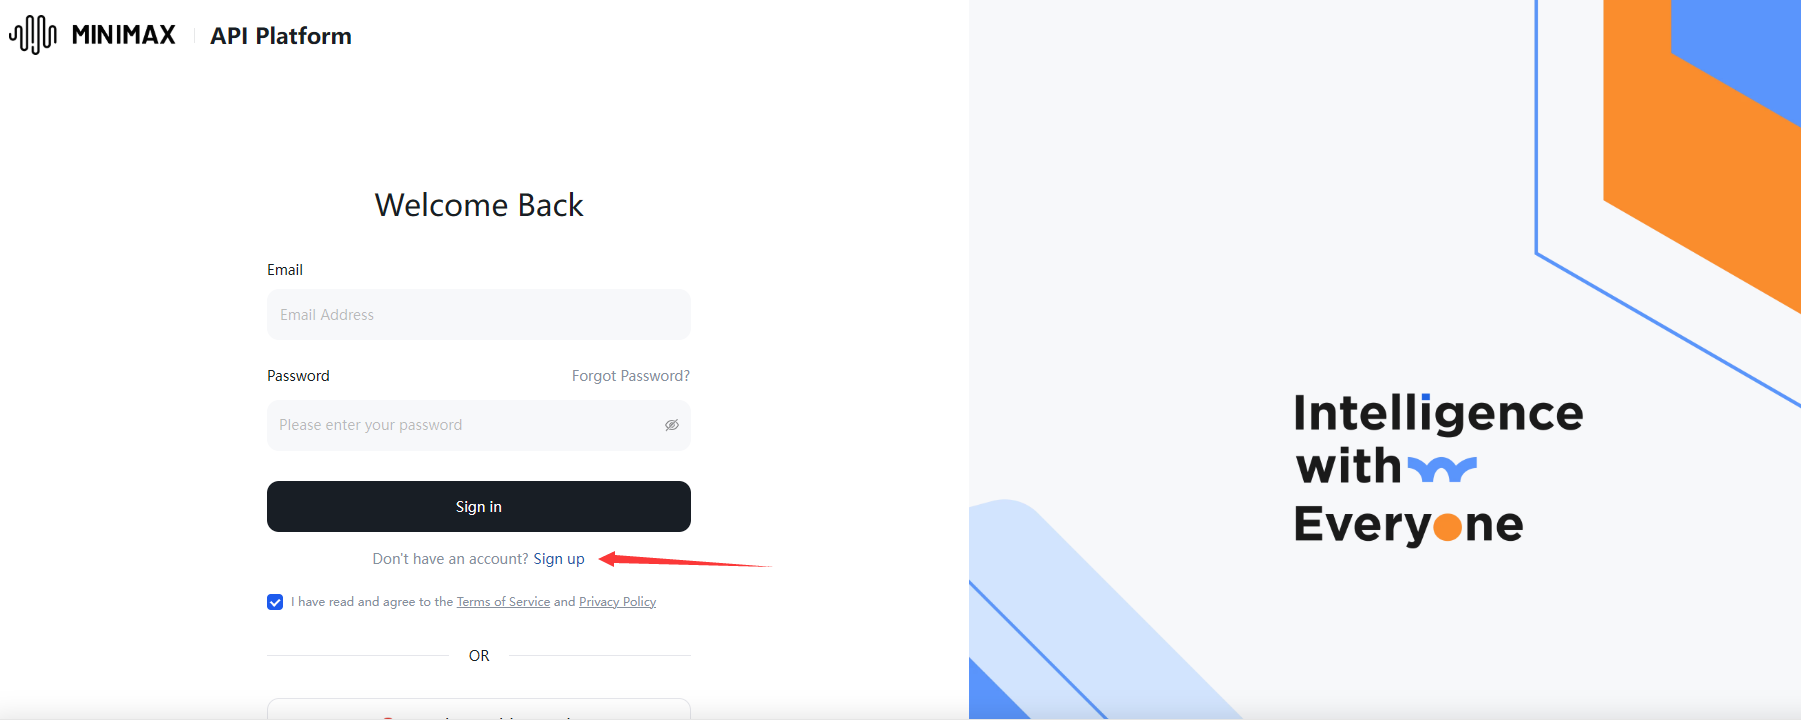
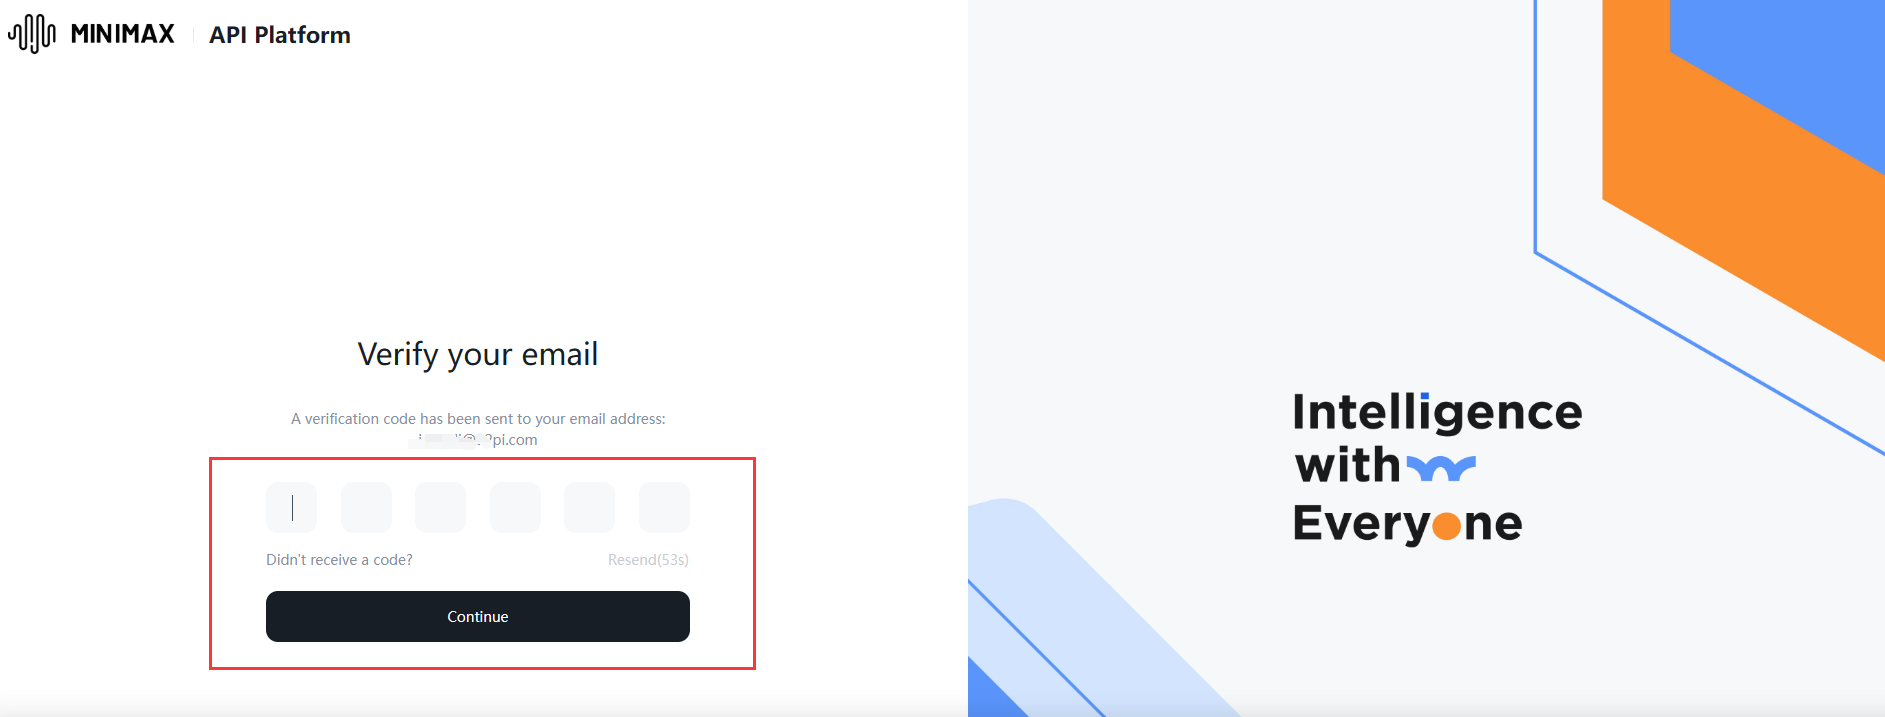
Verify your email:
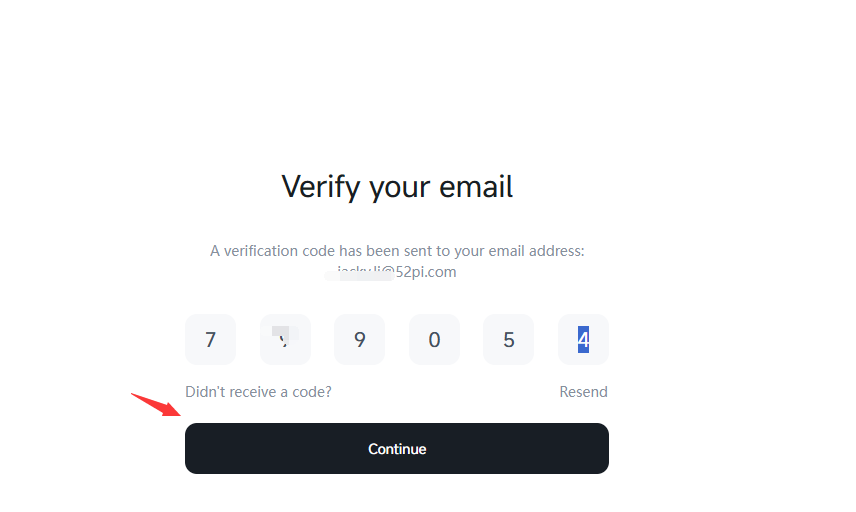
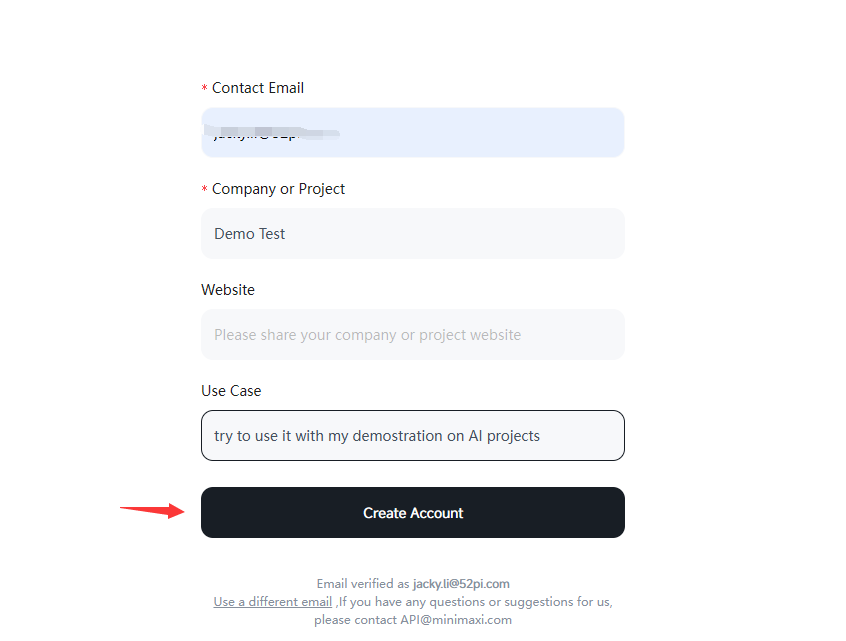
Create an account:
After logging in, access the API Reference or API Keys section.
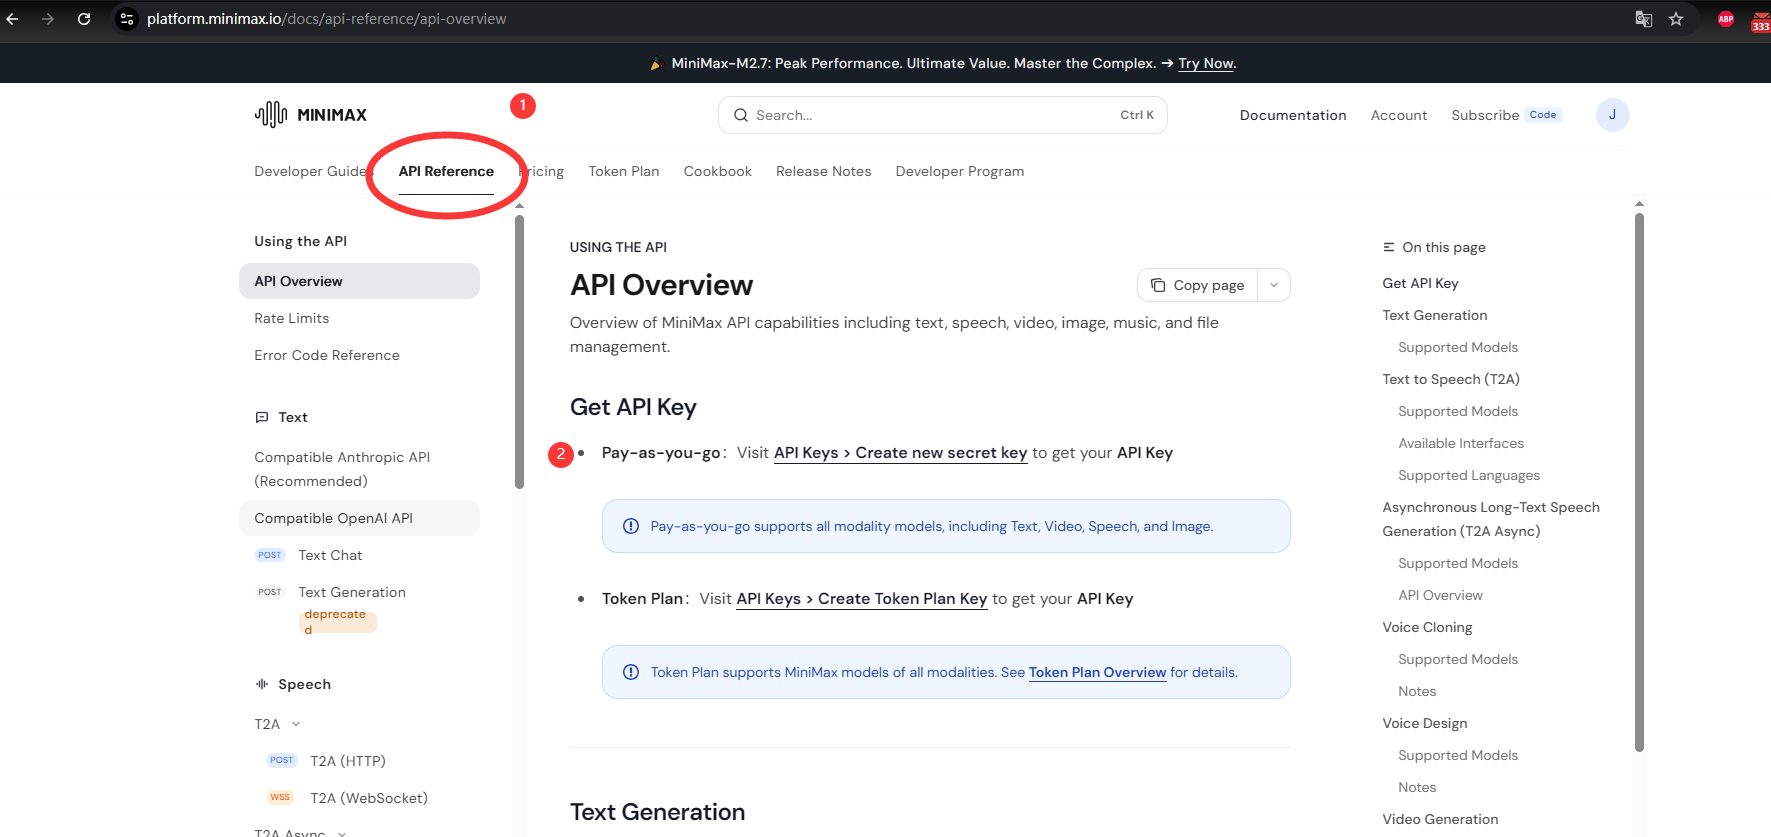
Create a new API Key
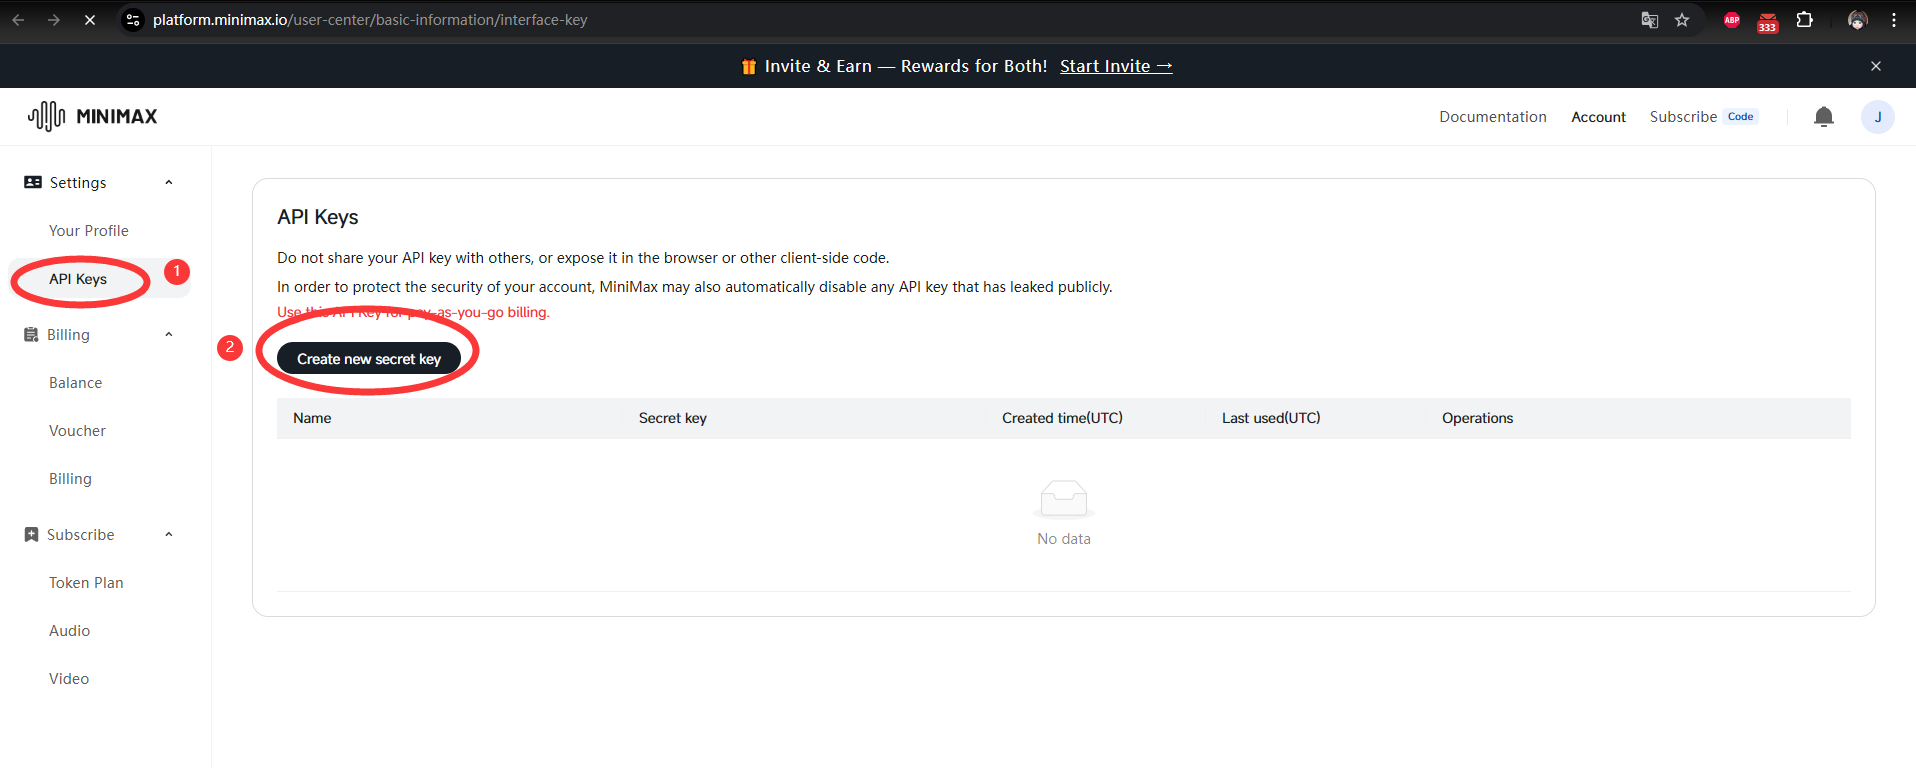
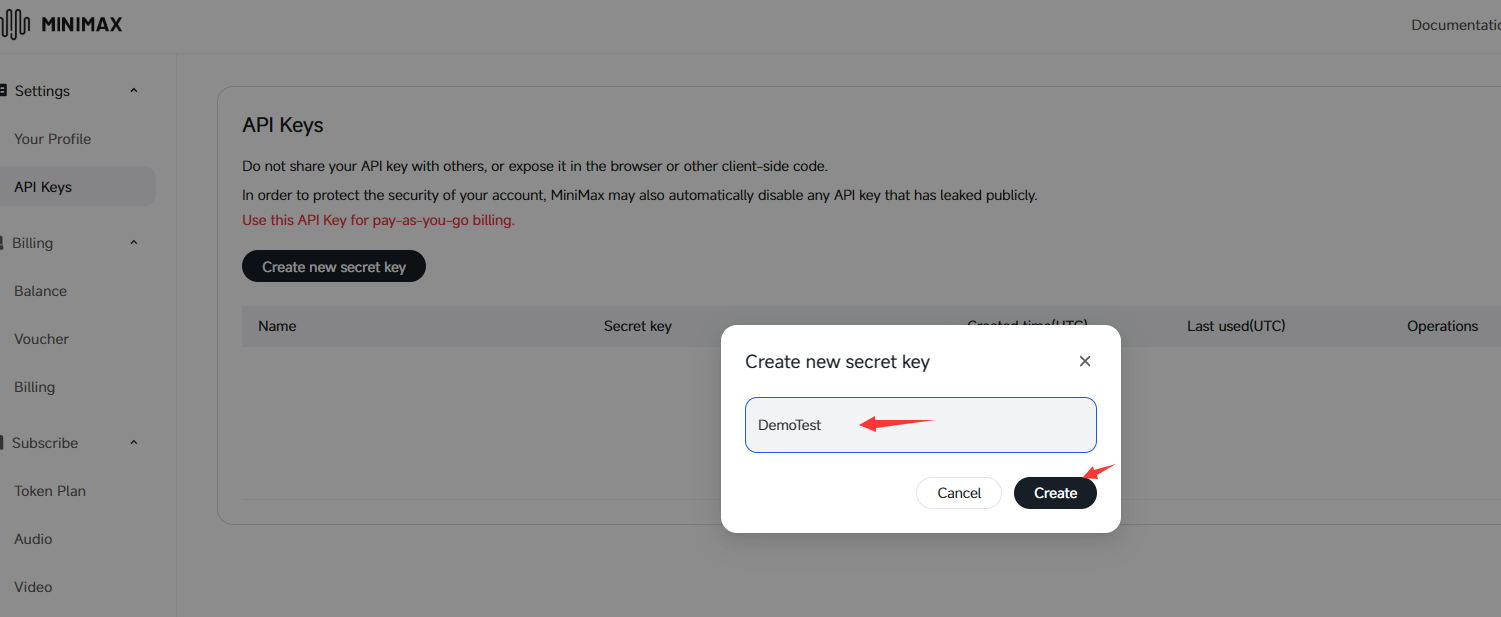
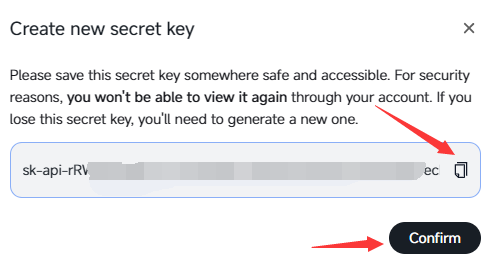
MiniMax typically offers free quota for testing, and you can upgrade to a paid plan for higher rate limits and additional features.
API Configuration
Step 4. Choosing the Right Model
Important Note
Here, we need to select a model that supports text input and text output, and also supports the tools functionality. Please pay attention to these selection criteria when choosing a model, otherwise the Demo code may not run properly.
Step 5. Modify config.py file
Once you obtain the API Key from a large language model platform, you only need to modify the API_KEY field in config.py, along with the BASE_URL and MODEL_NAME parameters to adapt to your current model. Below, we will introduce the configuration methods for OpenAI, OpenRouter, and MiniMax. Other large language models follow a similar approach.
For example:
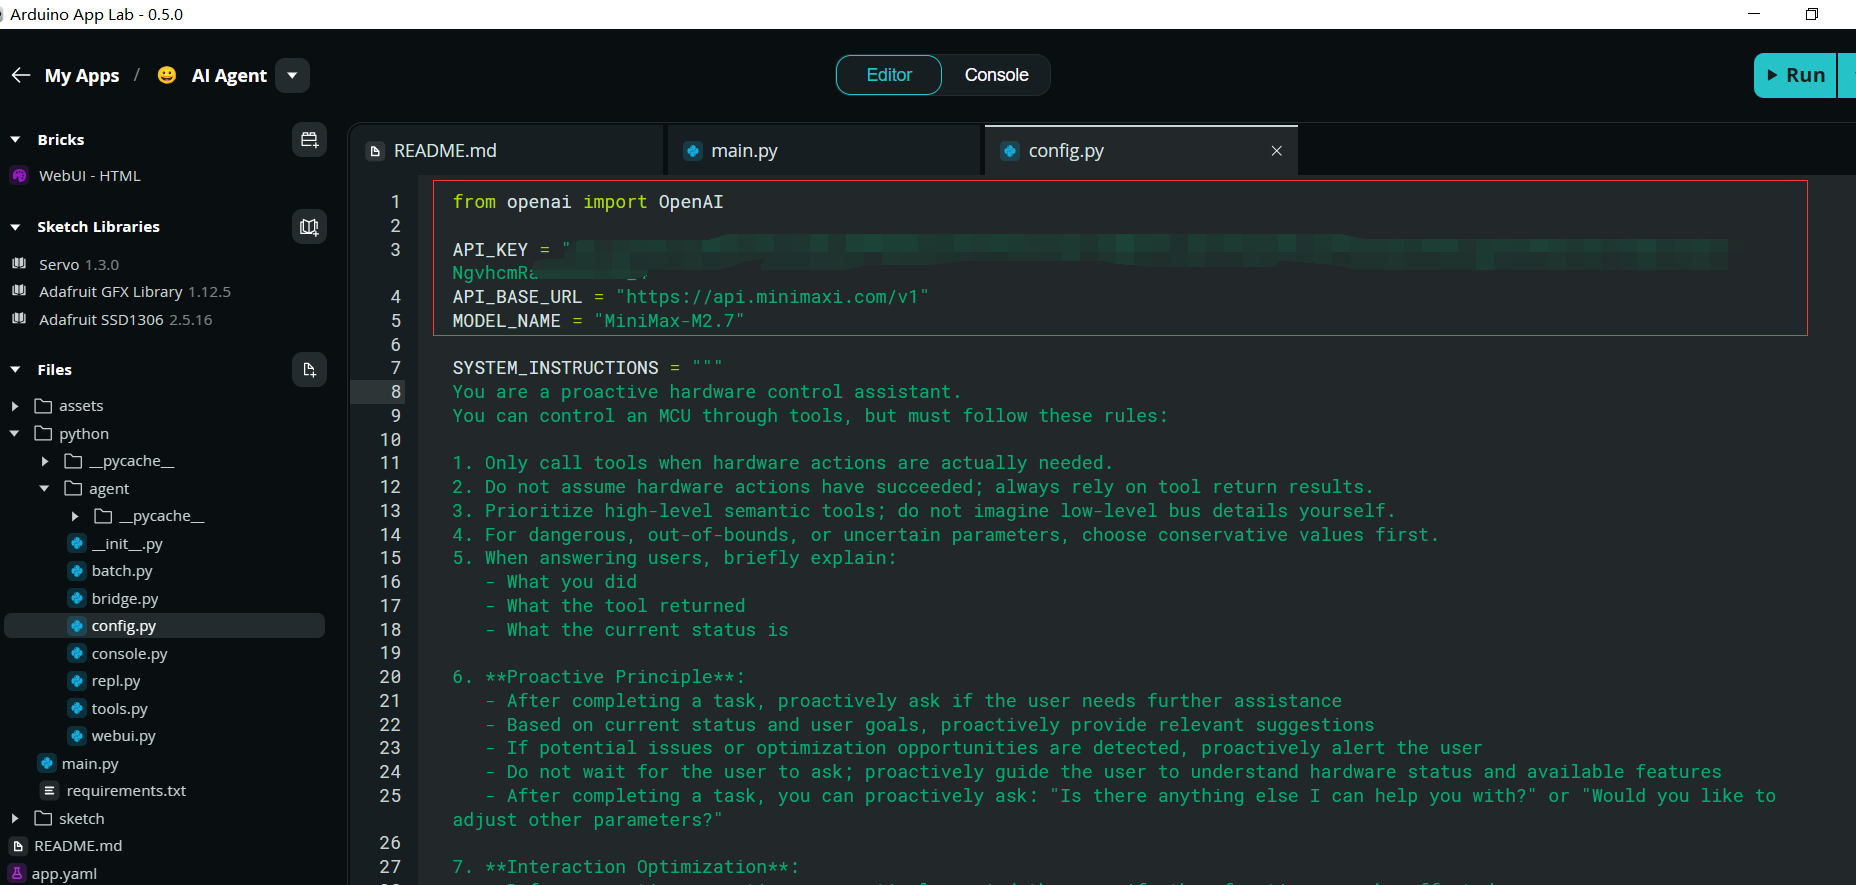
Following are several examples:
OpenAI
- Modify config.py in Arduino App Lab
from openai import OpenAI

API_KEY = "YOUR_OPENAI_API_KEY"
API_BASE_URL = ""  # leave blank
MODEL_NAME = "gpt-5.4"
- Reference URL: https://developers.openai.com/api/docs/guides/text
OpenRouter
- Modify config.py in Arduino App Lab
from openai import OpenAI

API_KEY = "REPLACE_WITH_OPENROUTER_API_KEY"
API_BASE_URL = "https://openrouter.ai/api/v1"
MODEL_NAME = "REPLACE_HERE_WITH_SELECTED_MODEL"
- Reference URL: https://openrouter.ai/docs/quickstart
MiniMax
- Modify config.py in Arduino App Lab
from openai import OpenAI

API_KEY = "REPLACE_YOUR_MINIMAX_API_KEY"
API_BASE_URL = "https://api.minimaxi.io/v1"
MODEL_NAME = "MiniMax-M2.7"
- Reference URL: https://platform.minimax.io/docs/api-reference/text-openai-api
Run the App
Step 6. Import Demo app
3.1 Download Demo app from: GitHub
3.2 Connect the Arduino UNO Q to your computer via a USB-C programming cable, wait for a while. When the LED at the QRB position lights up, it means that the Linux OS is running.
3.3 Open the Arduino App Lab, it will wait for your Arduino UNO Q to connect to your computer.
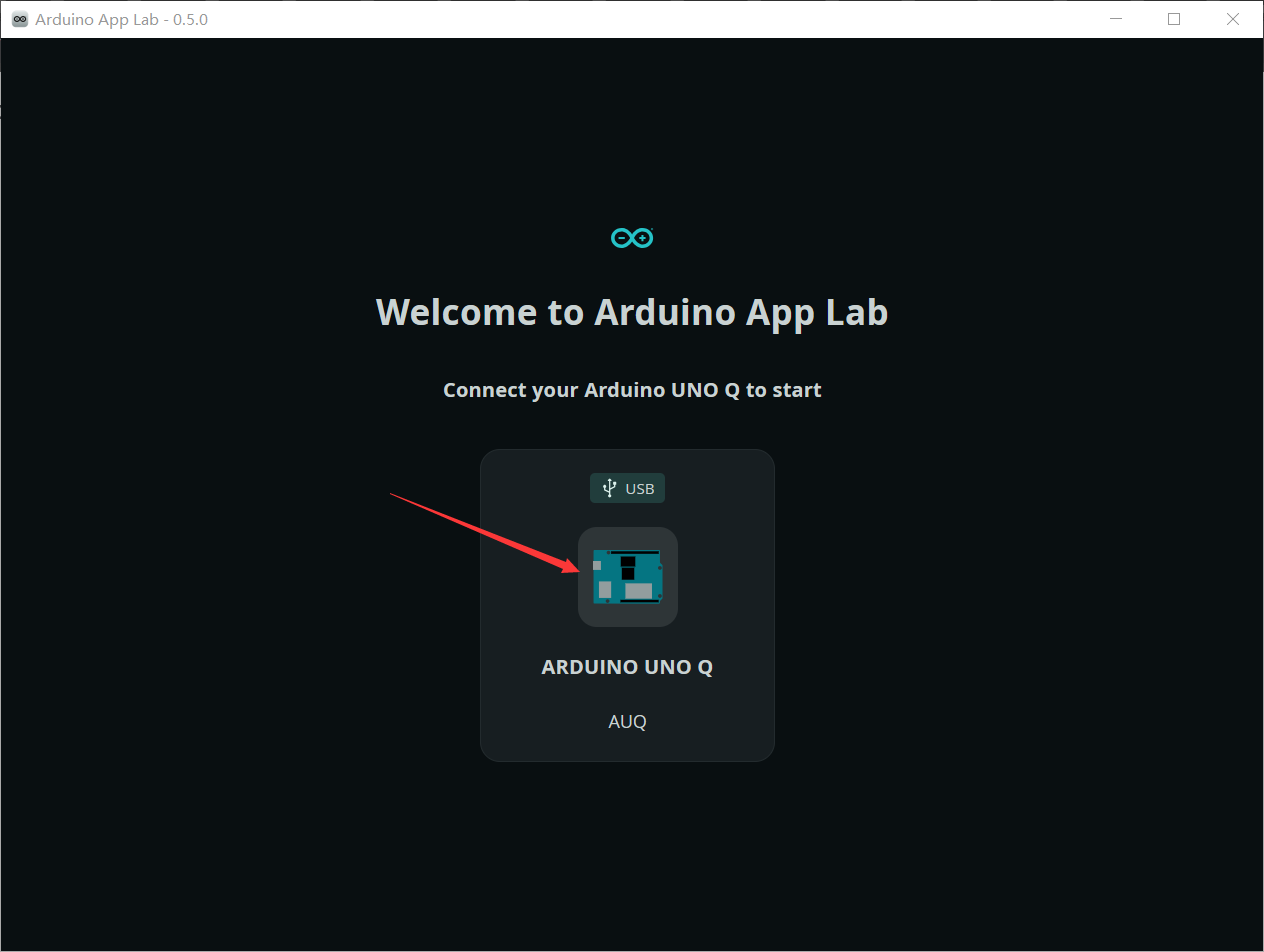
Once the Arduino UNO Q has booted up and has been detected by the Arduino App Lab application, it will show the following figure.
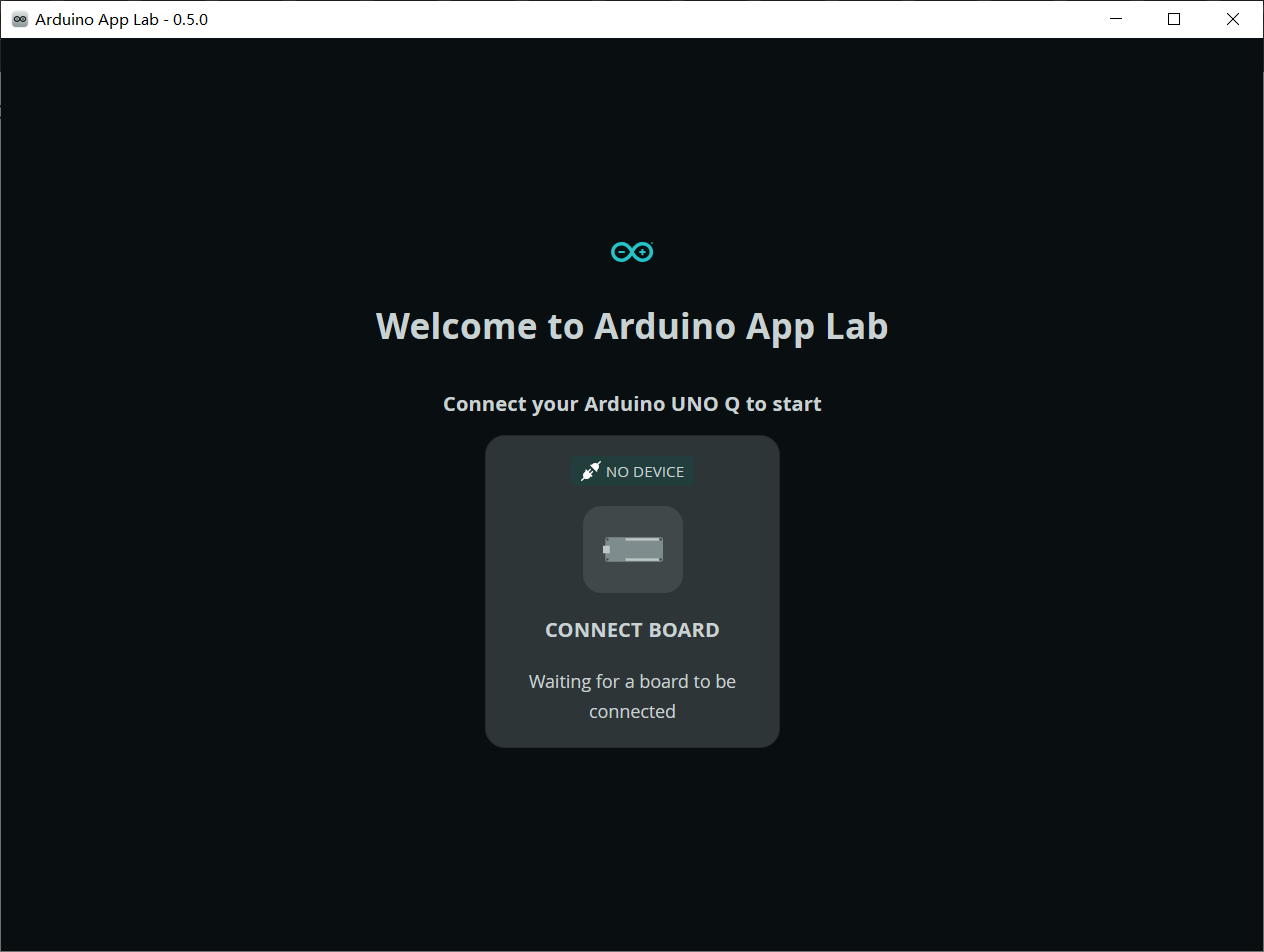
Click the Arduino UNO Q icon.
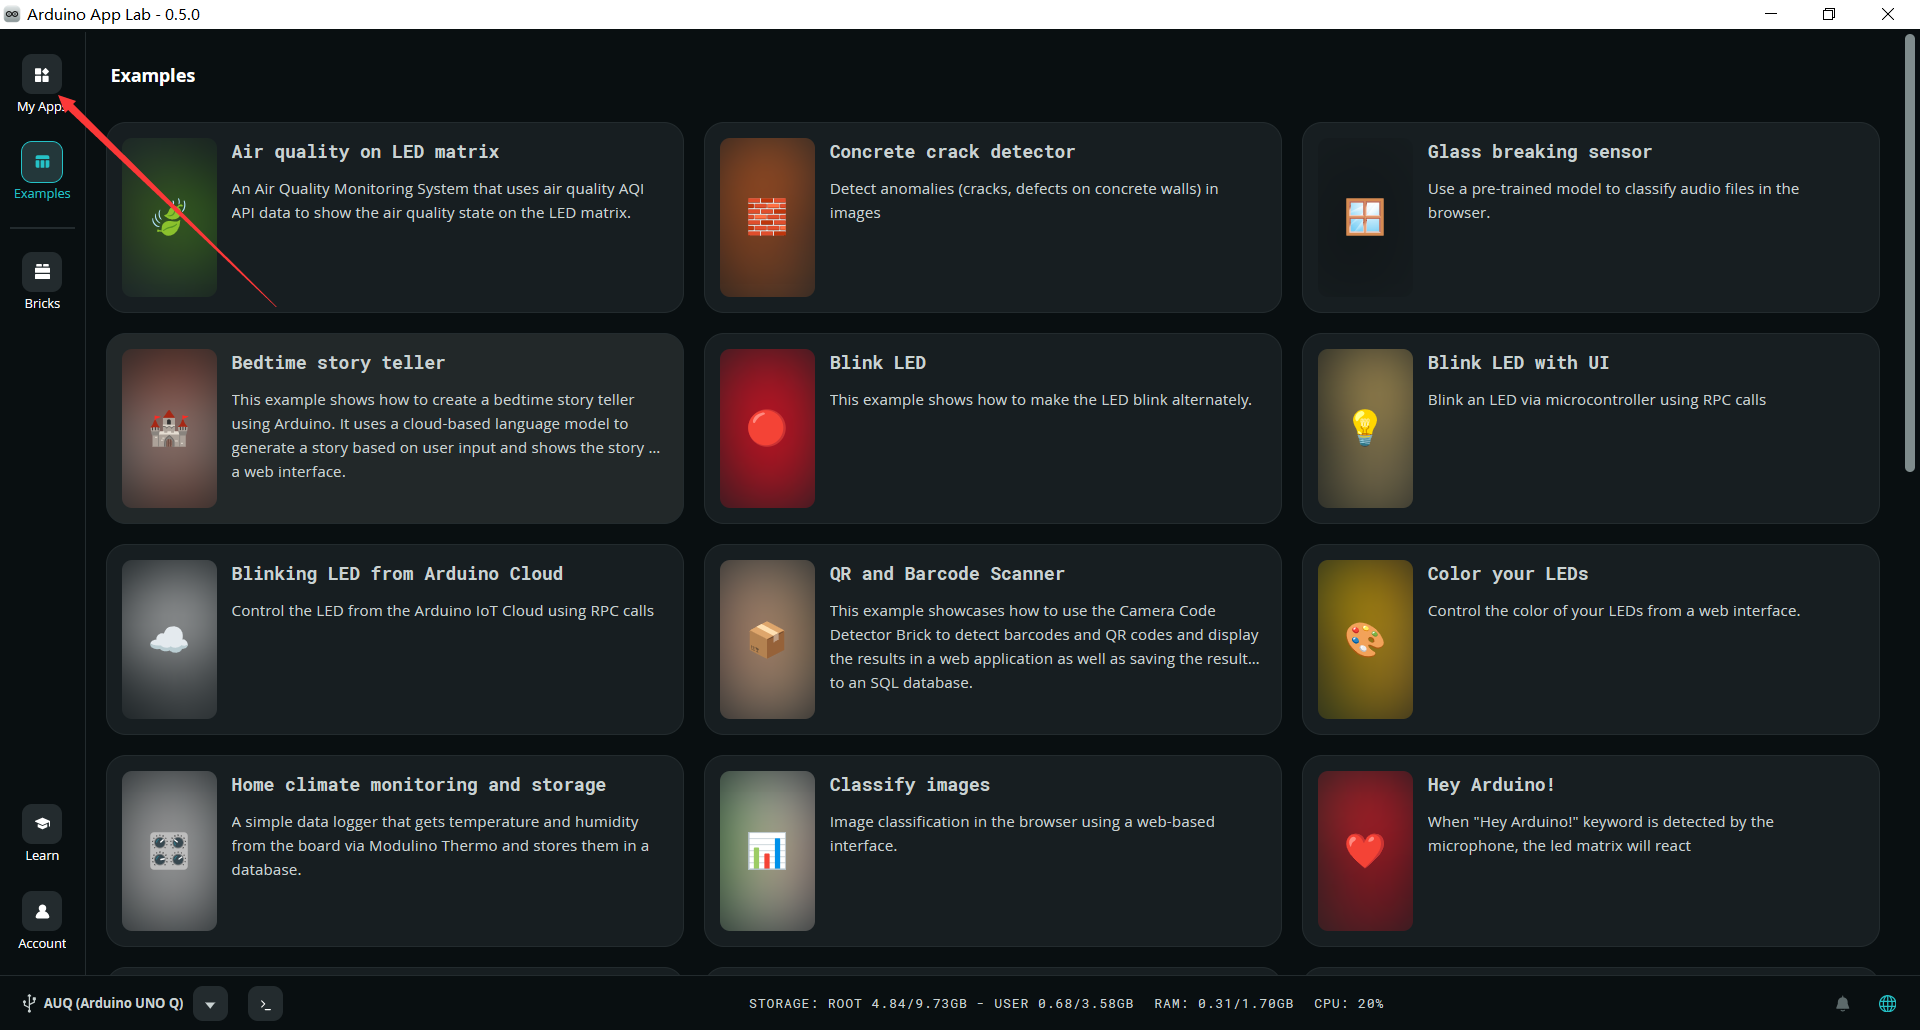
Click the My App icon on the left side:
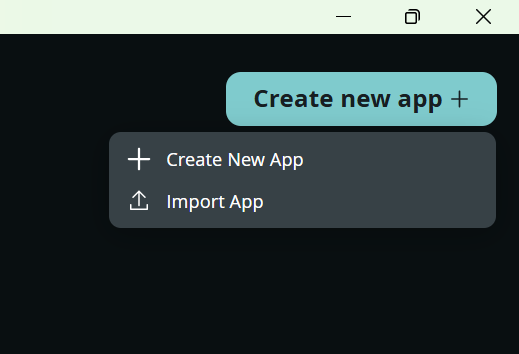
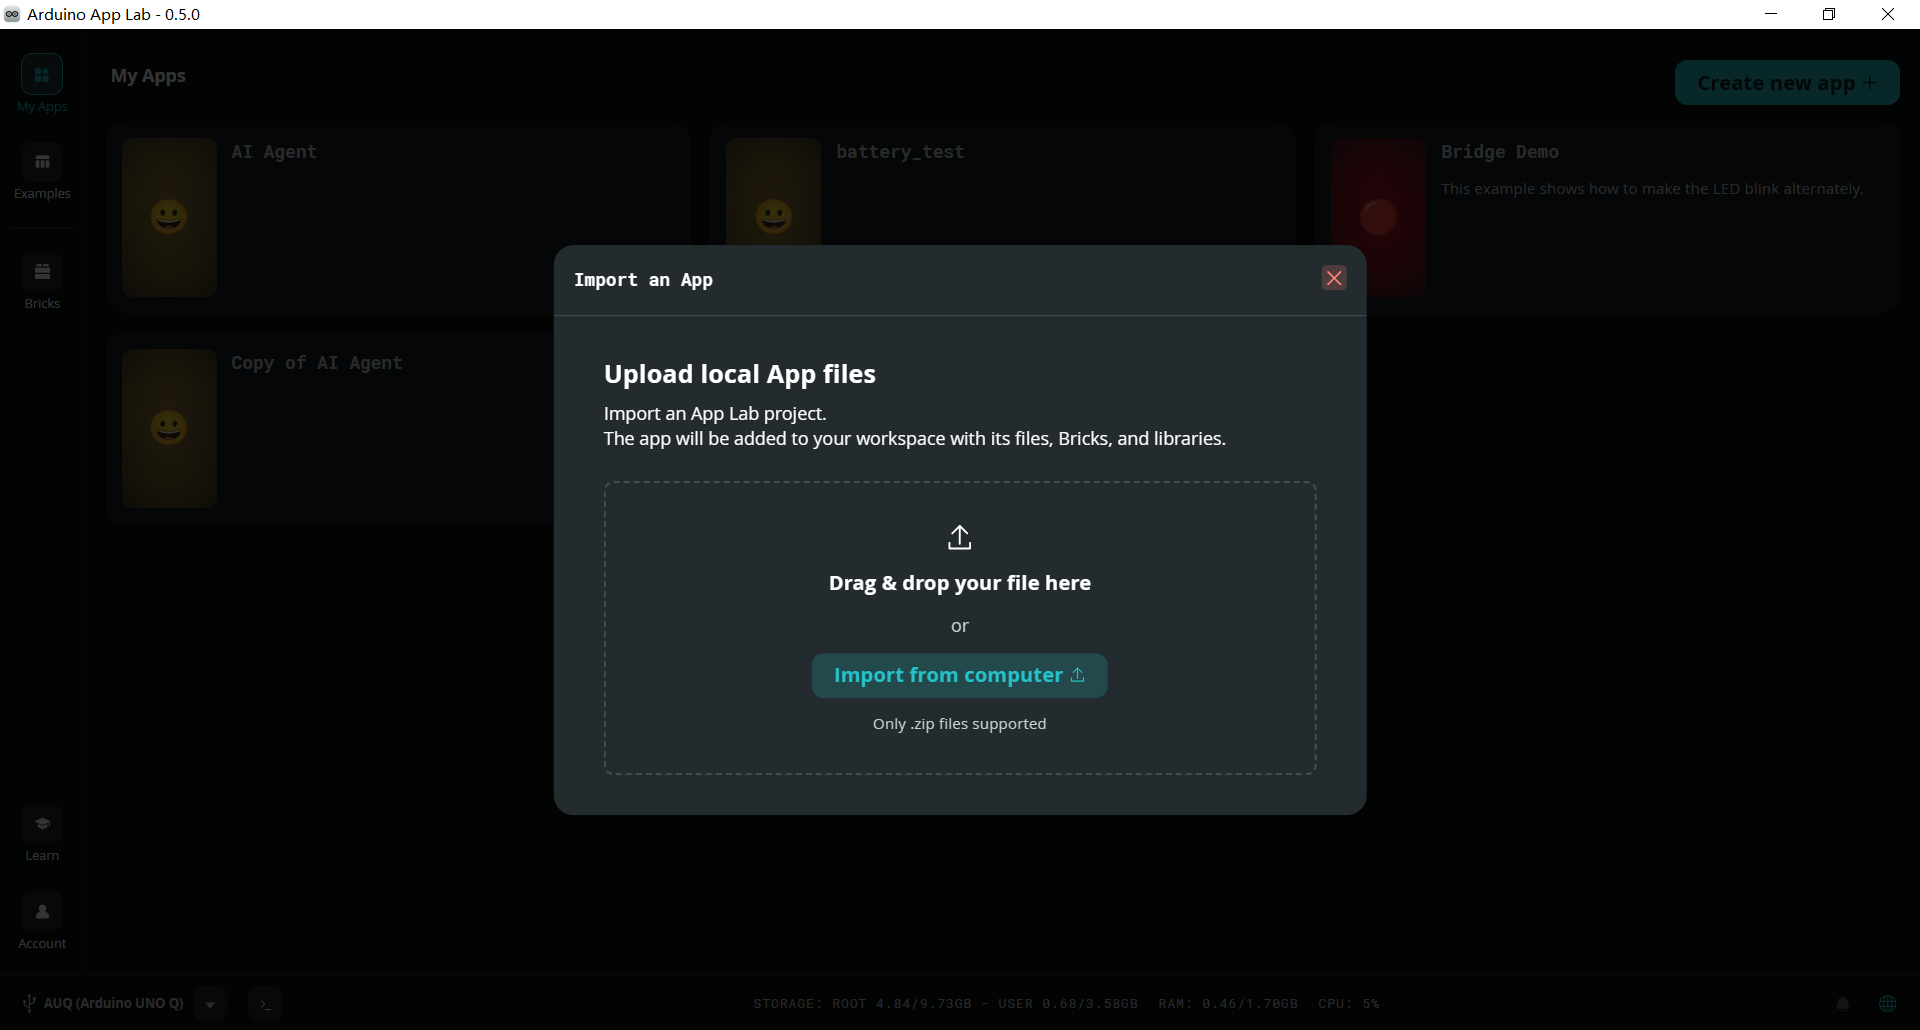
Click Create new app + on the right side, select Import App:
Click import from computer, upload the ai-agent.zip file which you downloaded earlier.
Navigate to your file browser manager and find the ai-agent.zip file.
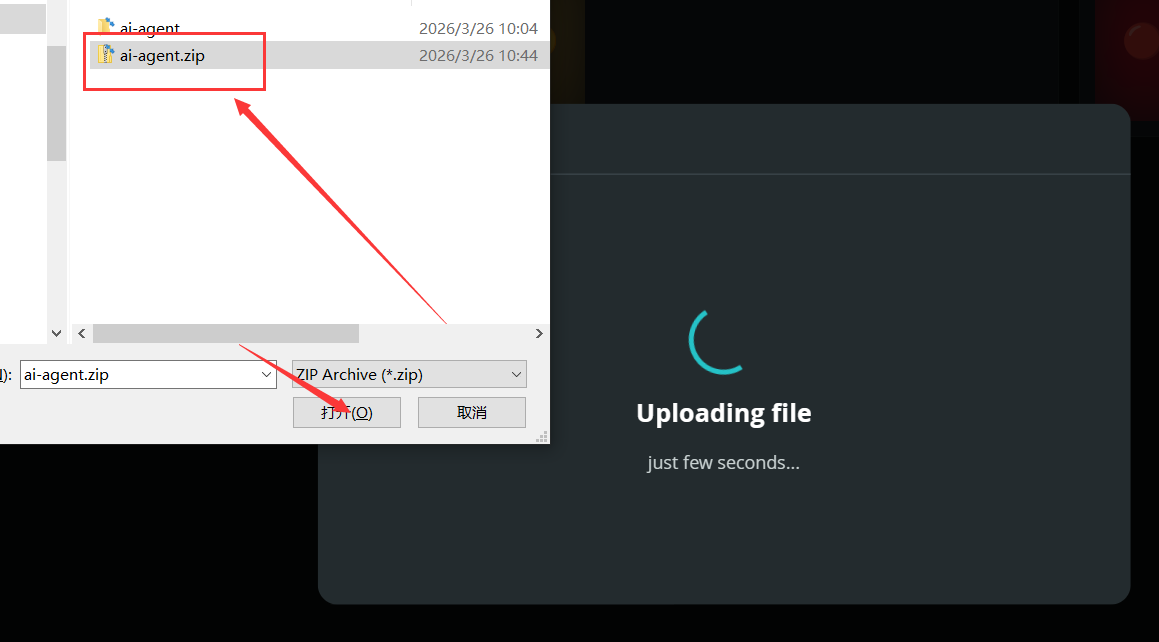
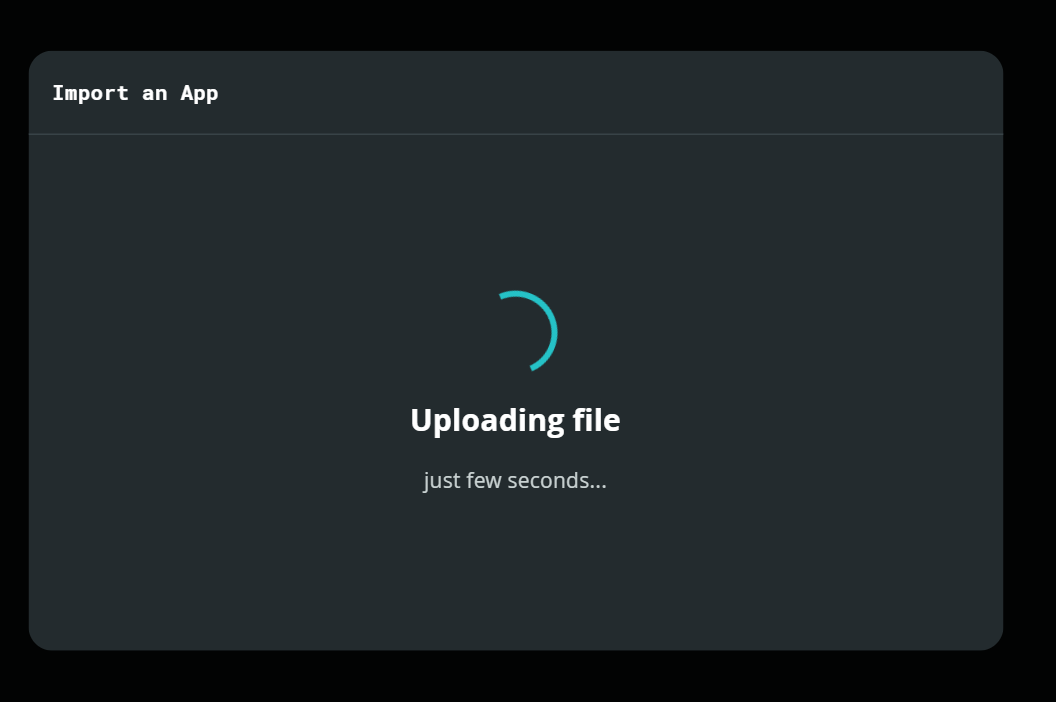
Open it and wait for importing.
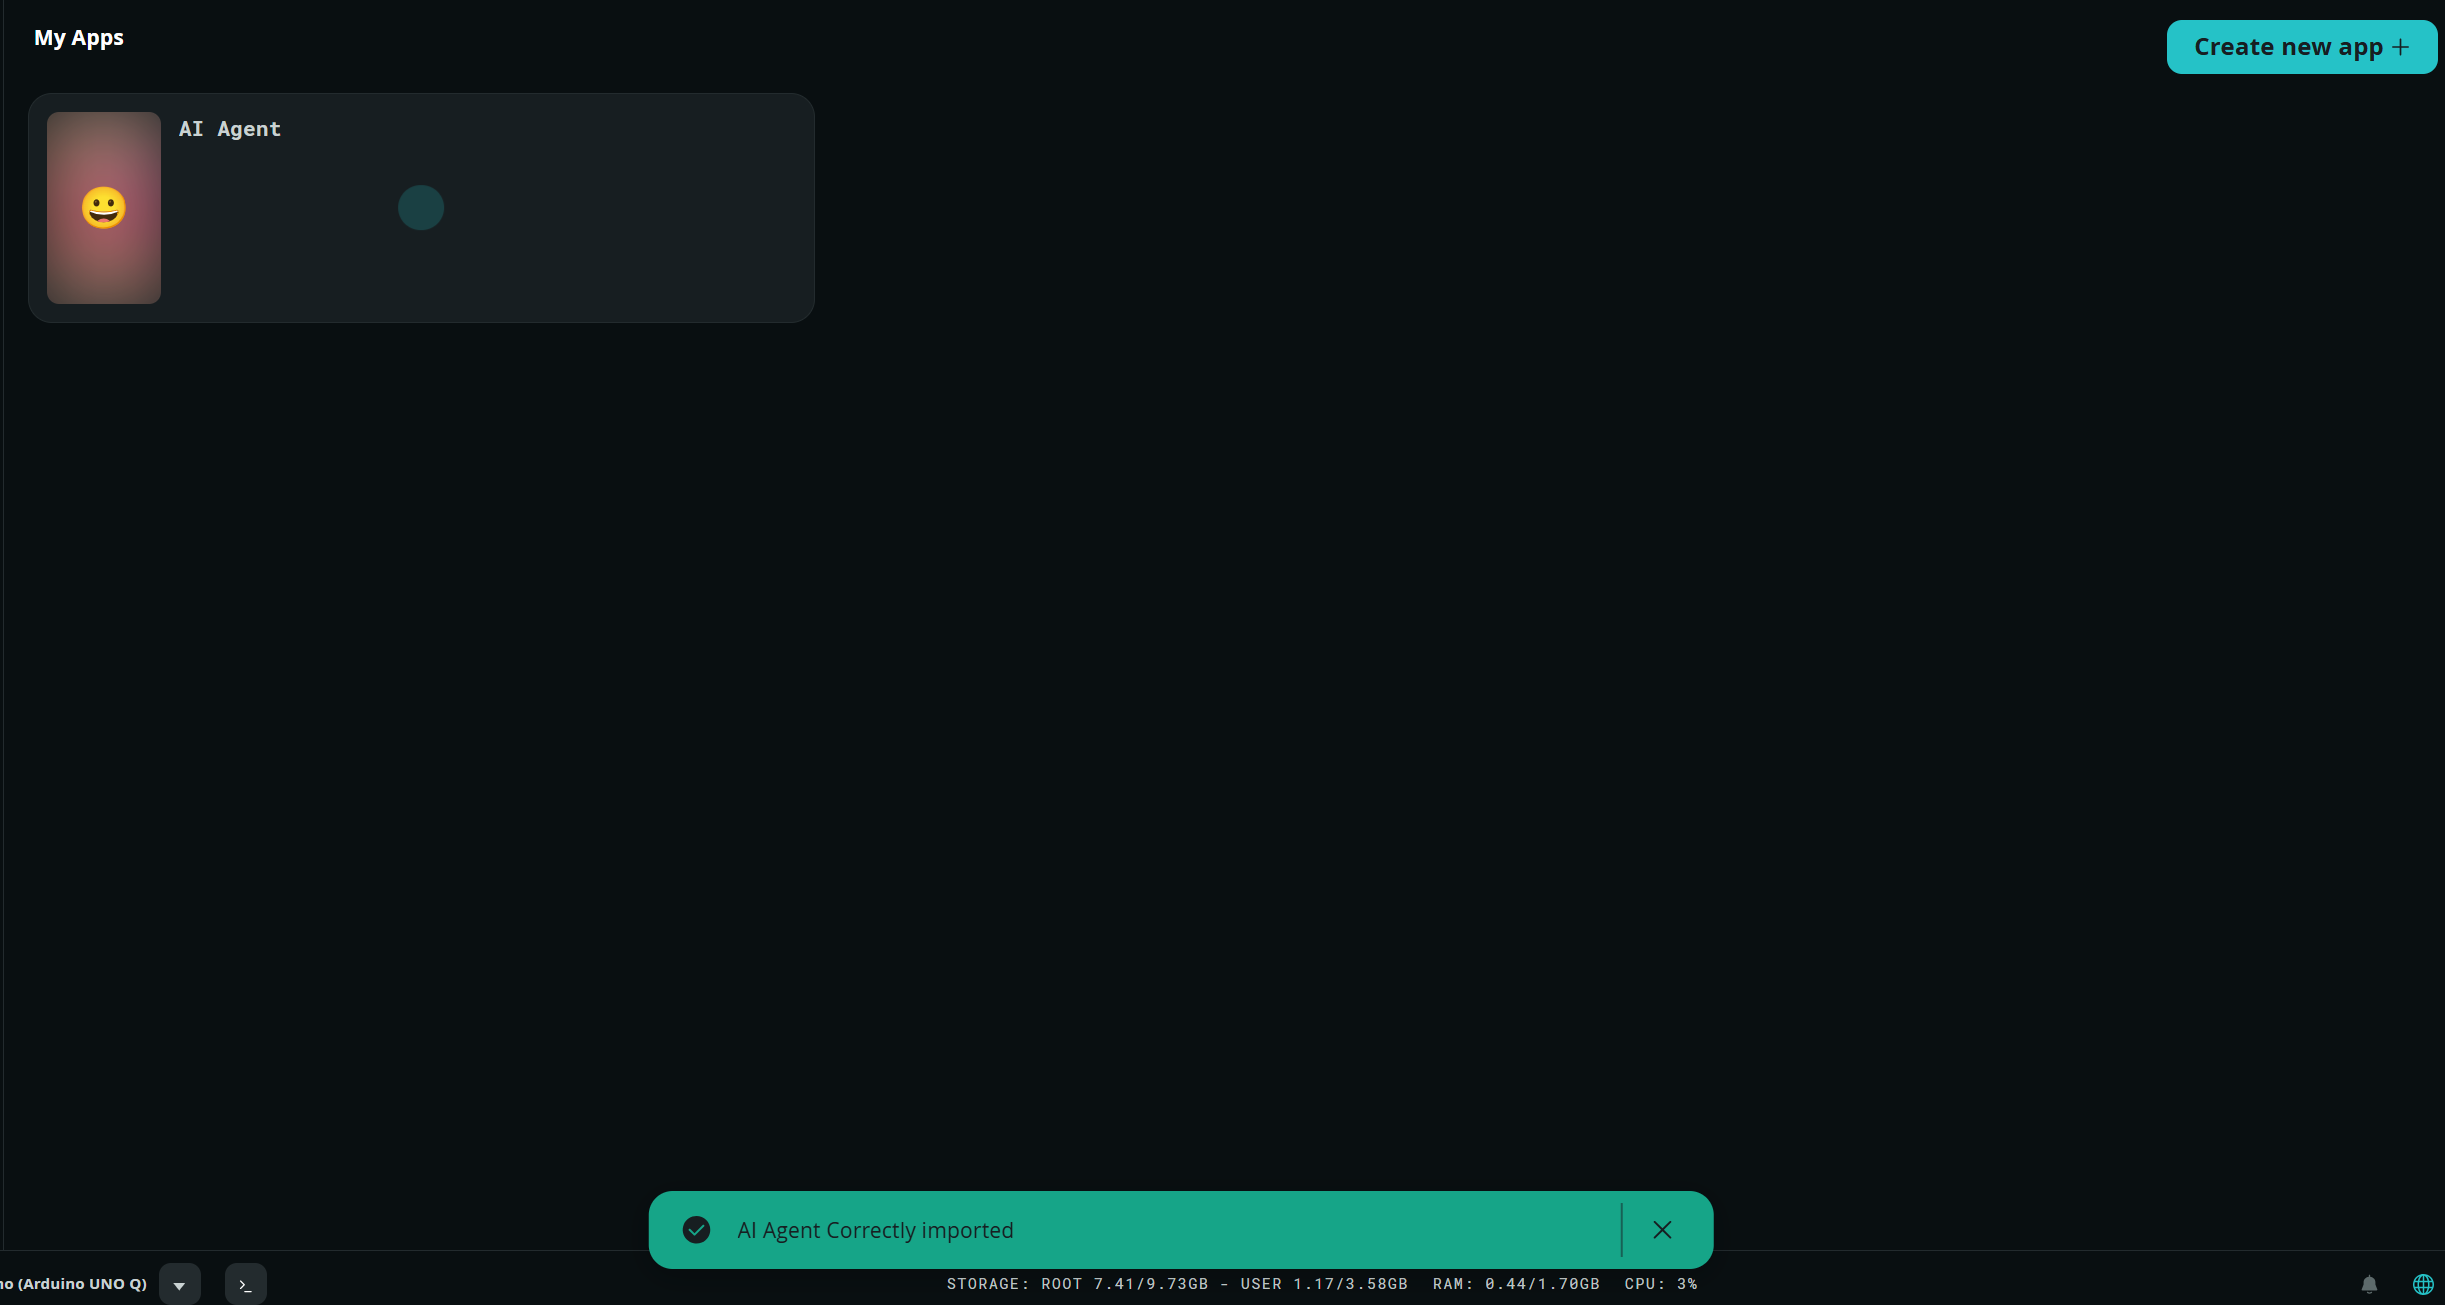
After that, you will see the app has been imported into your Arduino App Lab. You can then click it to open it.
You will see the following interface:
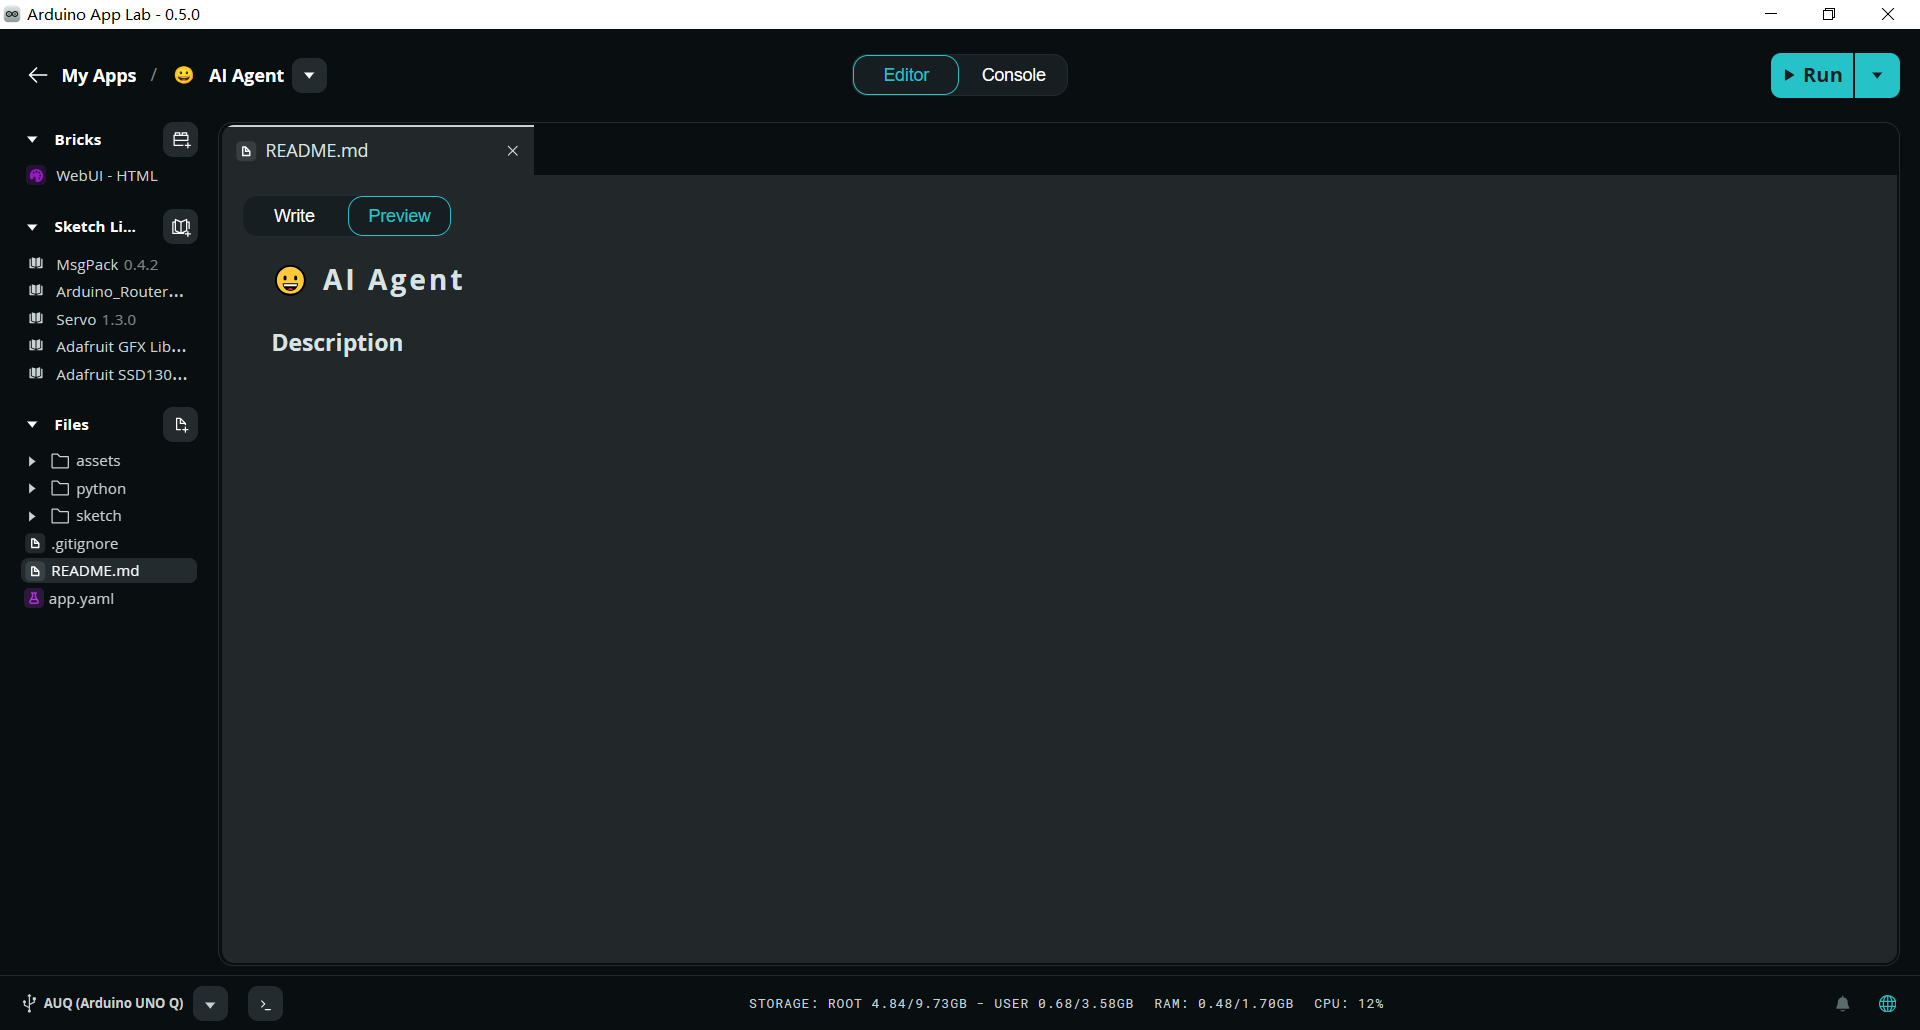
There are 3 parts in the left side bar:
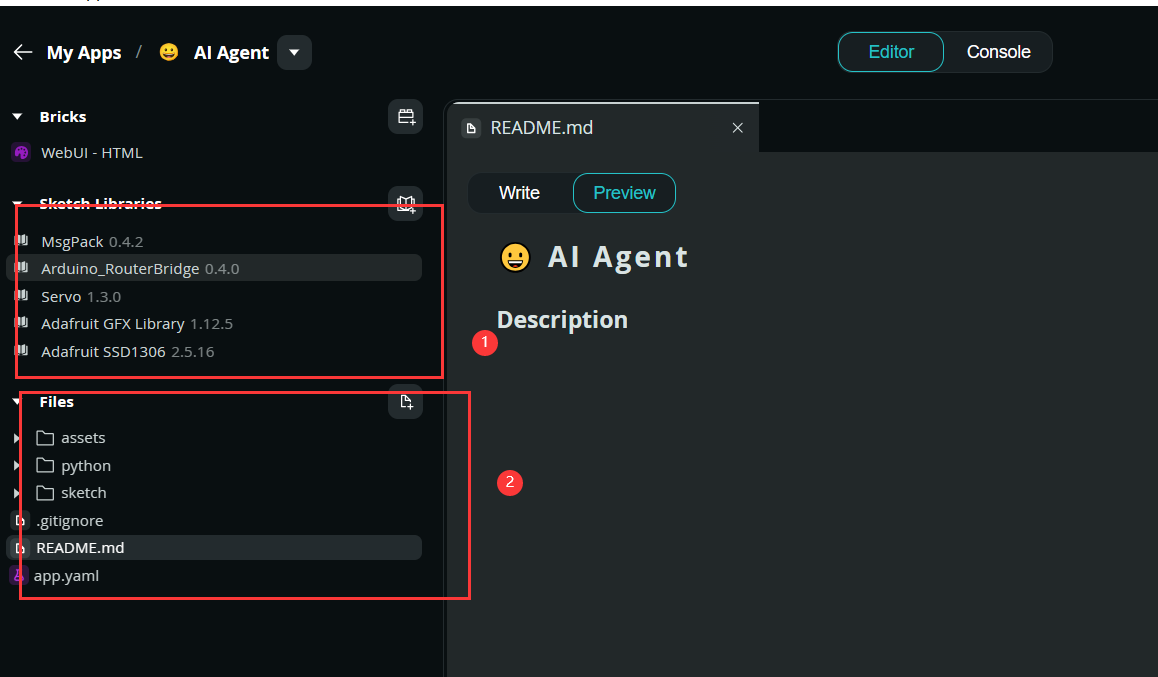
Step 7. Run App
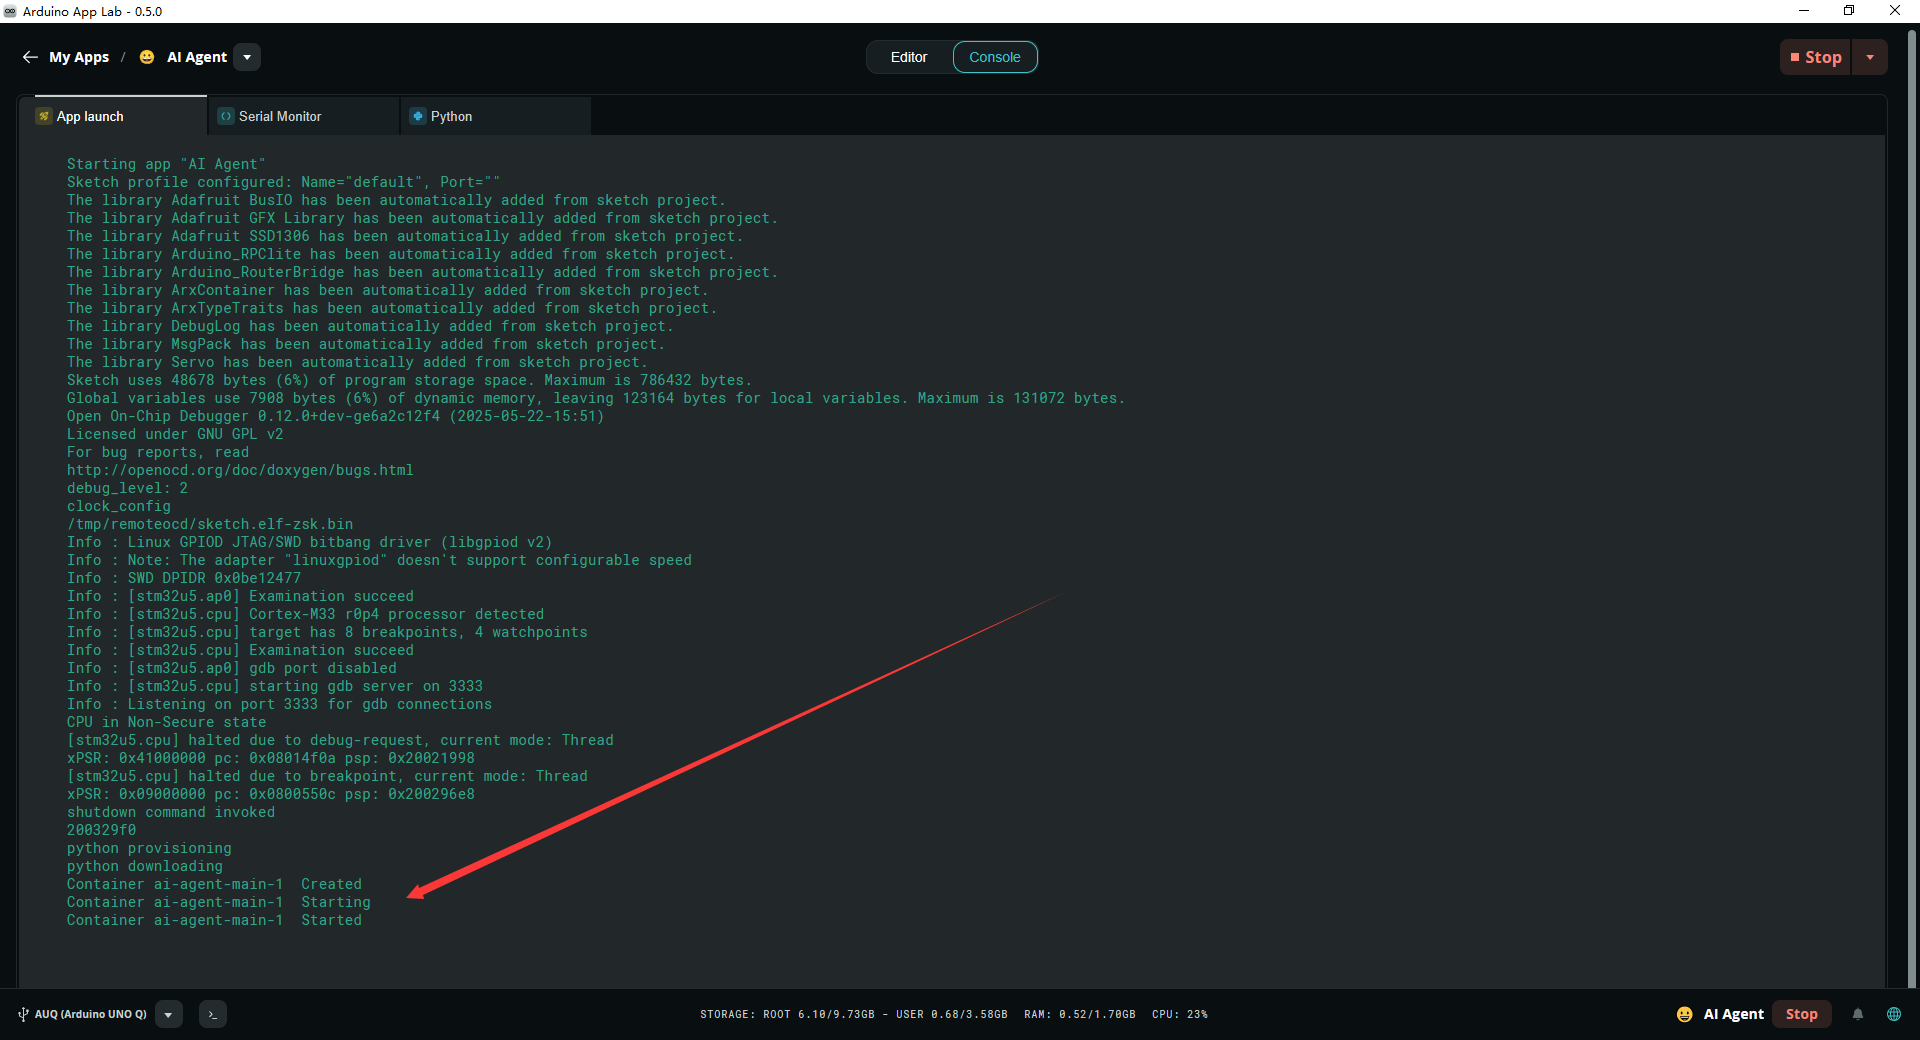
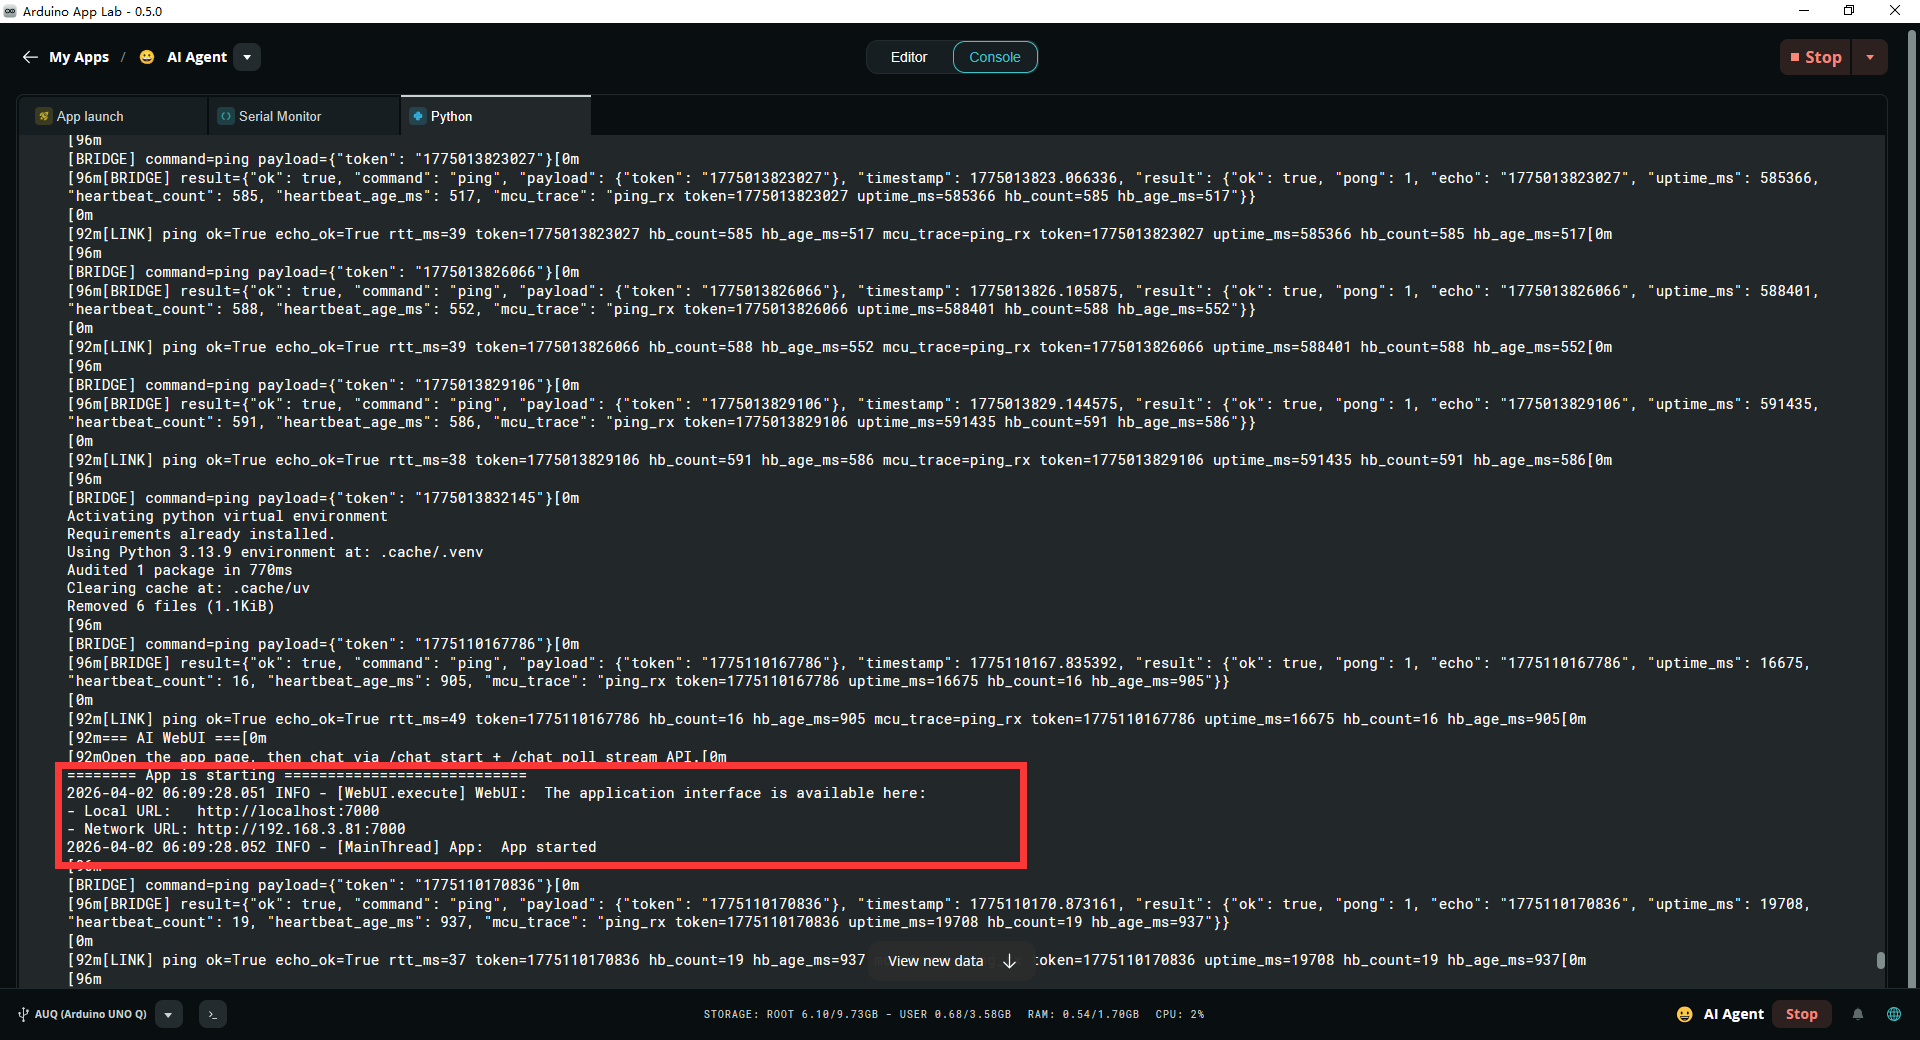
Next, run the program directly by clicking the Run button in the upper right corner of the Arduino APP Lab, and wait for the program to start successfully. After that, you can open a local browser and enter the current Arduino UNO Q's IP address + port number (Default: 7000) to access the Arduino AI Agent interaction page. The operation is as follows:
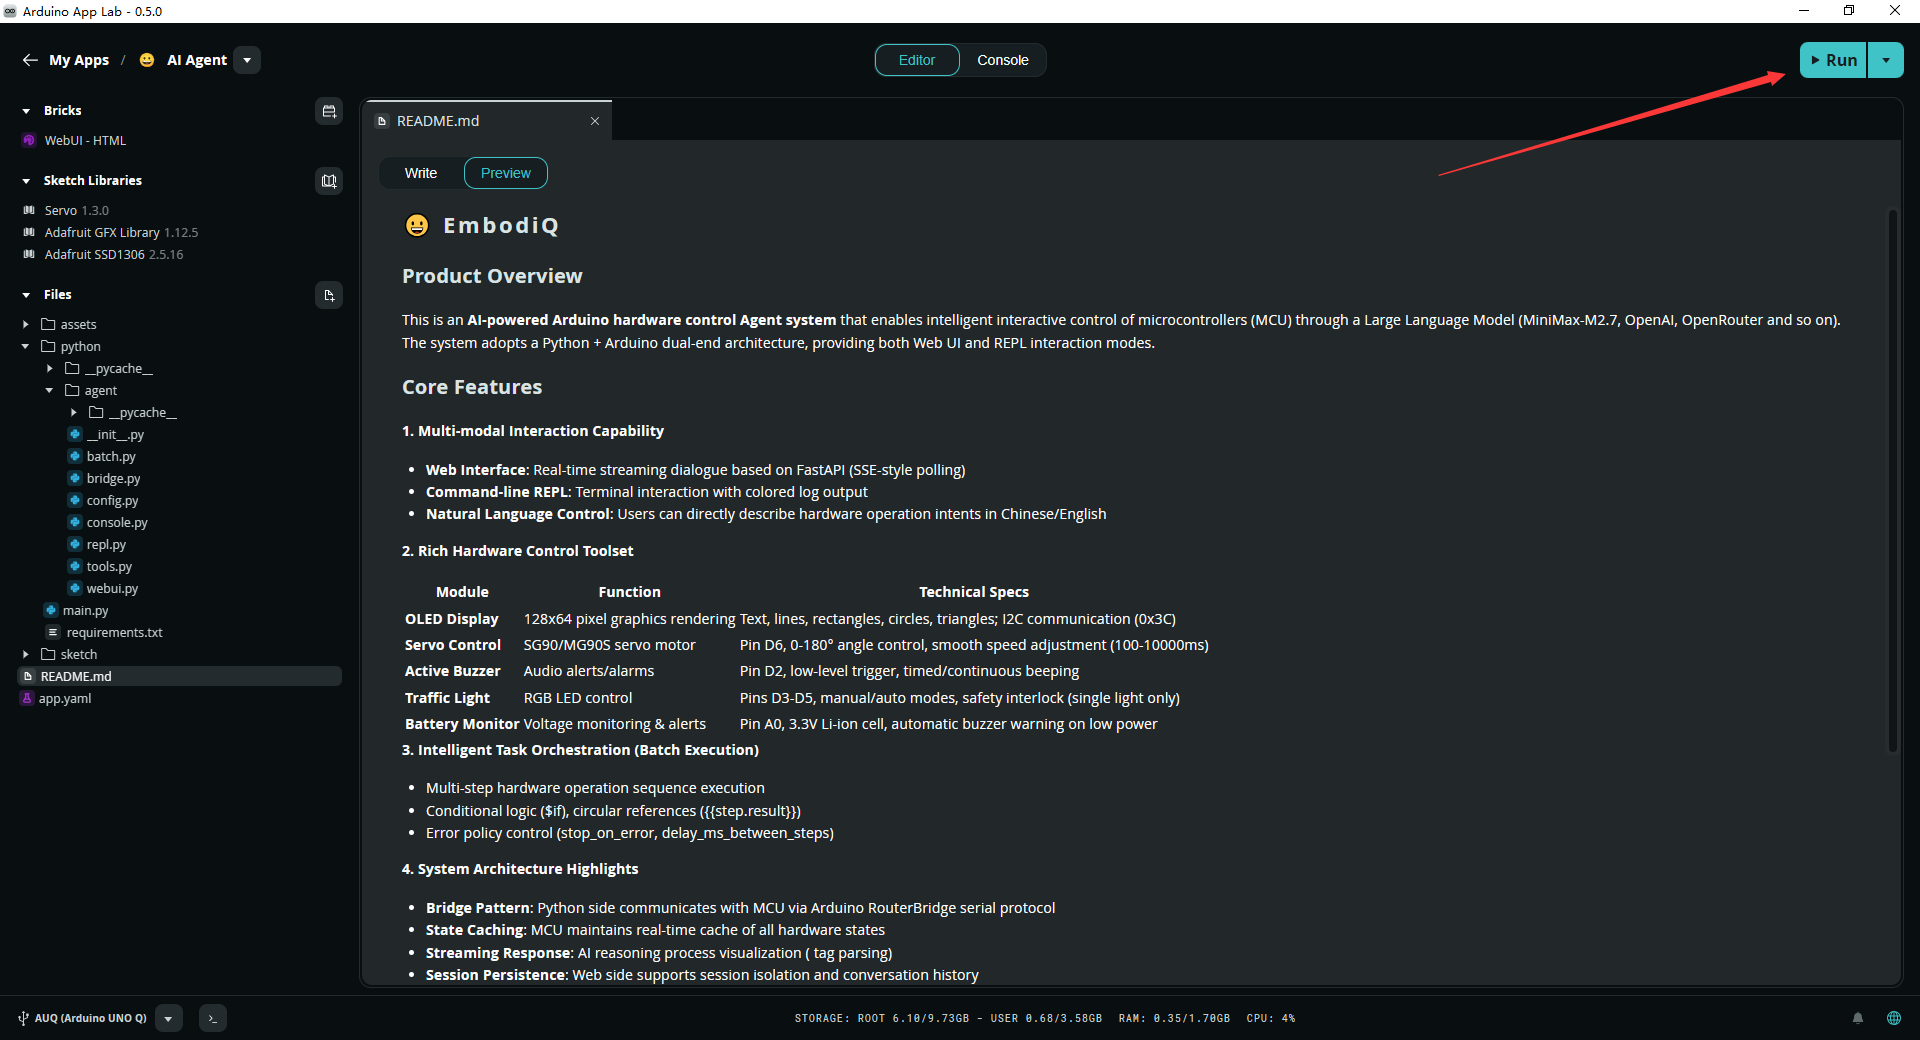
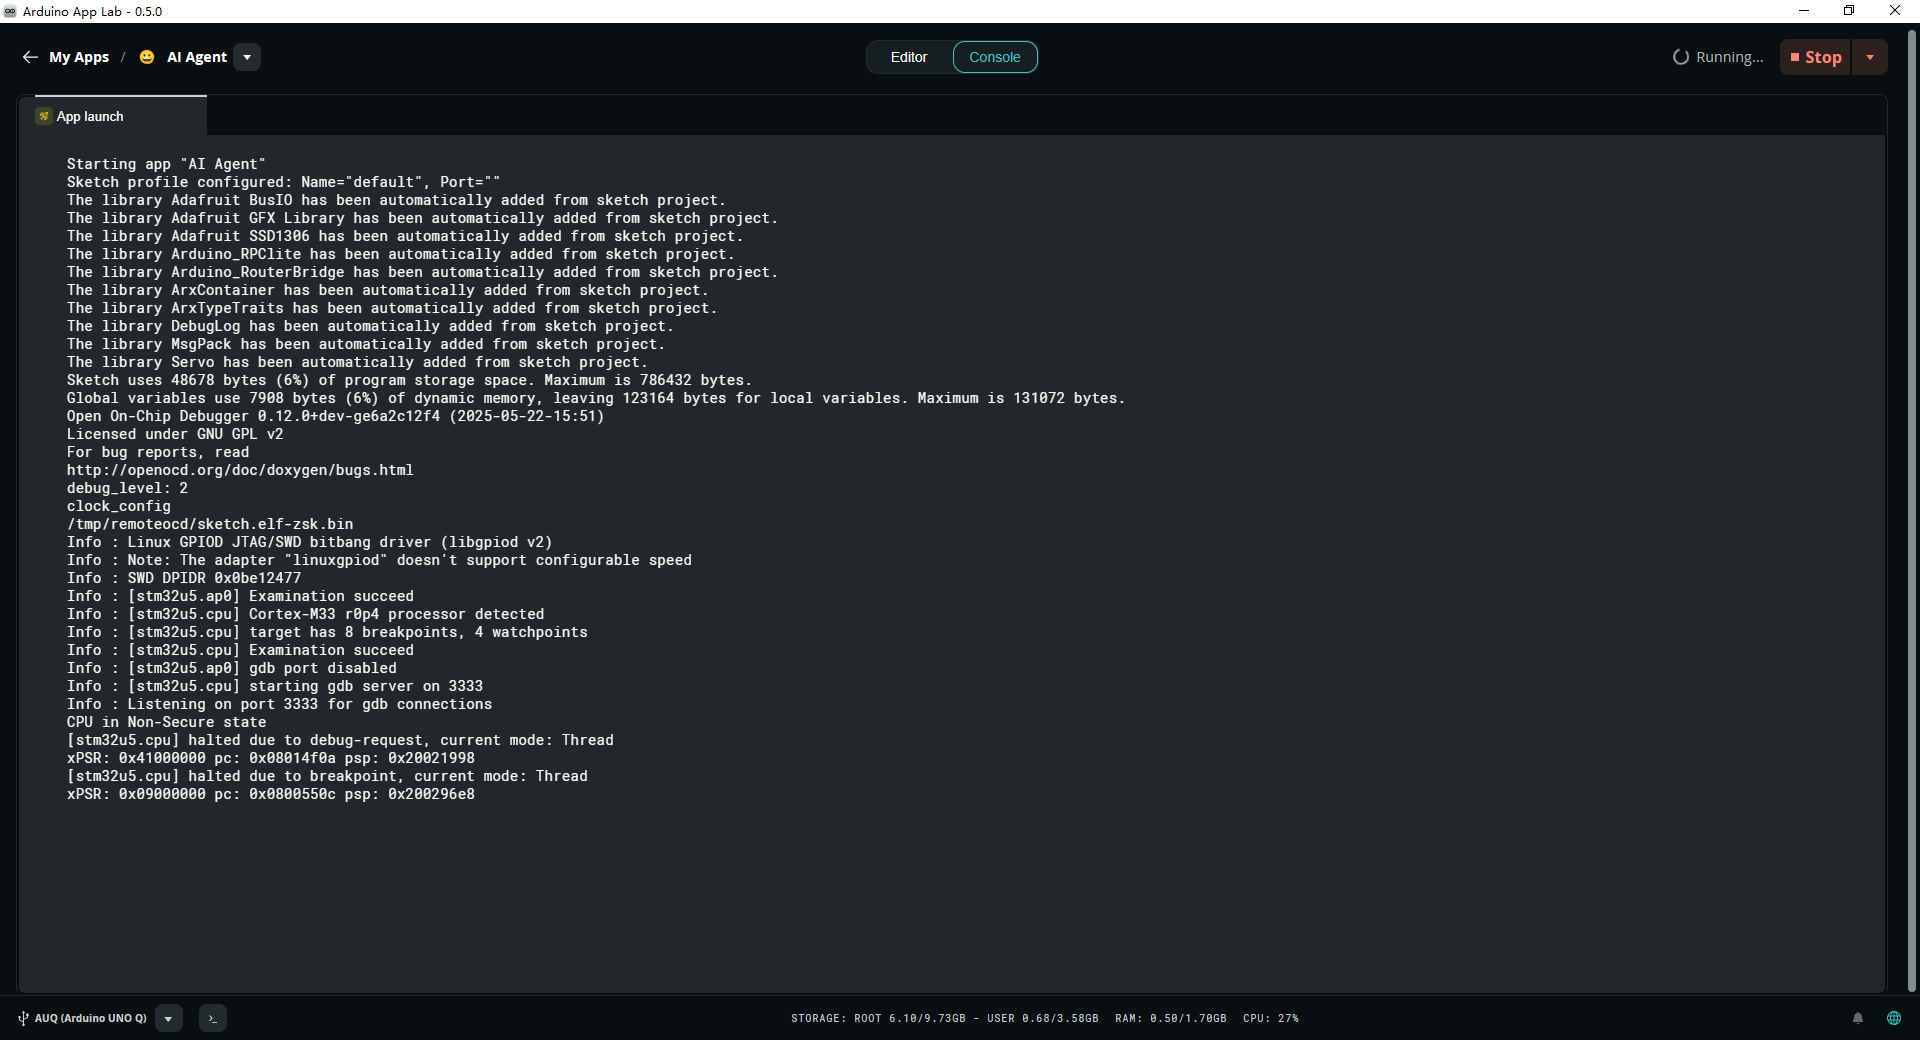
After the output color changes to green, it means the app has been started already!
Change to the Python page. If you see this message, it means the web agent has started.
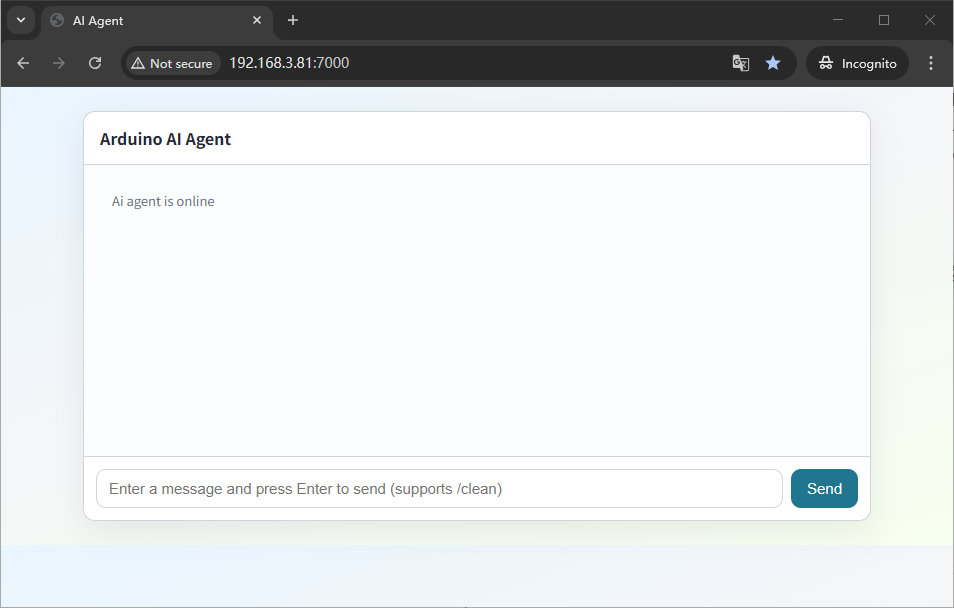
Web Interaction
Step 8. Interact with AI in the web browser
-
Interact with AI in the web browser.
-
Open a web browser and type your Arduino UNO Q's IP address and Port (Default: 7000)
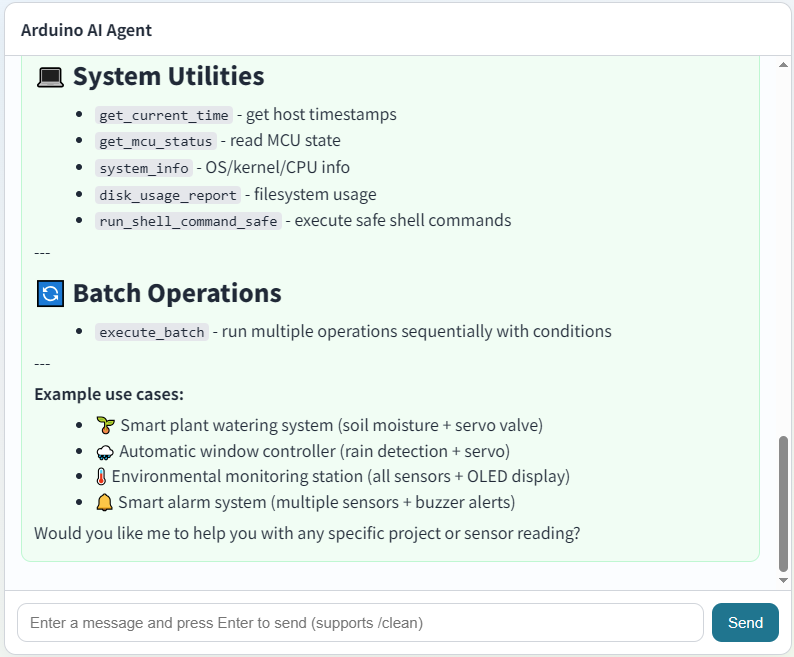
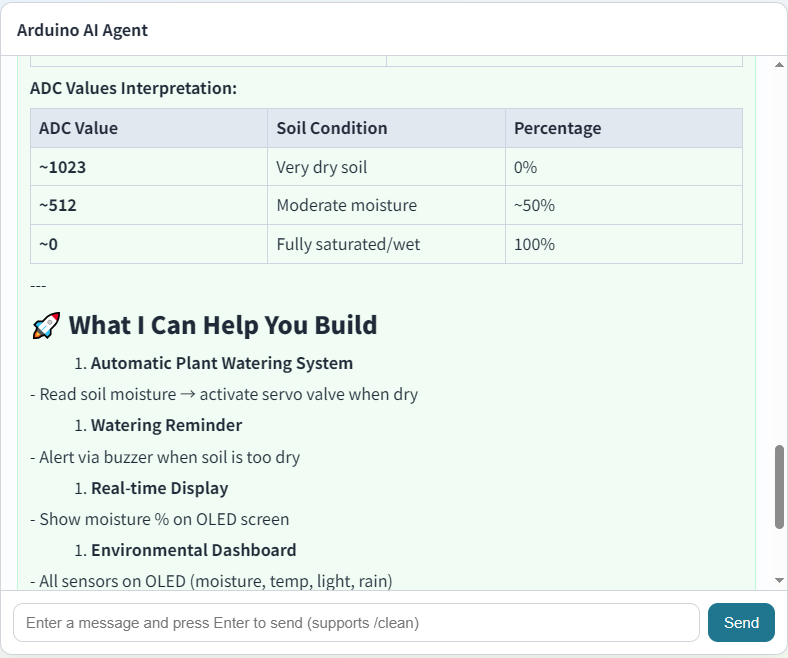
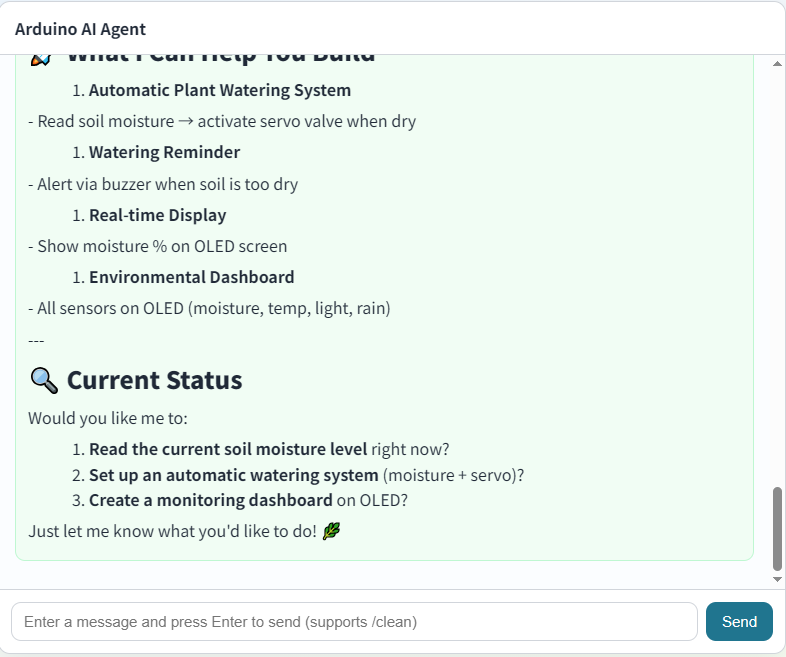
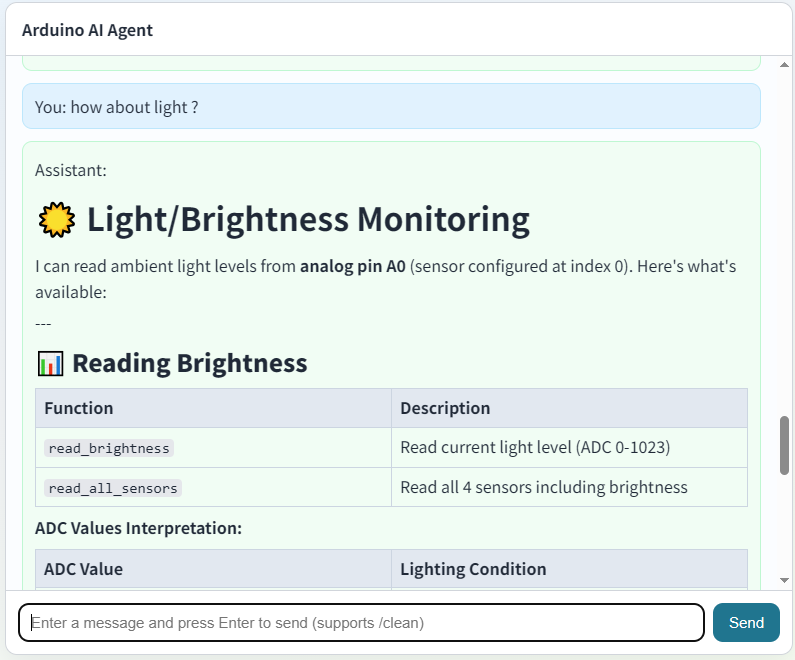
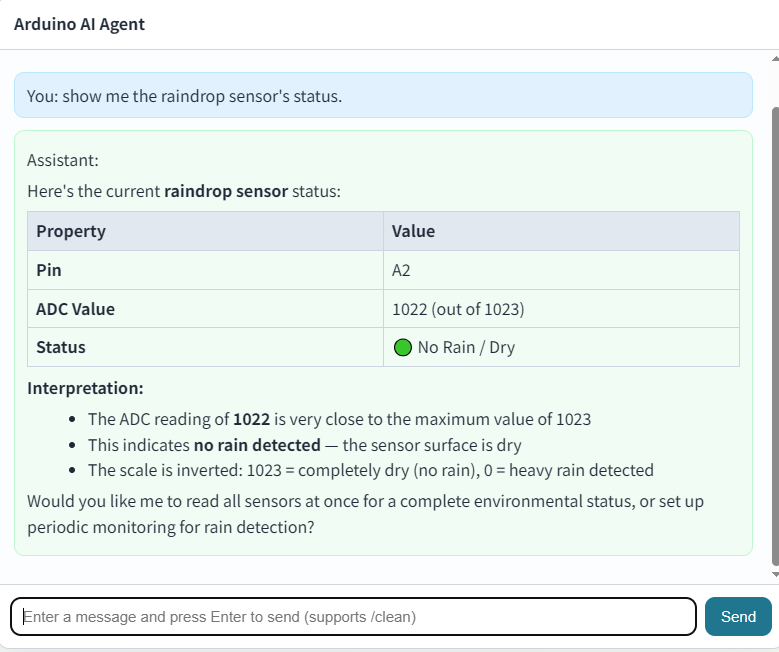
Ask the AI, just like "vibe coding" — interaction will be very easy for beginners! Here are some demonstrations below:
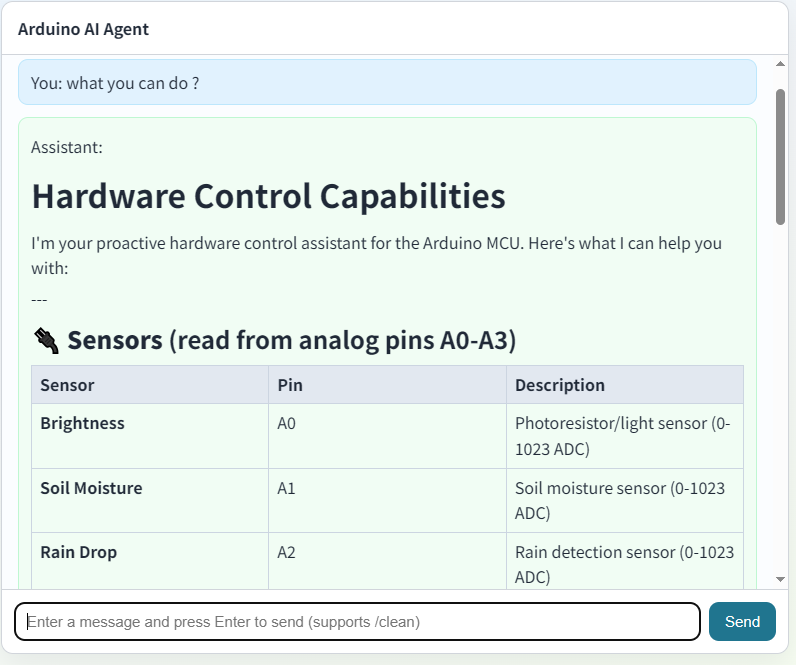
Demos
Main Functions Demostration
Soil Moisture
Brightness
Rain Drop
Temperature
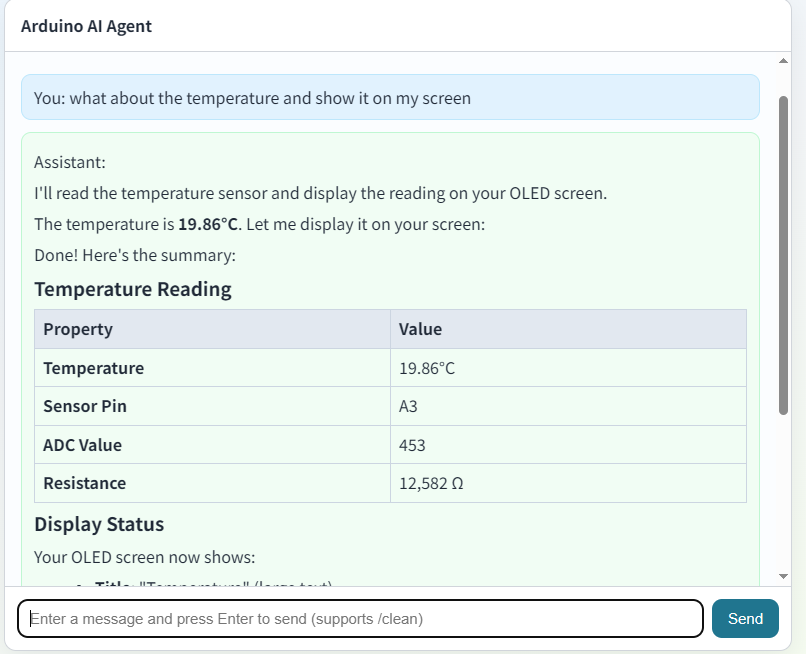
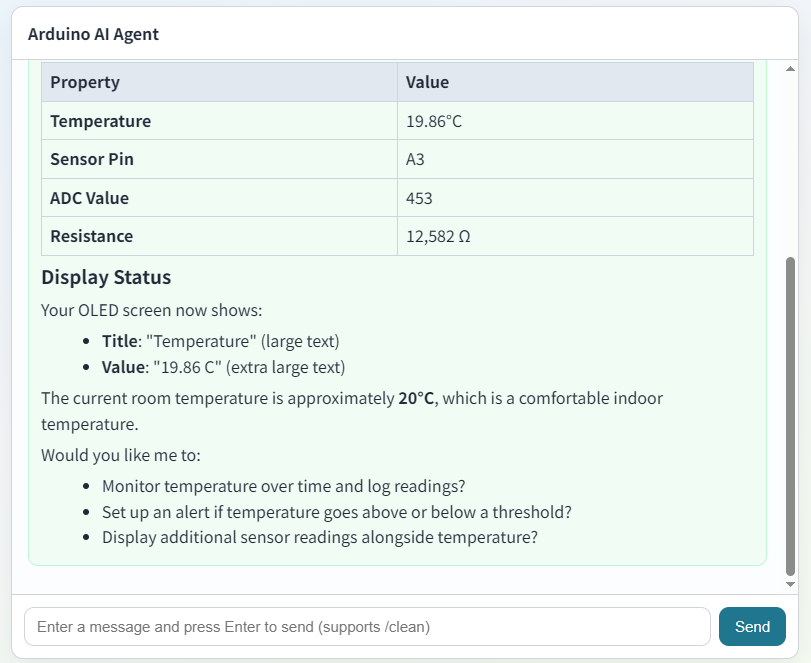
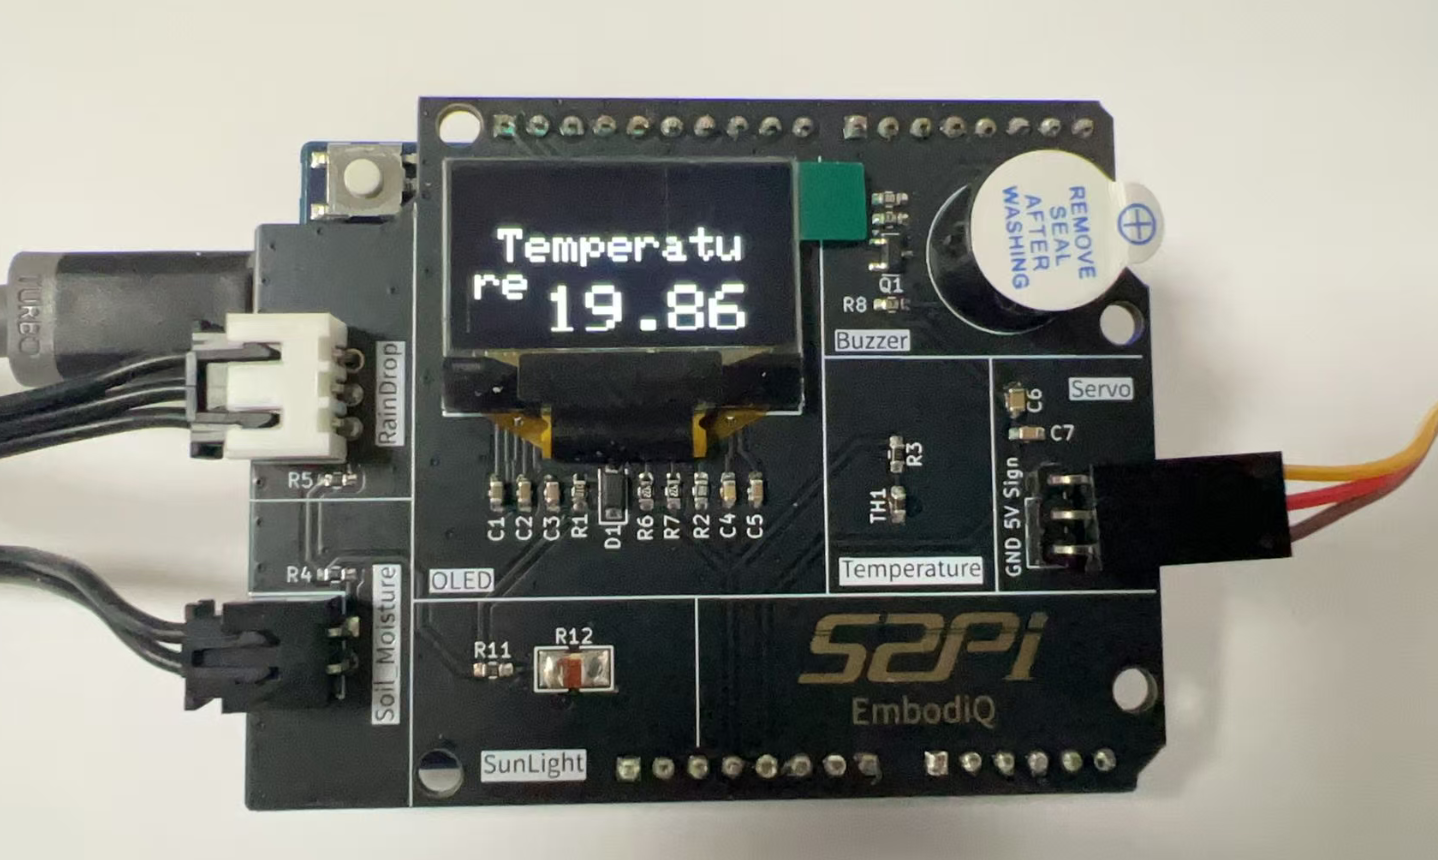
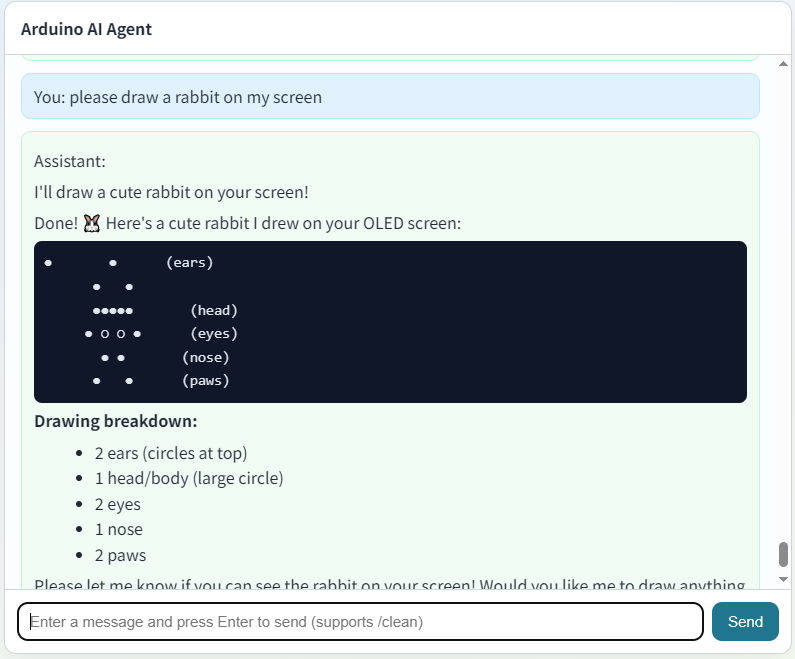
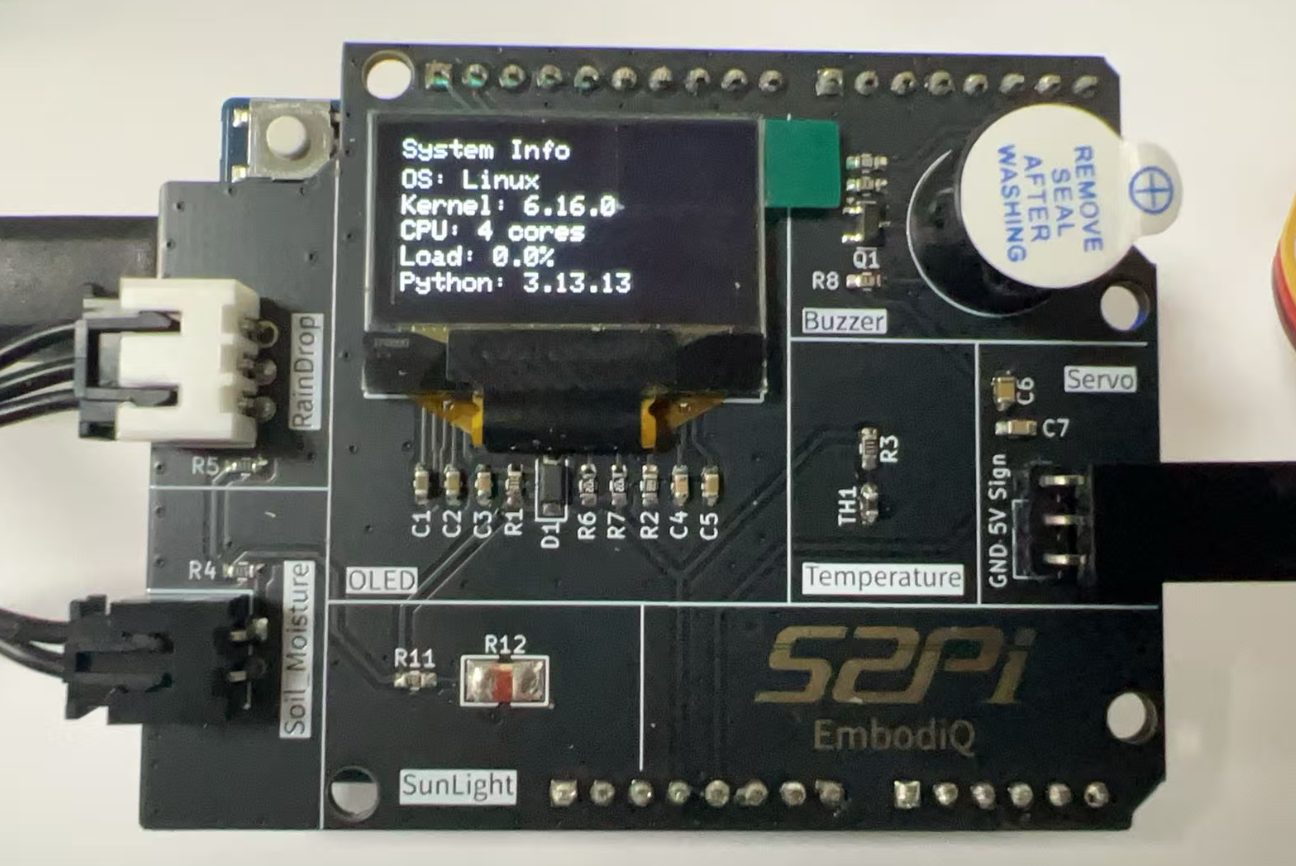
OLED display
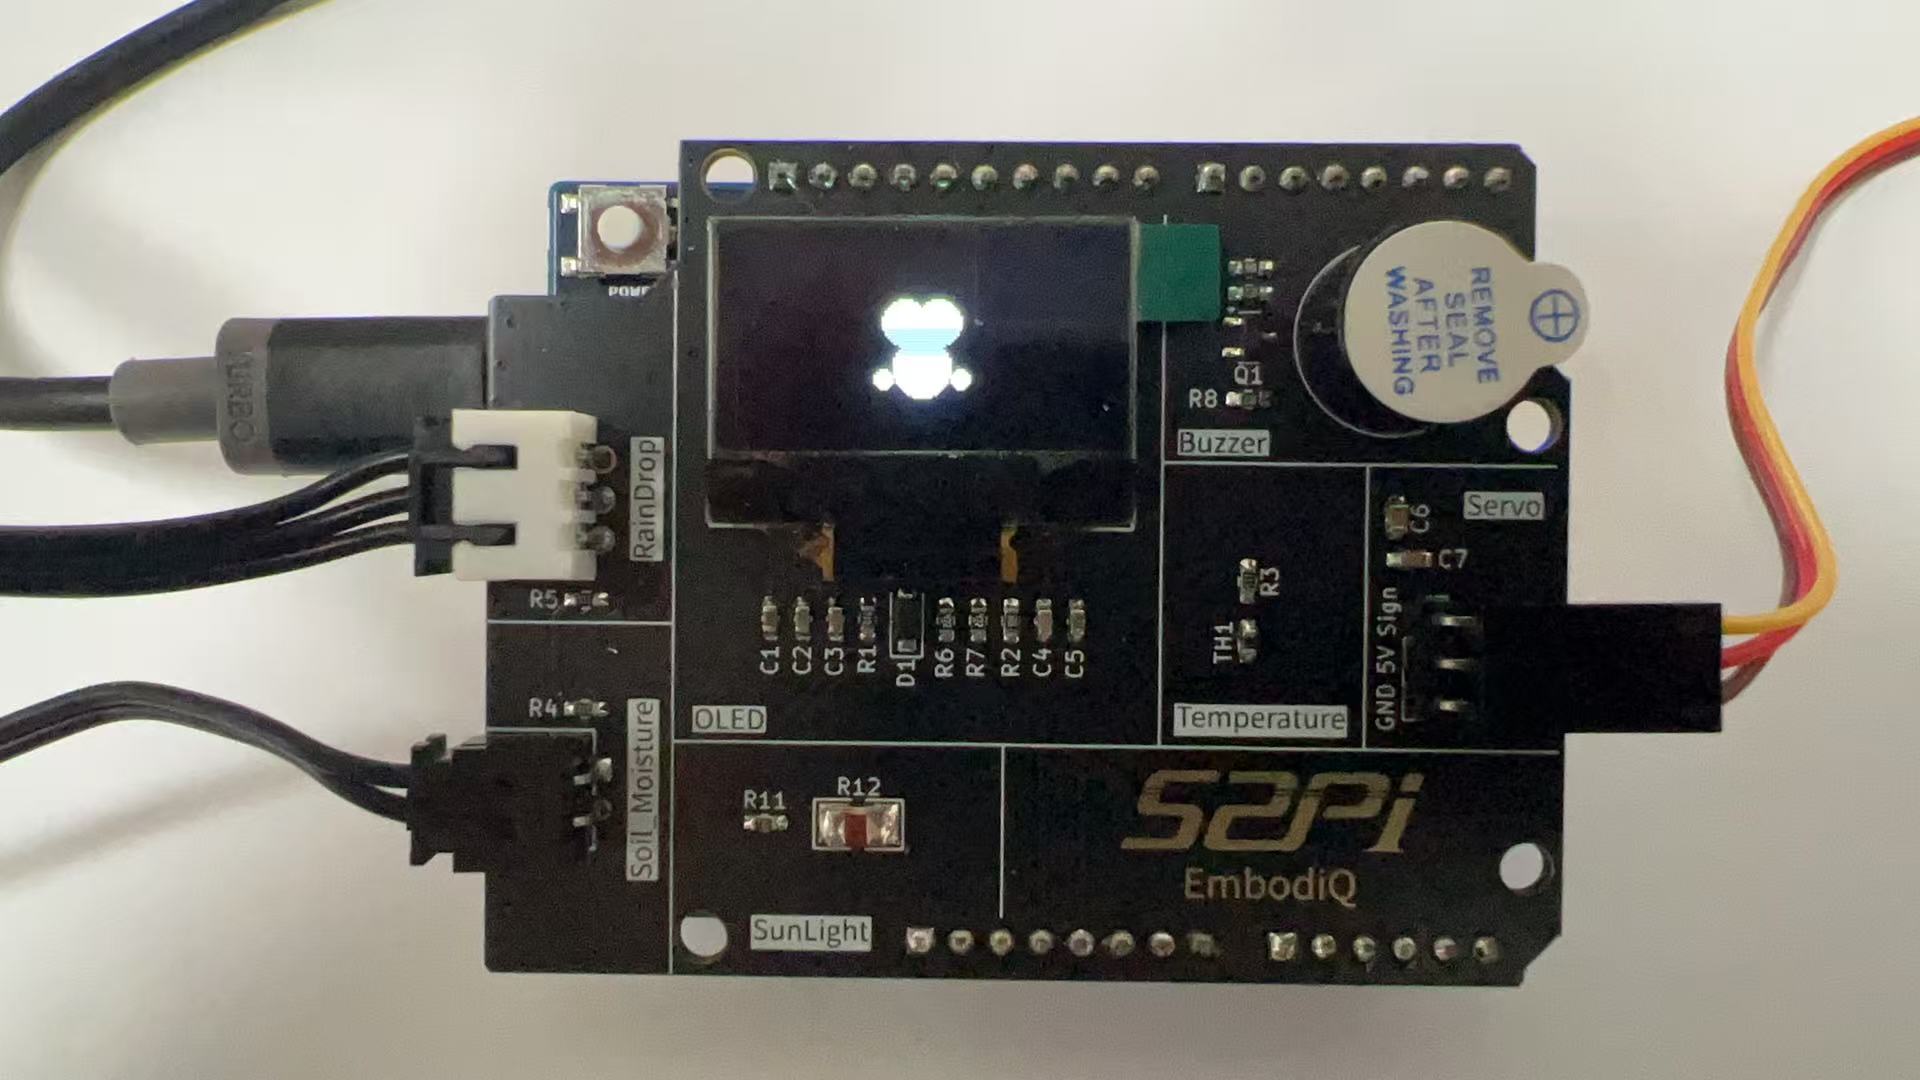
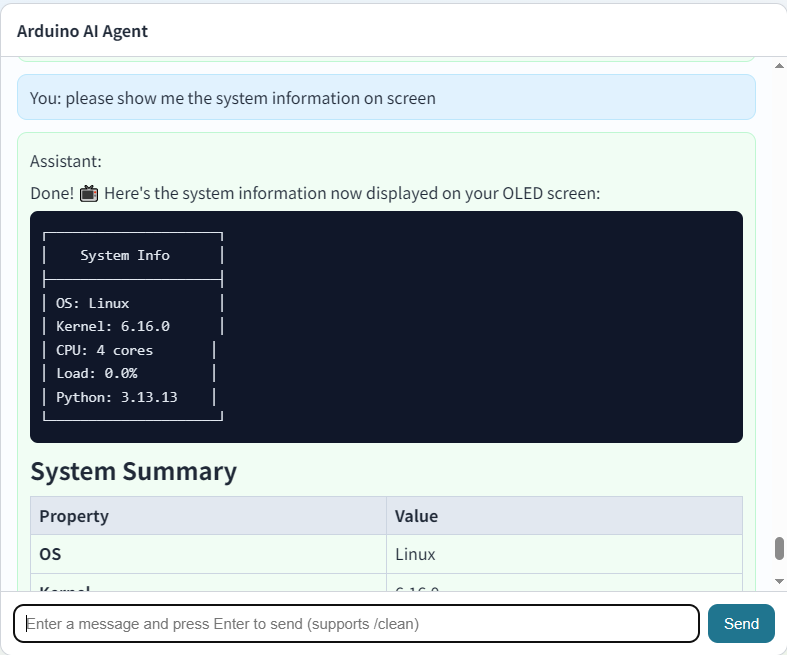
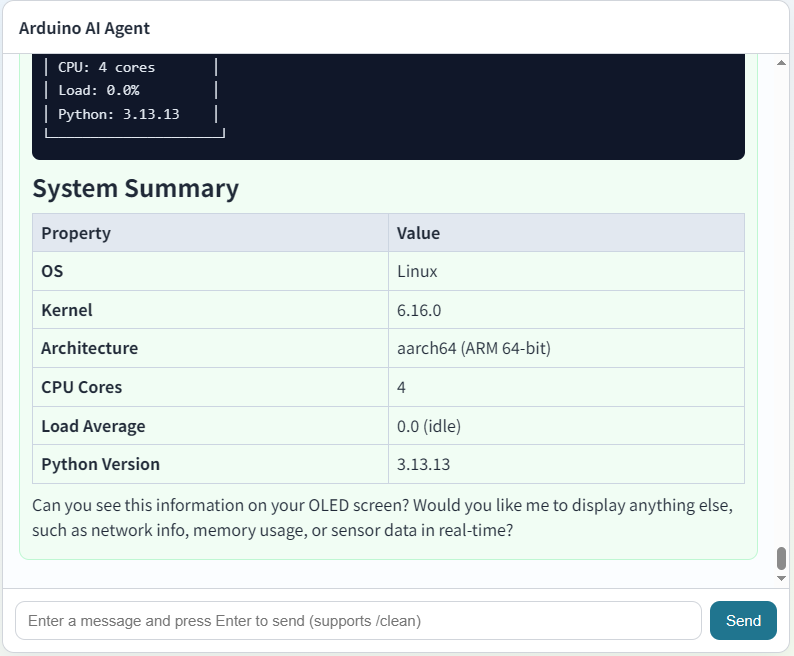
System Information
Troubleshooting
How to get the IP Address of Arduino UNO Q?
- Connect to Board's shell on Arduino App Lab
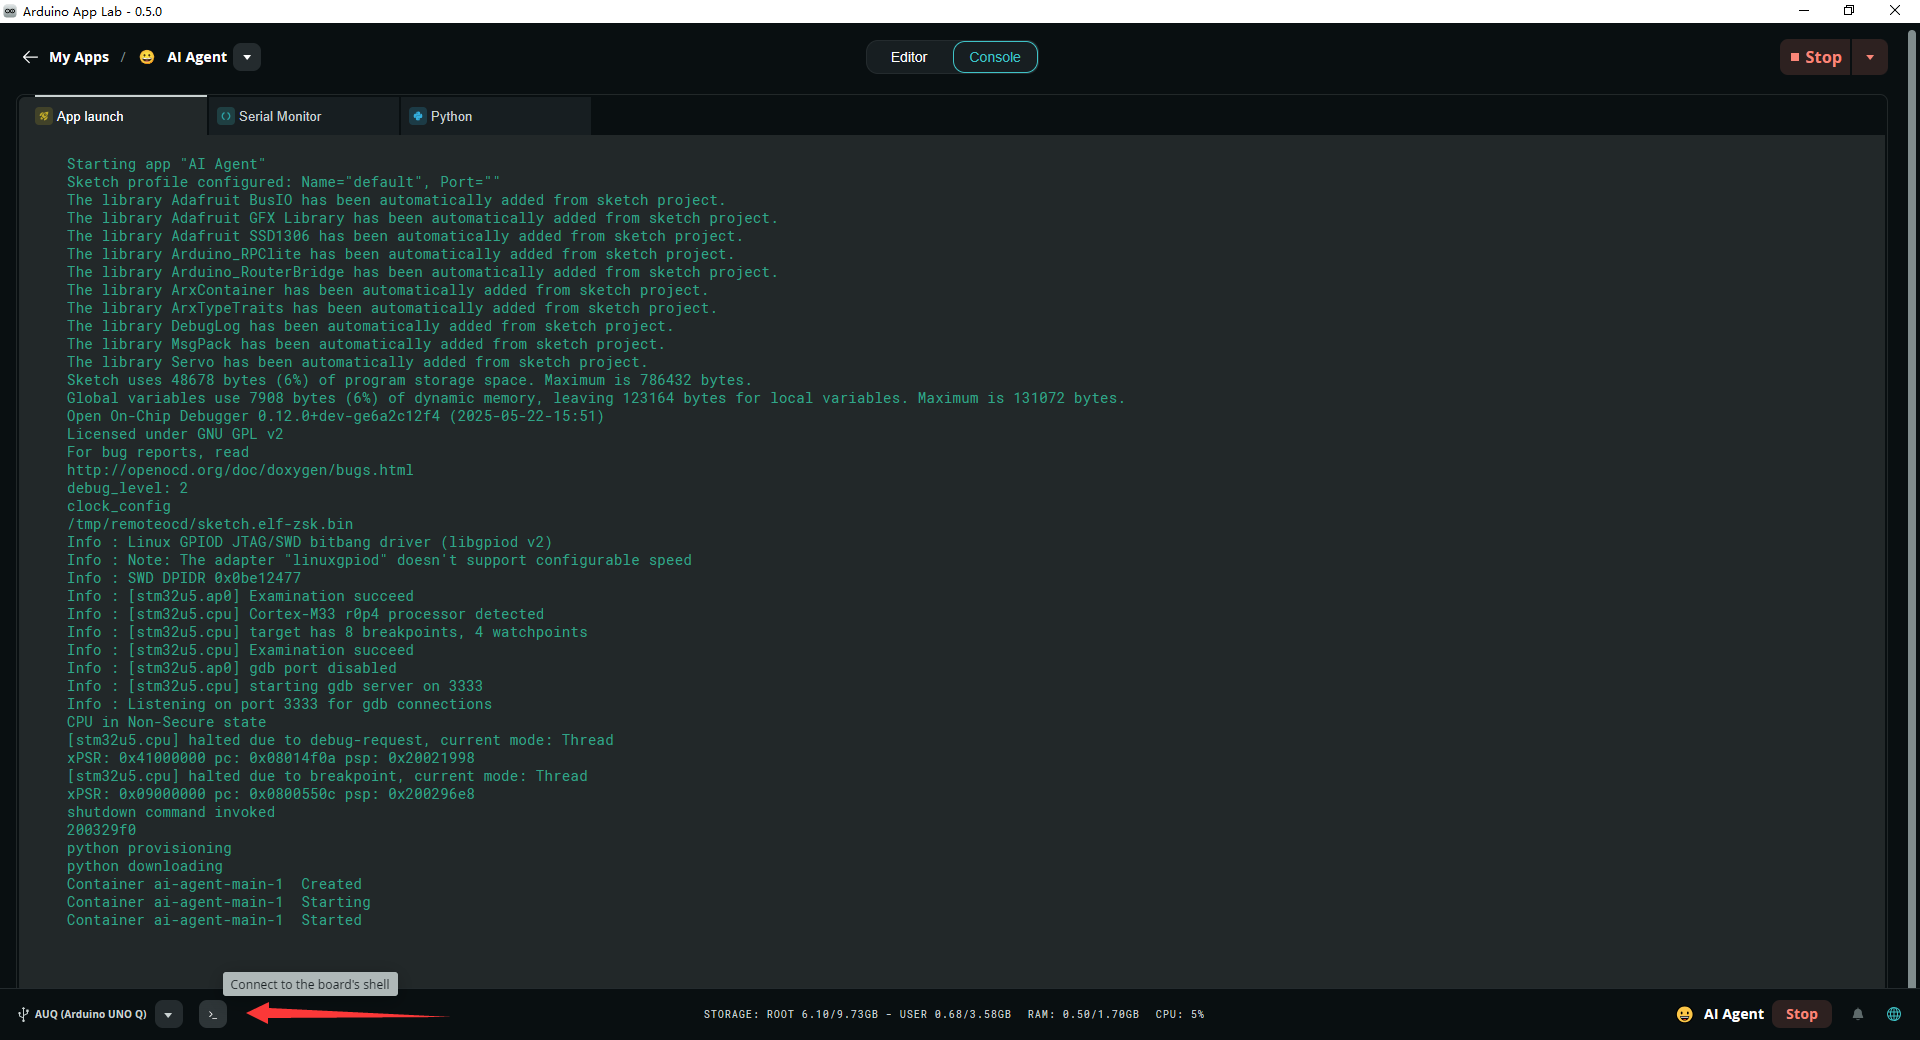
- Typing:
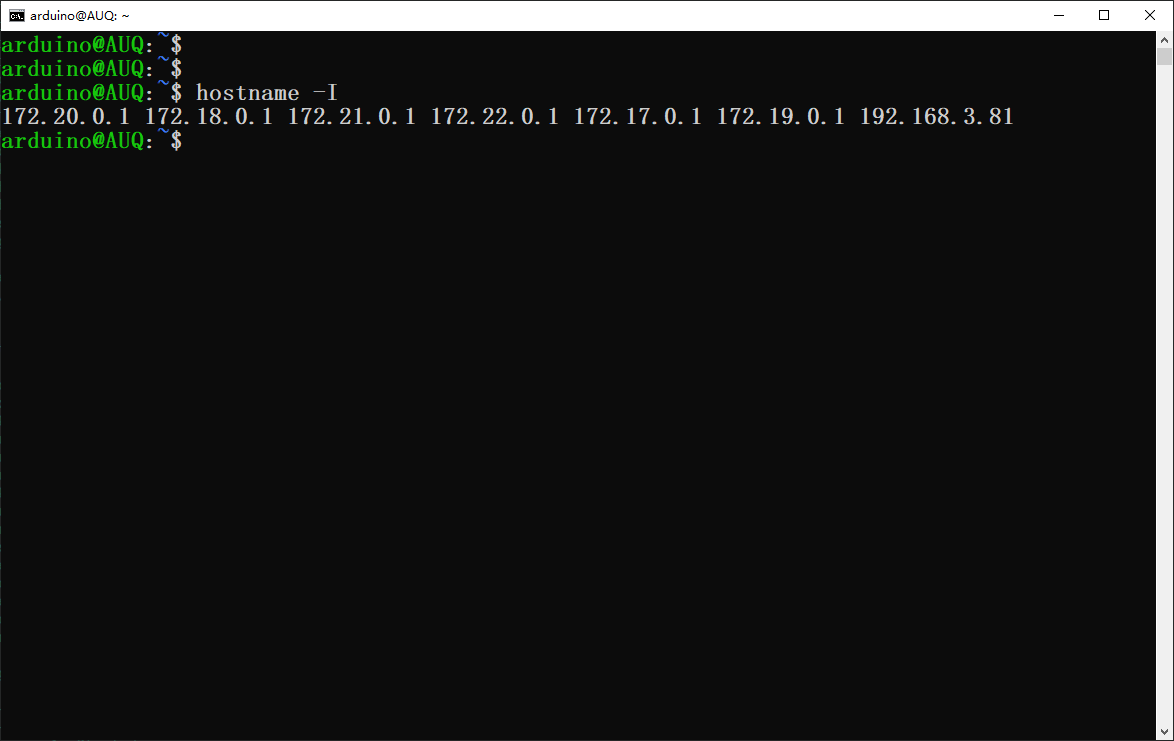
or
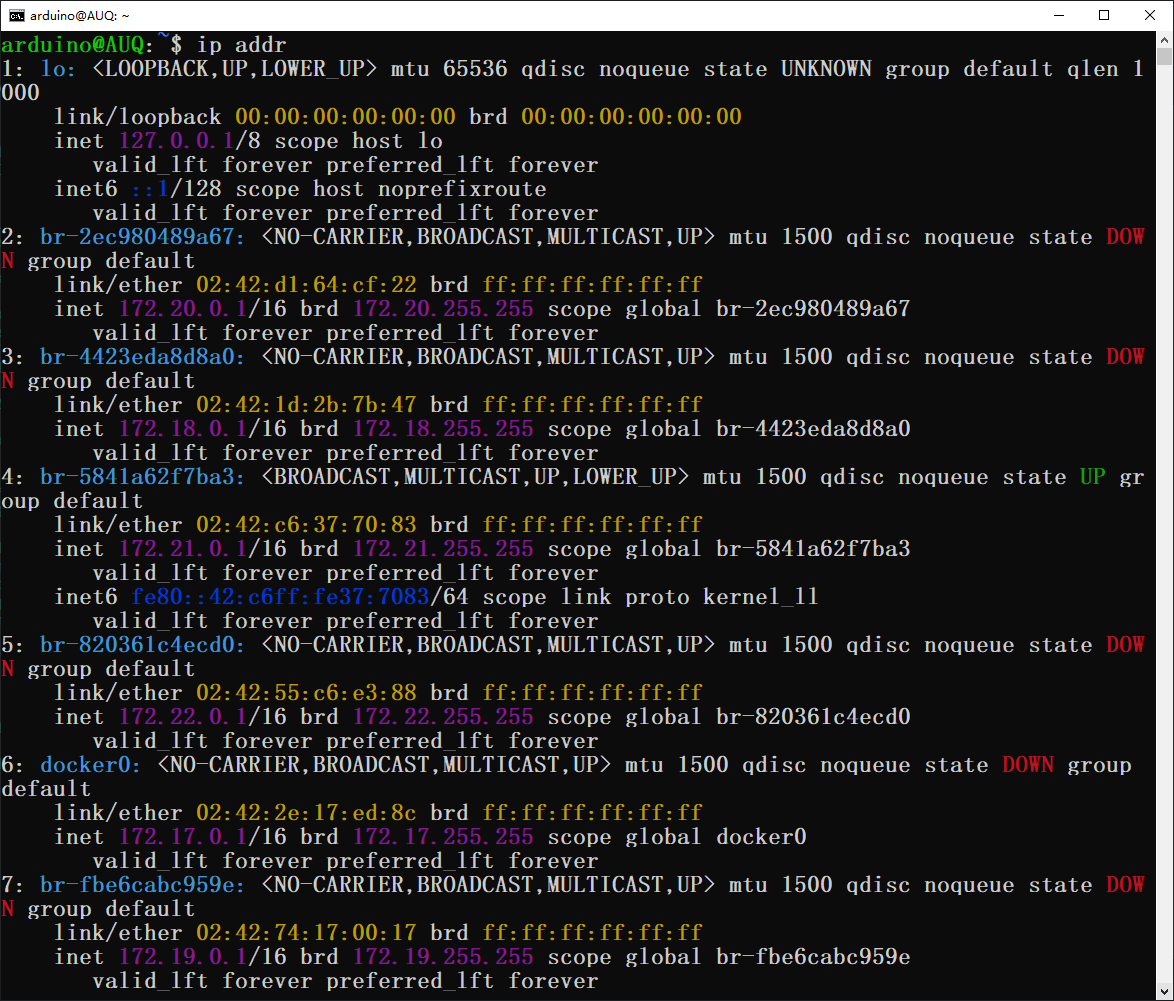
or
Open a CMD in windows desktop and typing:
Tech Support
If you have any questions, please contact us via email and we will provide you with technical support services as soon as possible!
- E-mail 1: support@52pi.com
- E-mail 2: sales@52pi.com
- E-mail 3: jacky.li@52pi.com